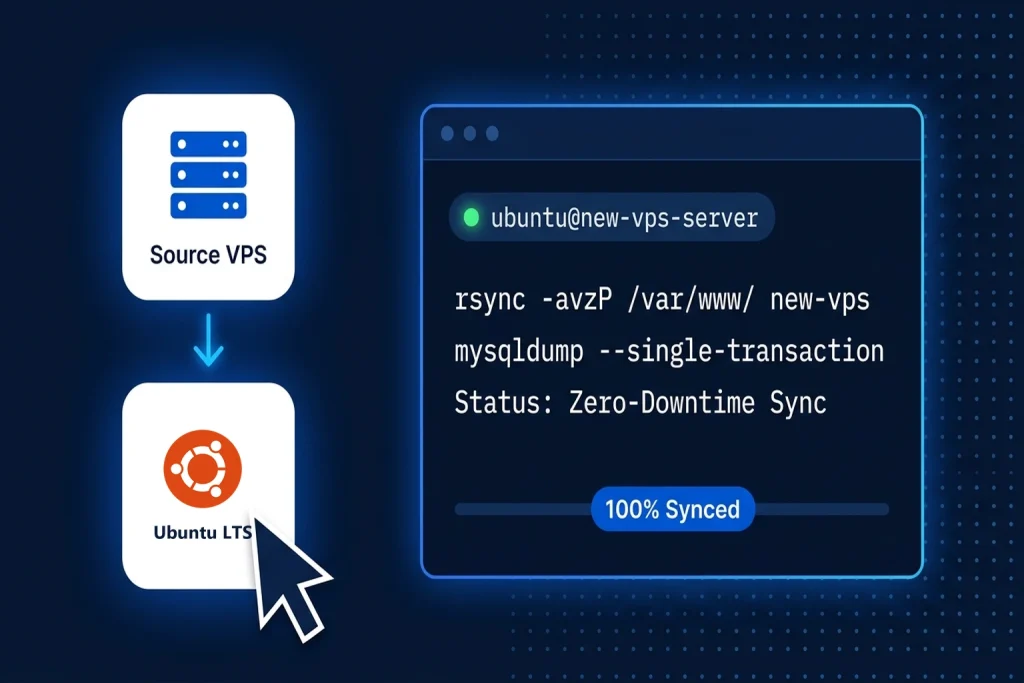
Learning how to migrate a Linux VPS to a new Ubuntu server is the cleanest way to upgrade from an end-of-life operating system, move off a slow provider, or consolidate workloads onto faster resources without carrying over years of configuration cruft.
Instead of cloning a full raw disk image—which copies outdated kernels, broken package dependencies, and filesystem fragmentation—the gold-standard production approach combines service-level provisioning on a fresh Ubuntu LTS instance with two-stage rsync file synchronization and transactional database dumps.
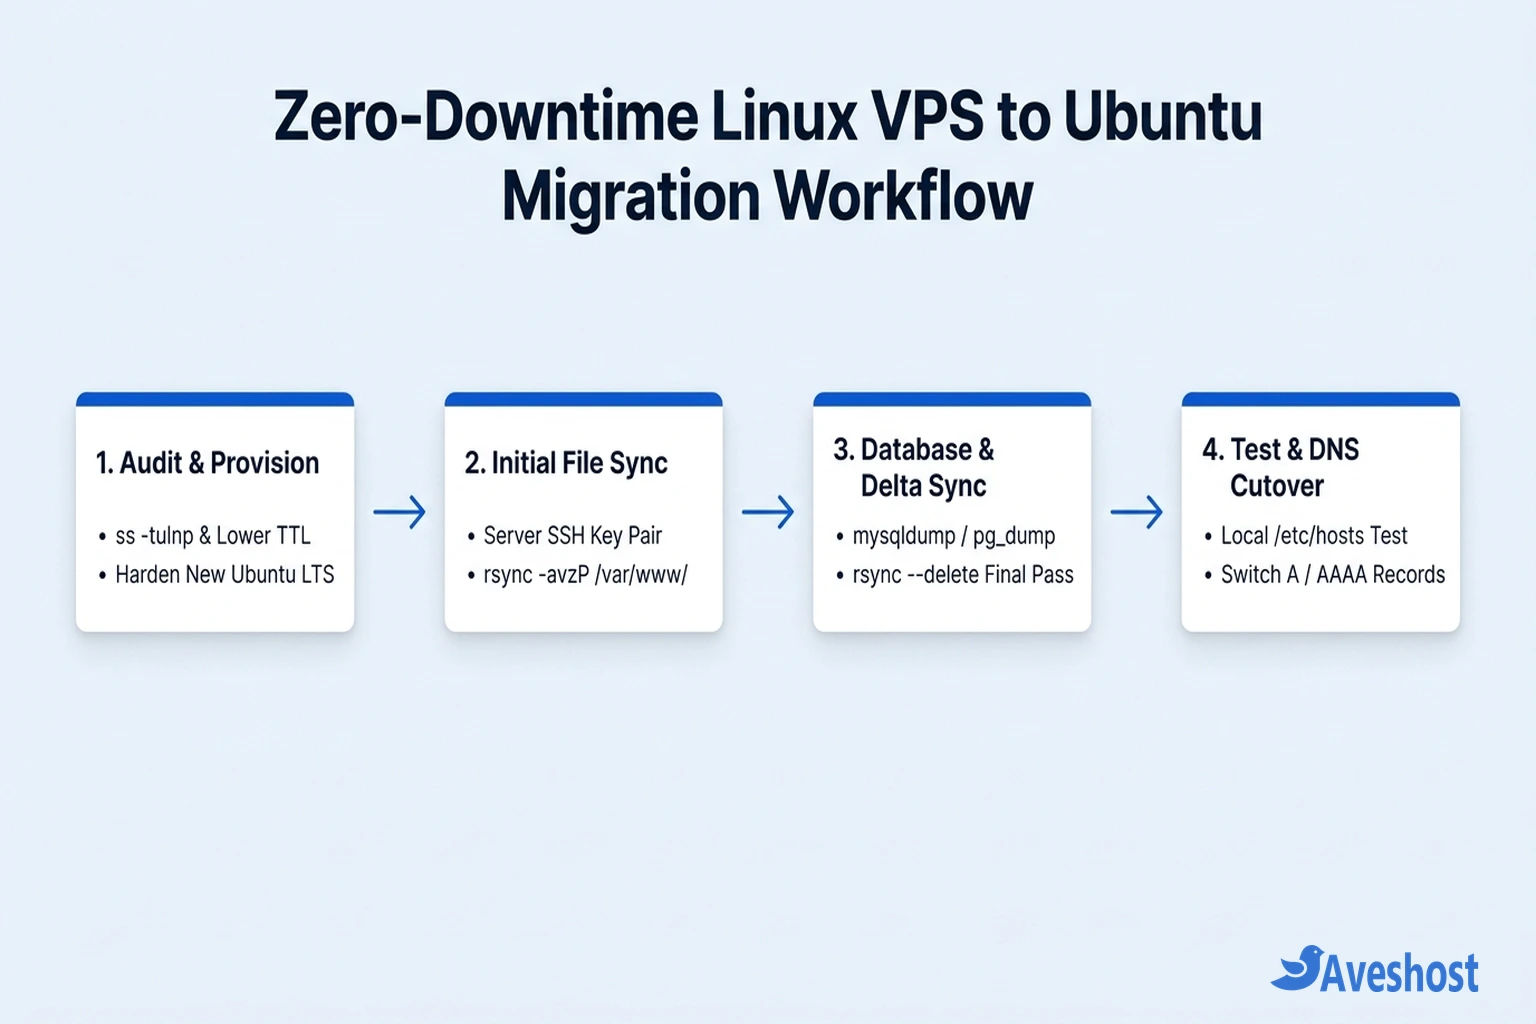
Key Takeaways: Lower your domain’s DNS TTL to 300 seconds (5 minutes) at least 24 hours before migration, provision and harden your target Ubuntu LTS server on Aveshost Self-Managed Linux VPS Hosting (or Aveshost Fully Managed VPS), run an initial rsync -avzP pass while your live site stays online, perform a brief maintenance-mode database dump and delta sync, verify the new server via your local /etc/hosts file, and then switch your DNS A and AAAA records.
Table of Contents
Choose the Right Linux VPS Migration Strategy
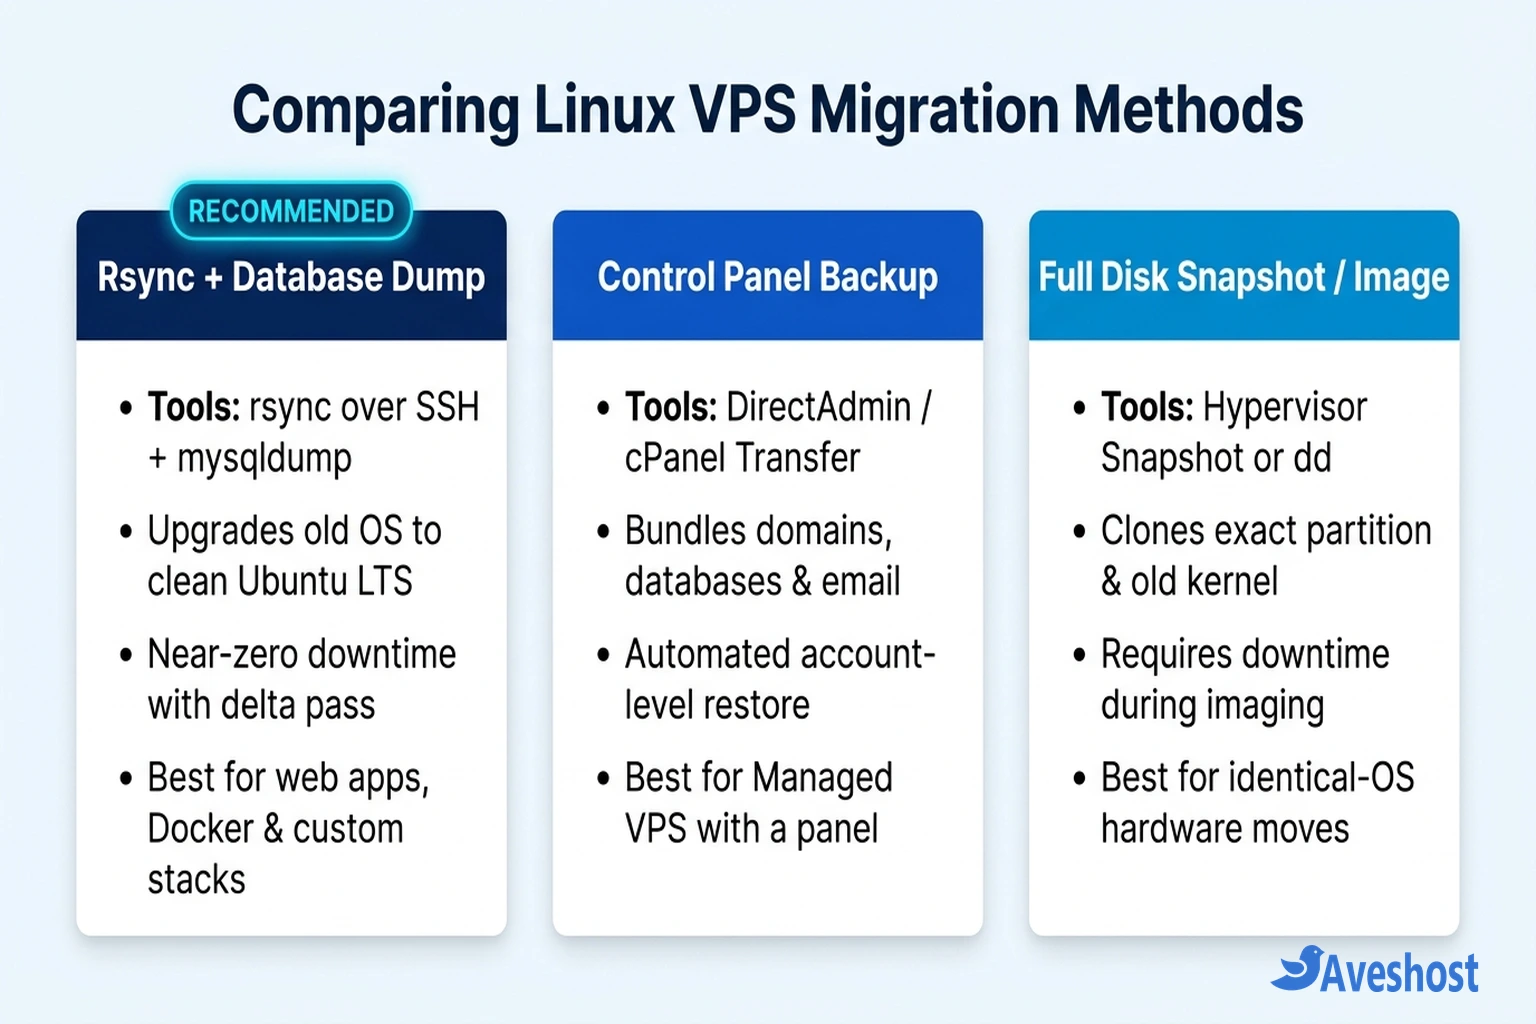
Before running your first terminal command, choose the migration method that matches how your current Linux VPS is managed and whether you are changing distributions (such as moving from CentOS, AlmaLinux, or Debian to Ubuntu 24.04 LTS).
For most production websites, Node.js/Python apps, and Docker stacks, Selective Rsync + Database Dump is the safest choice because it installs fresh, native Ubuntu packages on the destination server and copies only your application code, user data, and verified service configurations.
| Migration Method | Primary Tools | Expected Downtime | Best Use Case |
|---|---|---|---|
| Selective Rsync + Database Dump (Recommended) | rsync over SSH, mysqldump / pg_dump | 1 to 3 minutes (during final delta sync) | Upgrading to a clean Ubuntu LTS release or moving from Debian/AlmaLinux/CentOS |
| Control Panel Account Transfer | DirectAdmin Admin Backup or cPanel Transfer Tool | Under 5 minutes | Managed VPS servers running DirectAdmin or cPanel with mailboxes and domains |
| Docker Volume & Compose Migration | rsync + docker compose + database dump | 1 to 5 minutes | Containerized apps (such as self-hosted Supabase, n8n, or Next.js stacks) |
| Block-Level Disk Clone / Snapshot | Hypervisor snapshot or dd over SSH | 15 to 60+ minutes (source must be stopped) | Identical hardware/OS lift-and-shift when you cannot reinstall software |
Step 1: Audit Your Source Linux VPS and Lower DNS TTL
The most common cause of post-migration outages is forgetting a background worker, a custom cron job, or a secondary Redis/PostgreSQL port running on the old VPS. Start by logging into your existing Linux VPS via SSH and running a full service and port inventory:
# Check OS release, disk usage, and listening network ports on the old VPS:
cat /etc/os-release
df -h
sudo ss -tulnp

# List all active systemd services and scheduled cron jobs:
systemctl list-units --type=service --state=running
sudo crontab -l
ls -la /etc/cron* /etc/systemd/system/
Record the exact versions of your web server (Nginx, Apache, or Caddy), language runtimes (PHP-FPM, Node.js, Python), and database engines (MySQL, MariaDB, or PostgreSQL). Check /etc/crontab, /etc/cron.d/, and custom systemd units inside /etc/systemd/system/ so you know every background job that must be recreated on the new Ubuntu server.
Next, log in to your DNS provider and lower the TTL (Time to Live) on your domain’s A, AAAA, and mail records from the default 3600 or 14400 seconds down to 300 seconds (5 minutes). Doing this 24 hours ahead of time ensures that when you eventually update your IP address in Step 6, visitors worldwide switch to your new Ubuntu server within five minutes instead of waiting hours for stale DNS caches to expire.
Step 2: Provision and Harden Your New Ubuntu Server
Deploy your new Ubuntu LTS instance (Ubuntu 24.04 LTS or 22.04 LTS) on an Aveshost Self-Managed VPS with SSD storage, and connect to the new server via SSH as root or your sudo user.
Update the package index, install matching versions of your web server, database engine, and runtime packages, and configure the UFW firewall before transferring any production data:
# On the NEW Ubuntu LTS server: update packages, install stack & enable UFW:
sudo apt update && sudo apt full-upgrade -y
sudo apt install -y nginx certbot python3-certbot-nginx rsync ufw

sudo ufw allow OpenSSH
sudo ufw allow 80/tcp
sudo ufw allow 443/tcp
sudo ufw enable
Next, generate an Ed25519 SSH key pair on your old source VPS and copy its public key to your new Ubuntu server so the two servers can transfer files directly over an encrypted connection at data-center network speeds:
# On the OLD source VPS: generate an Ed25519 SSH key and authorize it on the new Ubuntu server:
ssh-keygen -t ed25519 -C "vps-migration" -f ~/.ssh/id_migration -N ""
ssh-copy-id -i ~/.ssh/id_migration.pub -p 22 [email protected]
Step 3: Run the Initial File Sync with Rsync Over SSH
Never blindly copy the entire root filesystem (/) or overwrite system identity files such as /etc/passwd, /etc/shadow, /etc/fstab, or /etc/netplan/ across different servers. Overwriting those files can corrupt boot loaders, break network interfaces, or lock you out of SSH.
Instead, perform a live initial sync of your application directories (/var/www/, /opt/, /home/), web server virtual hosts (/etc/nginx/sites-available/ or /etc/apache2/sites-available/), and Let’s Encrypt SSL certificates (/etc/letsencrypt/) while your old VPS remains online and serving traffic:
# Run from the OLD VPS to sync web files, Nginx configs, and SSL certs to the NEW Ubuntu server:
rsync -avzP -e "ssh -i ~/.ssh/id_migration" /var/www/ [email protected]:/var/www/
rsync -avzP -e "ssh -i ~/.ssh/id_migration" /etc/nginx/sites-available/ [email protected]:/etc/nginx/sites-available/
rsync -avzP -e "ssh -i ~/.ssh/id_migration" /etc/letsencrypt/ [email protected]:/etc/letsencrypt/
Using the -a (archive) flag preserves file ownership, permissions, symbolic links, and timestamps, while -z compresses data in transit and -P shows live progress and allows interrupted transfers to resume. Because this initial pass copies 99% of your static media and code ahead of time, your final cutover sync in Step 4 will take only seconds.
Step 4: Migrate MySQL/PostgreSQL Databases and Run the Final Delta Sync
Unlike static images or code files, relational databases cannot be copied safely by transferring raw /var/lib/mysql files while the database server is running. To prevent data loss or split-brain writes (where a customer submits an order on the old VPS after you already copied the database), follow this short cutover sequence:
1. Put your web application into brief maintenance mode (or temporarily stop your queue workers) on the old VPS so no new database writes occur.
2. Export a consistent database dump and stream or copy it to the new Ubuntu server: For MySQL or MariaDB, use mysqldump with --single-transaction; for PostgreSQL (such as when you self-host Supabase on a VPS), use pg_dump:
# MySQL / MariaDB: consistent transactional dump and transfer to the new Ubuntu server:
mysqldump -u root -p --single-transaction --routines --triggers --events --all-databases | gzip > all_dbs.sql.gz
scp -i ~/.ssh/id_migration all_dbs.sql.gz [email protected]:/root/
ssh -i ~/.ssh/id_migration [email protected] "gunzip < /root/all_dbs.sql.gz | mysql -u root"

# Final delta sync with --delete so recent file uploads match 100%:
rsync -avzP --delete -e "ssh -i ~/.ssh/id_migration" /var/www/ [email protected]:/var/www/
3. Run the final rsync --delete delta pass: Immediately after importing the database, run rsync one more time with the --delete flag on /var/www/. This transfers any user uploads created during the initial sync and removes any temporary files deleted on the old server, completing in just a few seconds.
| Directory or Data Type | Migrate Directly? | Recommended Command or Method |
|---|---|---|
| /var/www/ & /home/ (Web Roots & User Files) | Yes | rsync -avzP –delete /var/www/ user@new-ubuntu-ip:/var/www/ |
| /etc/letsencrypt/ (Certbot SSL Certificates) | Yes | rsync -avzP /etc/letsencrypt/ user@new-ubuntu-ip:/etc/letsencrypt/ |
| /etc/nginx/ or /etc/apache2/ (Virtual Hosts) | Yes (Selectively) | Copy sites-available/ and test with nginx -t or apache2ctl configtest |
| MySQL / MariaDB / PostgreSQL Data | Dump & Restore (Never raw /var/lib/) | mysqldump –single-transaction or pg_dump -Fc over SSH |
| /etc/fstab, /etc/netplan/, /etc/passwd, /boot/ | Never Overwrite | Keep the new Ubuntu server’s native network, disk UUID, and kernel files |
Step 5: Test Your New Ubuntu Server Using Your Local Hosts File
Never point your live domain’s DNS records at a new server before verifying that the web server, SSL certificates, and database connection work end to end. First, test your Nginx or Apache configuration syntax and restart your services on the new Ubuntu VPS:
Next, test the live website using your domain name without changing public DNS by overriding the domain IP in the hosts file on your personal computer (/etc/hosts on macOS/Linux or C:\Windows\System32\drivers\etc\hosts on Windows) or by running curl --resolve:
# On the NEW Ubuntu server: validate Nginx syntax and reload services:
sudo nginx -t && sudo systemctl reload nginx

# From your local workstation: test HTTPS response from the new IP before changing DNS:
curl -I --resolve yourdomain.com:443:203.0.113.50 https://yourdomain.com
When you open https://yourdomain.com in your browser (or inspect the curl --resolve output), your computer connects directly to the new Ubuntu server while sending the real Host: yourdomain.com header and validating your SSL certificate. Test user login, database reads, and form submissions, then remove the temporary line from your local hosts file.
Step 6: Switch DNS Records and Safely Decommission the Old VPS
Once your verification checks pass, complete the cutover and post-migration cleanup:
1. Update your DNS records: In your DNS provider’s dashboard, update your domain’s A record (IPv4) and AAAA record (IPv6) to point to the IP address of your new Ubuntu server. If you prefer a control-panel workflow for future static or React deployments, see our guide on deploying websites on DirectAdmin hosting included with Aveshost Fully Managed VPS plans.
2. Monitor live logs on both servers: Run sudo tail -f /var/log/nginx/access.log on both the old VPS and the new Ubuntu server. Because you lowered your TTL to 300 seconds in Step 1, you will see traffic shift onto the new Ubuntu server within a few minutes.
3. Test Certbot auto-renewal and restore DNS TTL: Once DNS propagation is complete, run sudo certbot renew --dry-run on the new Ubuntu server to confirm Let’s Encrypt can validate your domain at its new IP, then raise your DNS TTL back to 3600 seconds.
4. Keep the old VPS in read-only standby for 48–72 hours: Do not cancel or wipe your old Linux VPS immediately after switching DNS. Leave it stopped or firewalled for two to three days so you have an instant fallback if you discover a forgotten cron script or environment file, then create one final archive backup and decommission the old server.
Frequently asked questions
Can I migrate a Linux VPS to a new Ubuntu server without downtime?
Yes. By running an initial rsync -avzP pass while your old VPS stays live, lowering your DNS TTL to 300 seconds ahead of time, and performing a short maintenance-mode database dump plus a final rsync --delete delta pass, total write downtime is typically under two to three minutes.
Can I use rsync to migrate from CentOS, AlmaLinux, or Debian to Ubuntu?
Yes, as long as you migrate only application files (/var/www/, /home/, /opt/), SSL certificates (/etc/letsencrypt/), and database dumps rather than system binaries or OS identity files. Install Nginx/Apache, PHP, Node.js, and MySQL/PostgreSQL natively on the new Ubuntu server using apt, then sync your site data and virtual host blocks.
Why shouldn't I copy /var/lib/mysql directly with rsync?
Copying raw InnoDB tablespace files in /var/lib/mysql while MySQL or MariaDB is running produces corrupted tables because uncommitted transactions and buffer pool pages remain in memory. Always use mysqldump --single-transaction (or stop the database service completely on identical engine versions) to guarantee a clean, consistent database restore.
How do I migrate Let's Encrypt SSL certificates to a new Ubuntu server?
Sync the entire /etc/letsencrypt/ directory from your old VPS to the new Ubuntu server using rsync -avzP (which preserves the symbolic links inside /etc/letsencrypt/live/ pointing to ../../archive/). After switching your DNS records to the new server’s IP, run sudo certbot renew --dry-run to verify automatic renewal.
What is the easiest way to migrate a VPS if I use DirectAdmin or cPanel?
If both servers run DirectAdmin (included with Aveshost Fully Managed VPS Hosting) or cPanel, use the built-in Admin Backup/Transfer tool. It automatically packages your website files, MySQL databases, DNS zones, cron jobs, and email accounts into a single archive and restores them over SSH or FTP on the new server.