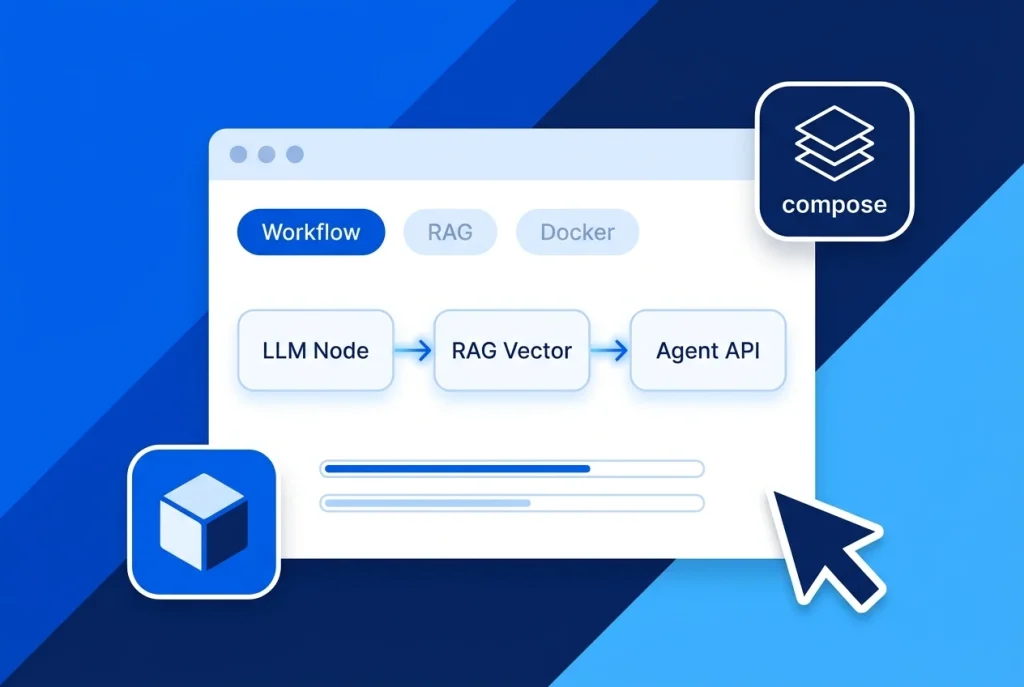
Learning how to self-host Dify on a VPS with Docker Compose gives you a complete, private AI application studio—combining visual agent workflows, Retrieval-Augmented Generation (RAG) knowledge bases, Model Context Protocol (MCP) tools, and 100+ LLM integrations without per-seat SaaS limits or workspace data caps. Maintained by LangGenius (langgenius/dify), Dify lets you build and deploy production chatbots, multi-step AI agents, and internal APIs on your own infrastructure.
Because Dify’s production stack orchestrates around ten microservices—including a Python API server, Celery background workers, a Next.js web frontend, PostgreSQL, Redis, a Weaviate vector database, a code sandbox, and a plugin daemon—running it on a dedicated Aveshost Self-Managed VPS keeps your vector embeddings, prompts, and API keys under your full control.
In this guide, we walk through how to self-host Dify on a VPS running Ubuntu 22.04 or 24.04 LTS, size your CPU and RAM properly, configure critical .env security tokens, enable Let’s Encrypt HTTPS, and upgrade Dify safely without losing your knowledge bases.
Table of Contents
Why Self-Host Dify on a VPS? Docker Compose Architecture and Requirements
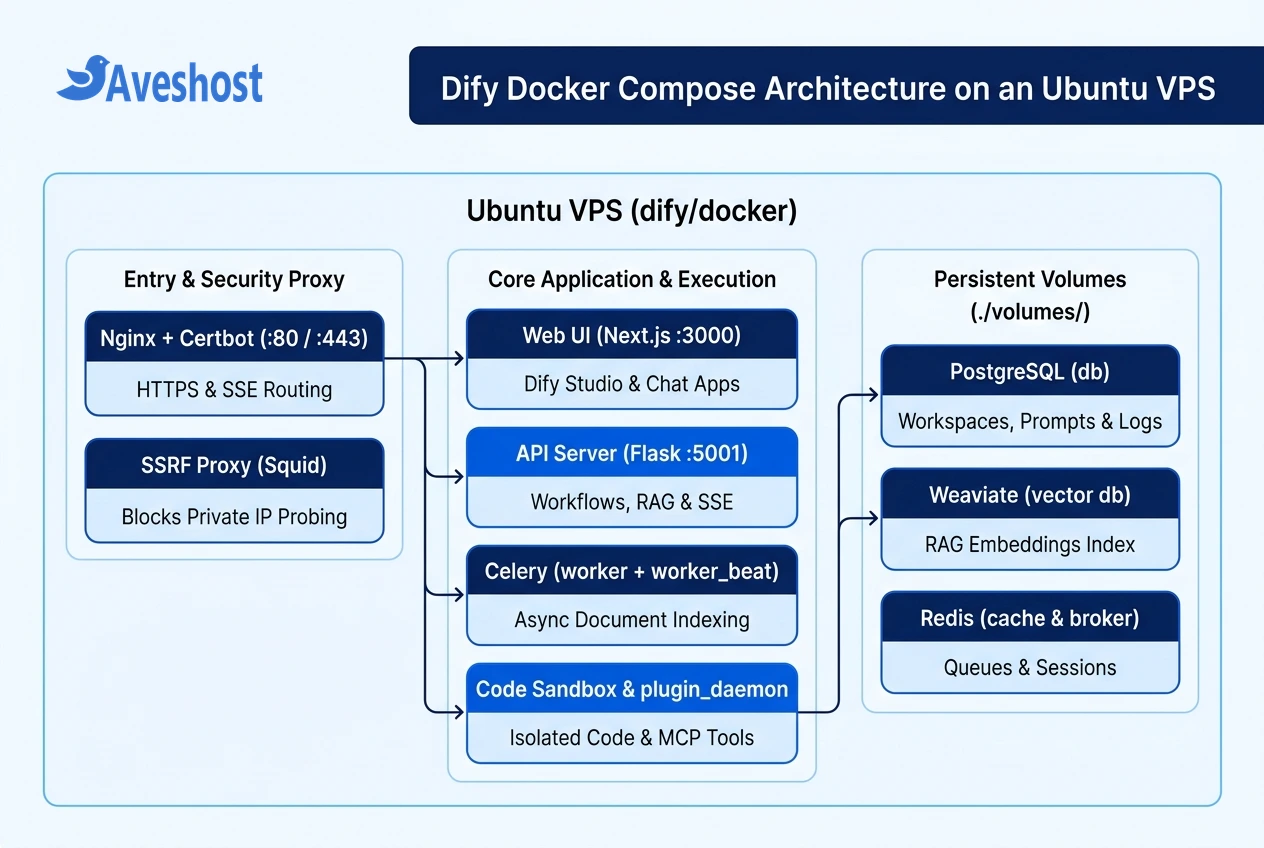
Before you self-host Dify on a VPS, it helps to understand what happens when you run docker compose up -d inside the dify/docker directory. Unlike single-binary CLI coding agents, Dify launches a complete multi-container platform wired together over an internal Docker bridge network:
• nginx & web: Nginx serves as the single reverse-proxy entry point on ports 80 and 443, routing browser traffic to the Next.js Studio frontend (web on port 3000) and API requests (/console/api, /api, and /v1) to the backend.
• api, worker & worker_beat: The core Python Flask backend handles workflow execution and Server-Sent Events (SSE) token streaming, while Celery workers (worker) asynchronously parse uploaded PDFs, chunk documents, compute vector embeddings, and run periodic scheduled tasks via worker_beat.
• db (PostgreSQL), redis & weaviate: PostgreSQL stores workspaces, user accounts, workflow graphs, and conversation logs; Redis manages session caches and Celery task queues; and Weaviate serves as the default vector database for RAG retrieval (configurable via VECTOR_STORE in .env if you prefer Qdrant, PGVector, or Milvus).
• sandbox, plugin_daemon & ssrf_proxy: The dify-sandbox container executes untrusted Python and Node.js code blocks inside workflows safely; plugin_daemon installs and runs modular model providers and agent tools; and the Squid-based ssrf_proxy blocks workflows from probing private RFC-1918 IP addresses or cloud metadata endpoints.
Because all ten containers run concurrently alongside background embedding jobs, memory is the primary bottleneck on small servers. Here is how to size your Ubuntu VPS based on your expected Dify workload:
| Deployment Tier | vCPU Cores | RAM (Memory) | NVMe / SSD Storage | Recommended Use Case |
|---|---|---|---|---|
| Minimum (Official Spec) | 2 vCPU | 4 GB RAM (+ 4 GB Swap) | 40 GB SSD/NVMe | Personal testing, prompt prototyping & light API workflows |
| Recommended Production | 4 vCPU | 8 GB RAM | 80 GB NVMe | Team workspace, active RAG document indexing & multiple plugins |
| Heavy RAG & Multi-Agent | 8+ vCPU | 16 GB+ RAM | 160 GB+ NVMe | Large vector knowledge bases, high concurrency & local embeddings |
Step 1: Prepare Your Ubuntu VPS and Install Docker Compose v2
According to the official Dify documentation (docs.dify.ai), self-hosting requires a 64-bit Linux server with Docker Engine and Docker Compose v2 (version 2.35.0 or newer is recommended), along with git and openssl.
When you self-host Dify on a VPS with 4 GB or 8 GB of RAM, configuring a 4 GB Linux swap file is essential. Whenever you install a new model provider plugin in Dify v1.x, the plugin_daemon container unpacks and compiles Python dependencies in the background, which can briefly spike memory consumption.
SSH into your Ubuntu 22.04 or 24.04 LTS server, configure the UFW firewall to allow SSH, HTTP, and HTTPS, create a 4 GB swap file, and install the official Docker Engine and Compose plugin:
# 1. Update Ubuntu packages and install prerequisites
sudo apt update && sudo apt upgrade -y
sudo apt install -y ca-certificates curl gnupg git openssl ufw

# 2. Configure UFW firewall for SSH, HTTP (80), and HTTPS (443)
sudo ufw allow OpenSSH
sudo ufw allow 80/tcp
sudo ufw allow 443/tcp
sudo ufw --force enable

# 3. Create a 4 GB swap file (prevents OOM kills during RAG indexing & plugin installs)
sudo fallocate -l 4G /swapfile
sudo chmod 600 /swapfile
sudo mkswap /swapfile && sudo swapon /swapfile
echo '/swapfile none swap sw 0 0' | sudo tee -a /etc/fstab

# 4. Install official Docker Engine & Docker Compose v2
curl -fsSL https://get.docker.com | sudo sh
sudo usermod -aG docker $USER
newgrp docker

# 5. Verify Docker Engine and Docker Compose v2 versions
docker --version
docker compose version
Step 2: Clone Dify and Configure Your .env File
To self-host Dify on a VPS reliably, always clone the latest tagged release from the official langgenius/dify GitHub repository rather than an untested development commit on the main branch. Inside the dify/docker directory, Dify provides a comprehensive .env.example template that controls every microservice.
Before launching the stack, copy .env.example to .env and generate two mandatory cryptographic secrets using OpenSSL: SECRET_KEY (a 42-byte base64 key used to encrypt LLM provider credentials stored in PostgreSQL) and DIFY_AGENT_LOCAL_SANDBOX_AUTH_TOKEN (a 32-byte hex token that authenticates communication between the Dify API server and the code-execution sandbox):
# 1. Fetch the latest stable release tag and clone Dify
LATEST_TAG=$(curl -s https://api.github.com/repos/langgenius/dify/releases/latest | grep -oP '"tag_name": "\K(.*)(?=")')
git clone https://github.com/langgenius/dify.git --branch "${LATEST_TAG}" --depth 1
cd dify/docker

# 2. Create your active .env configuration from the official template
cp .env.example .env

# 3. Generate and inject a strong SECRET_KEY and sandbox auth token
NEW_SECRET=$(openssl rand -base64 42)
sed -i "s|^SECRET_KEY=.*|SECRET_KEY=${NEW_SECRET}|" .env

SANDBOX_TOKEN=$(openssl rand -hex 32)
if grep -q "^DIFY_AGENT_LOCAL_SANDBOX_AUTH_TOKEN=" .env; then
  sed -i "s|^DIFY_AGENT_LOCAL_SANDBOX_AUTH_TOKEN=.*|DIFY_AGENT_LOCAL_SANDBOX_AUTH_TOKEN=${SANDBOX_TOKEN}|" .env
else
  echo "DIFY_AGENT_LOCAL_SANDBOX_AUTH_TOKEN=${SANDBOX_TOKEN}" >> .env
fi
If you plan to serve Dify under a single custom domain (such as https://dify.yourdomain.com), leave CONSOLE_API_URL, CONSOLE_WEB_URL, SERVICE_API_URL, APP_API_URL, and APP_WEB_URL blank (=) in .env—Dify’s bundled Nginx container automatically resolves the correct origin from the incoming browser request. You can also raise UPLOAD_FILE_SIZE_LIMIT=50 and UPLOAD_FILE_BATCH_LIMIT=20 in .env if your team uploads large PDF manuals into RAG knowledge bases.
Step 3: Launch Dify with Docker Compose and Complete Admin Setup
With your .env file configured, start the Dify container stack in detached mode and verify that all containers reach an active Up state:
# 1. Pull images and start all Dify containers in the background
docker compose up -d

# 2. Check container health and port bindings
docker compose ps

# 3. Tail the API container logs to watch database migrations complete
docker compose logs -f api
On first boot, the api container automatically executes Alembic database migrations across PostgreSQL because MIGRATION_ENABLED=true is enabled by default. Once the logs show Gunicorn listening on port 5001, open your web browser and navigate to:
• Admin Initialization URL: http://your-vps-ip/install (or https://dify.yourdomain.com/install after completing Step 4).
Create your administrator email, username, and strong password, then log into the Dify Studio dashboard. Click your top-right profile avatar and open Settings → Model Providers to install and configure model plugins for OpenAI, Anthropic Claude, Google Gemini, DeepSeek, or OpenRouter. Once a systemic reasoning model and an embedding model (such as text-embedding-3-small) are connected, you can immediately build RAG pipelines and multi-step AI agent workflows.
Step 4: Enable Let’s Encrypt HTTPS and Upgrade Dify Safely
When you self-host Dify on a VPS for production or team access, never transmit administrator passwords or LLM API keys over unencrypted HTTP. Dify’s docker-compose.yaml includes a built-in certbot profile that issues and renews Let’s Encrypt SSL certificates directly inside the bundled Nginx container.
To avoid the classic Nginx SSL startup error—where Nginx refuses to boot on port 443 before the certificate files exist—keep NGINX_HTTPS_ENABLED=false while Certbot completes the HTTP-01 challenge on port 80, then flip NGINX_HTTPS_ENABLED=true and recreate the Nginx container:
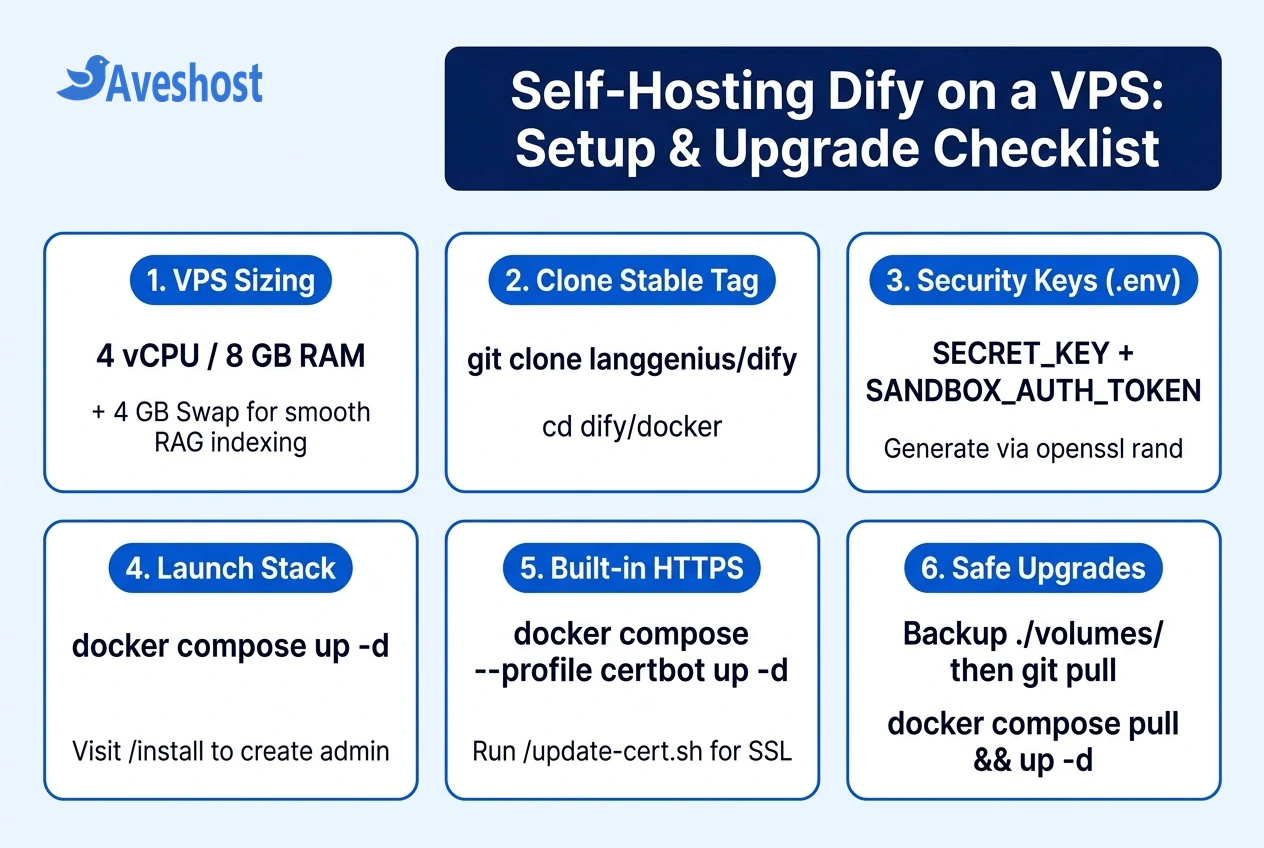
# === PART A: Enable Let's Encrypt HTTPS via Dify's built-in Certbot profile ===
cd ~/dify/docker

# 1. Enable ACME challenge on port 80 first (keep NGINX_HTTPS_ENABLED=false while requesting cert)
sed -i 's|^NGINX_ENABLE_CERTBOT_CHALLENGE=.*|NGINX_ENABLE_CERTBOT_CHALLENGE=true|' .env
sed -i 's|^CERTBOT_DOMAIN=.*|CERTBOT_DOMAIN=dify.yourdomain.com|' .env
sed -i 's|^CERTBOT_EMAIL=.*|[email protected]|' .env

# 2. Start the certbot profile and request your Let's Encrypt certificate
docker compose --profile certbot up -d
docker compose exec -it certbot /bin/sh /update-cert.sh

# 3. Turn on HTTPS in .env and reload the Nginx container
sed -i 's|^NGINX_HTTPS_ENABLED=.*|NGINX_HTTPS_ENABLED=true|' .env
docker compose --profile certbot up -d --no-deps --force-recreate nginx

# === PART B: Safe Zero-Data-Loss Dify Upgrade Workflow ===
cd ~/dify/docker
docker compose down
sudo cp -r volumes "volumes_backup_$(date +%Y%m%d)"
git fetch --all --tags
LATEST_TAG=$(curl -s https://api.github.com/repos/langgenius/dify/releases/latest | grep -oP '"tag_name": "\K(.*)(?=")')
git checkout "${LATEST_TAG}"
docker compose pull
docker compose up -d
Critical Upgrade Rule: All of your persistent state—PostgreSQL tables, Redis keys, Weaviate vector embeddings, uploaded documents, and installed plugins—is stored on the host filesystem inside dify/docker/volumes/. Always back up the volumes/ directory and your .env file before upgrading, and never run docker compose down -v, which permanently deletes Docker volumes.
Want to expand your self-hosted AI stack on your VPS? Explore our step-by-step guides on how to run OpenCode on a VPS for remote terminal coding, how to self-host OpenHands on a VPS, and how to install Hermes Agent on an Ubuntu VPS.
Frequently asked questions
What are the minimum VPS requirements to self-host Dify with Docker Compose?
Dify’s official minimum requirement is a 2 vCPU, 4 GB RAM Linux server. However, because Docker Compose runs around 10 containers—including PostgreSQL, Redis, Weaviate, Celery workers, and the plugin daemon—we recommend a 4 vCPU, 8 GB RAM Ubuntu VPS with 80 GB of NVMe storage and a 4 GB swap file for smooth production RAG indexing.
Where does Dify store persistent data in a Docker Compose deployment?
Dify mounts all persistent state directly into the dify/docker/volumes/ directory on your host VPS. This folder contains subdirectories for PostgreSQL (db), Redis (redis), Weaviate vector embeddings (weaviate), uploaded files (app/storage), and installed plugins (plugin_daemon).
How do I update a self-hosted Dify instance without losing my workflows or knowledge bases?
Navigate to dify/docker, stop the stack with docker compose down, copy the volumes/ folder to a timestamped backup (sudo cp -r volumes volumes_backup), check out the latest Git release tag, run docker compose pull, and start the stack with docker compose up -d. Dify automatically applies any PostgreSQL schema migrations on startup.
Why are my Dify plugins or custom tools failing to connect to internal services?
Dify routes outbound requests from workflows and tools through an isolated Squid container (ssrf_proxy) to prevent Server-Side Request Forgery attacks against private RFC-1918 networks. If your workflow needs to reach a private service or local Ollama instance, update the Squid configuration inside docker/volumes/ssrf_proxy/ or use host.docker.internal.
How do I change the default HTTP/HTTPS ports if Nginx is already running on my VPS?
If you already run a host Nginx or Caddy reverse proxy on ports 80 and 443, edit dify/docker/.env and change EXPOSE_NGINX_PORT=8080 and EXPOSE_NGINX_SSL_PORT=8443. Restart the stack with docker compose up -d and proxy traffic from your host web server to http://127.0.0.1:8080 with proxy_buffering off; enabled for SSE streaming.