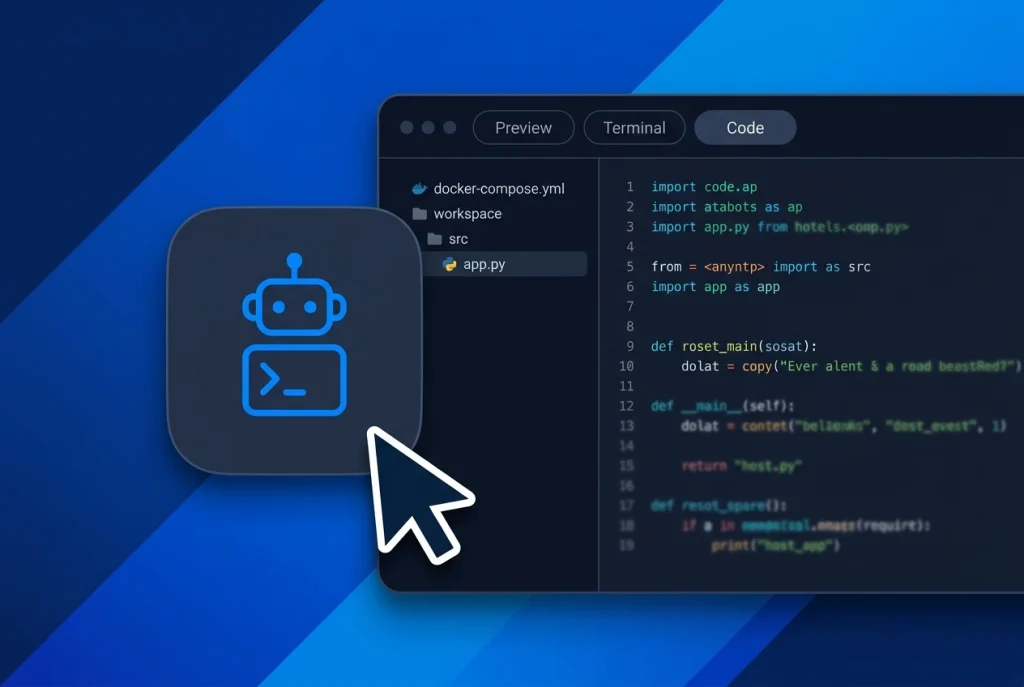
Learning how to self-host OpenHands on a VPS gives you a dedicated, browser-accessible AI software engineer that can clone repositories, run test suites, debug full-stack applications, and open GitHub pull requests without slowing down your local laptop. Formerly known as OpenDevin, OpenHands is an MIT-licensed open-source platform built specifically for autonomous AI coding projects.
Unlike lightweight chat bots that only generate code snippets, OpenHands spins up a full Linux developer workspace inside an isolated Docker sandbox container—complete with Python, Node.js, Git, a bash terminal, and a headless Chromium browser. Deploying that stack on an Aveshost Self-Managed VPS keeps heavy container builds and long-running refactoring jobs online 24/7.
In this guide, we walk through the exact hardware requirements, Docker socket security rules, docker-compose.yml configuration, and Nginx HTTPS + WebSocket reverse proxy setup required to self-host OpenHands on a VPS safely in production.
Table of Contents
How OpenHands Works on a VPS: App vs Sandbox Containers
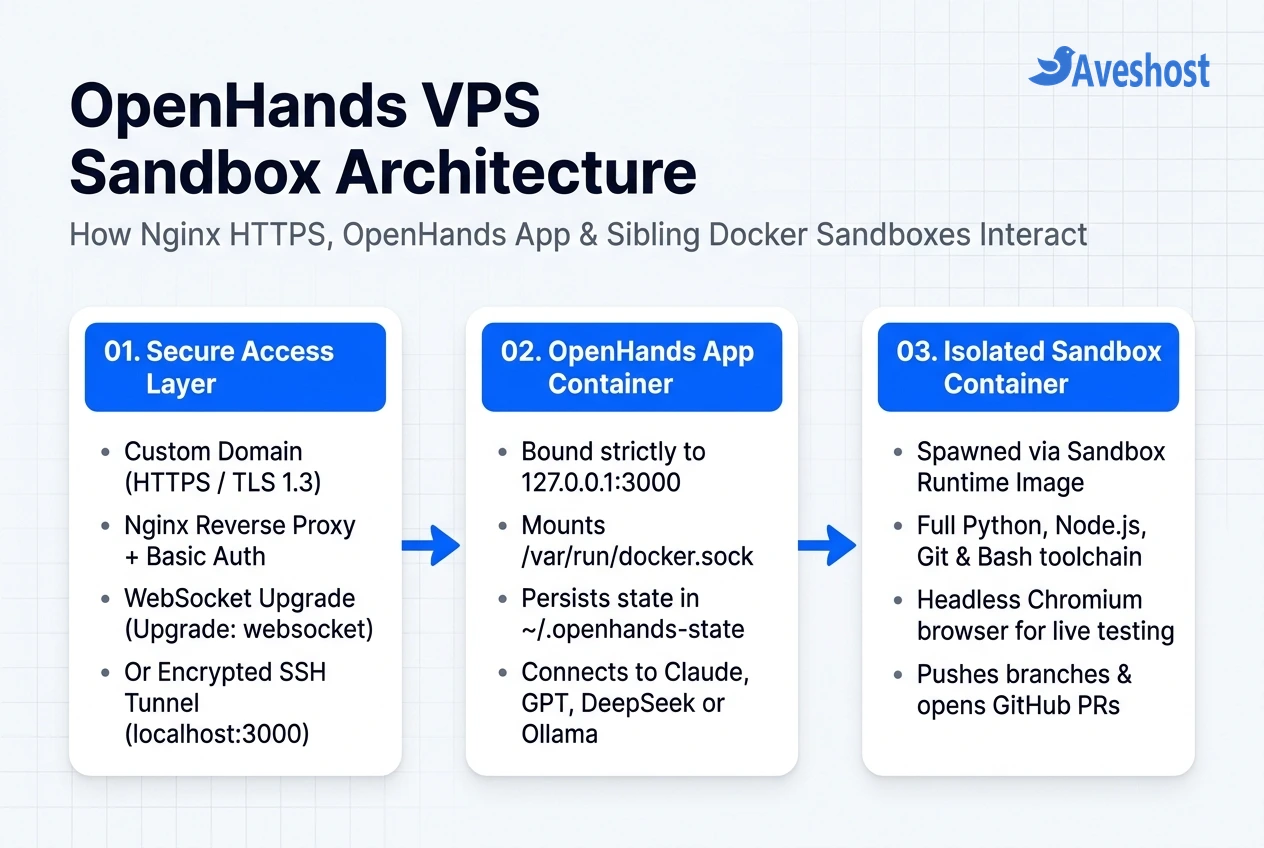
Before you self-host OpenHands on a VPS, it helps to understand its two-container architecture. When you start OpenHands, you are not running a single monolithic container. Instead, the main OpenHands Application Container (listening on port 3000) mounts your host server’s Docker socket (/var/run/docker.sock) so it can dynamically launch sibling Sandbox Runtime Containers (SANDBOX_RUNTIME_CONTAINER_IMAGE).
Every time you start an AI coding session, the agent executes bash commands, installs npm or pip packages, and runs tests inside that isolated runtime container rather than on your underlying Ubuntu host. However, because the application container has access to the Docker socket and stores your LLM API keys, you must never expose port 3000 directly to the public internet without authentication.
Here is how the recommended hardware tiers compare when you self-host OpenHands on a VPS:
| VPS Tier / Workload | Recommended vCPU & RAM | NVMe / SSD Storage | Ideal AI Coding Use Case |
|---|---|---|---|
| Starter Coding VPS (Single Active Session) | 2 vCPU / 4 GB RAM (+ 4 GB Swap) | 30 GB – 40 GB SSD/NVMe | Frontend/backend scripts, bug fixes, and single-repo pull requests |
| Standard Developer VPS (Recommended) | 4 vCPU / 8 GB RAM | 50 GB – 80 GB NVMe | Full-stack Next.js/Python apps, automated test suites, and headless browser debugging |
| Heavy Multi-Agent VDS | 6+ vCPU / 16 GB+ RAM | 100+ GB NVMe | Concurrent coding sessions, Docker-in-Docker builds, and local Ollama/vLLM routing |
Step 1: Prepare Your Ubuntu VPS and Install Docker
Start with a clean Ubuntu 22.04 LTS or 24.04 LTS server. Because OpenHands pulls a pre-built developer runtime image (runtime:0.51-nikolaik) that weighs several gigabytes uncompressed, configuring a 4 GB swap file on 4 GB or 8 GB RAM servers prevents out-of-memory kills during heavy compilation or test runs.
Connect to your VPS over SSH, create a dedicated non-root Linux user, configure UFW so only SSH and HTTPS are open, and install the official Docker Engine and Compose plugin:
# 1. Update packages and configure UFW firewall
sudo apt update && sudo apt upgrade -y
sudo apt install -y curl git ufw ca-certificates apache2-utils
sudo ufw allow OpenSSH
sudo ufw allow 80/tcp
sudo ufw allow 443/tcp
sudo ufw --force enable

# 2. Add a 4 GB swap file to cushion heavy container builds
sudo fallocate -l 4G /swapfile
sudo chmod 600 /swapfile
sudo mkswap /swapfile
sudo swapon /swapfile
echo '/swapfile none swap sw 0 0' | sudo tee -a /etc/fstab

# 3. Install official Docker Engine & Docker Compose plugin
curl -fsSL https://get.docker.com | sudo sh

# 4. Create a dedicated non-root user and grant Docker permissions
sudo adduser --disabled-password --gecos "" openhands
sudo usermod -aG docker,sudo openhands
sudo su - openhands
Verify that Docker is working under your new user by running docker compose version before moving to the next step.
Step 2: Self-Host OpenHands on a VPS with Docker Compose
When you self-host OpenHands on a VPS, two details in your docker-compose.yml file are critical for stability and security:
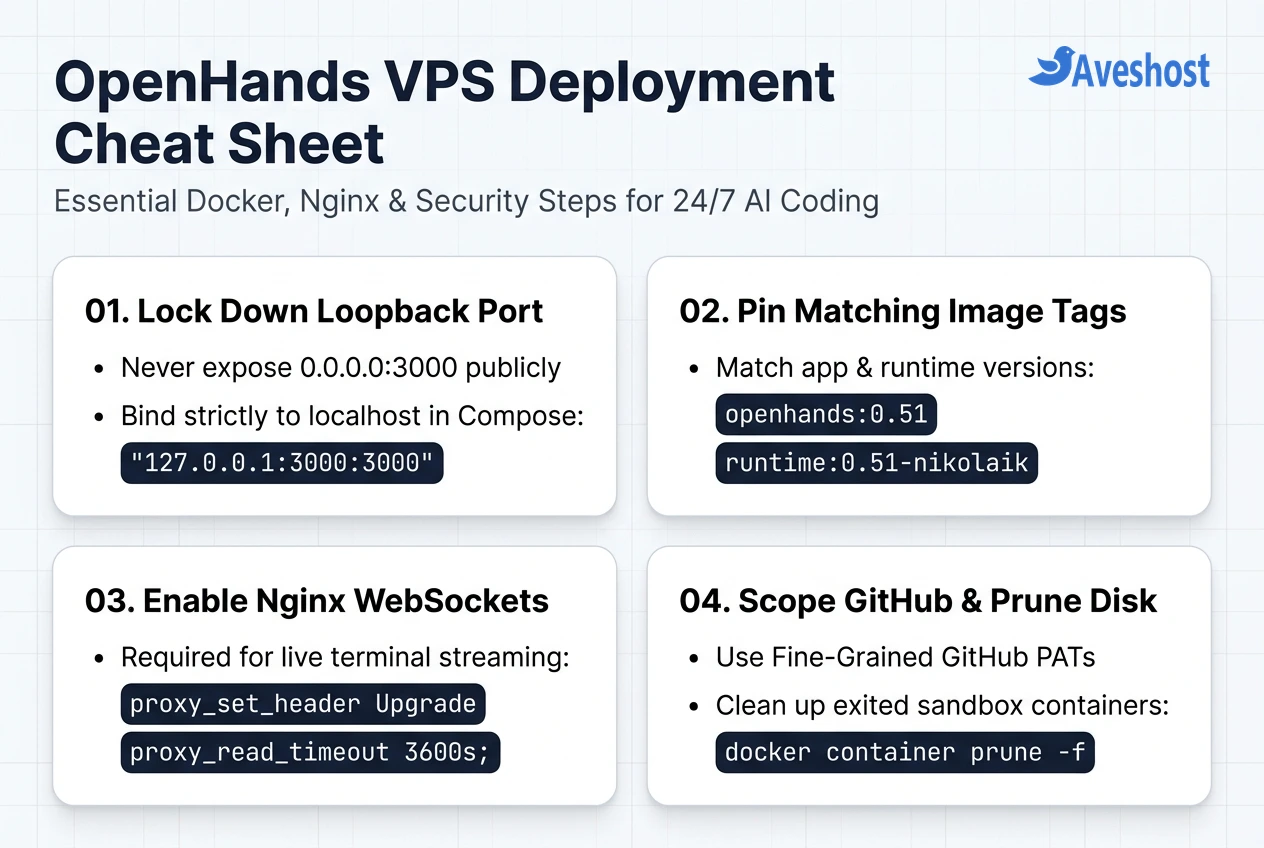
1. Bind Port 3000 to Localhost (127.0.0.1:3000:3000): Docker automatically manipulates Linux iptables rules, which means publishing -p 3000:3000 on all interfaces bypasses UFW and exposes your unauthenticated agent UI to the entire internet. Binding to 127.0.0.1:3000:3000 ensures only your local Nginx reverse proxy or an SSH tunnel can reach OpenHands.
2. Match the App and Runtime Image Versions: Always pin the exact same version tag on both openhands and SANDBOX_RUNTIME_CONTAINER_IMAGE so the agent protocol and runtime container stay in sync.
Create your project directory, pre-pull the sandbox runtime image, and launch the stack with Docker Compose:
# 1. Create persistent directories for OpenHands state and project workspaces
mkdir -p ~/openhands ~/.openhands-state ~/openhands-workspace
cd ~/openhands

# 2. Create the production docker-compose.yml file
cat << 'EOF' > docker-compose.yml
services:
  openhands:
    image: docker.all-hands.dev/all-hands-ai/openhands:0.51
    container_name: openhands-app
    restart: unless-stopped
    ports:
      - "127.0.0.1:3000:3000"
    environment:
      - SANDBOX_RUNTIME_CONTAINER_IMAGE=docker.all-hands.dev/all-hands-ai/runtime:0.51-nikolaik
      - LOG_ALL_EVENTS=true
      - SANDBOX_USER_ID=1000
      - WORKSPACE_MOUNT_PATH=/home/openhands/openhands-workspace
    volumes:
      - /var/run/docker.sock:/var/run/docker.sock
      - /home/openhands/.openhands-state:/.openhands-state
      - /home/openhands/openhands-workspace:/opt/workspace_base
    extra_hosts:
      - "host.docker.internal:host-gateway"
EOF

# 3. Pre-pull the sandbox runtime image so your first coding session starts instantly
docker pull docker.all-hands.dev/all-hands-ai/runtime:0.51-nikolaik

# 4. Start OpenHands in the background
docker compose up -d
Run docker ps to confirm that openhands-app is up and listening solely on 127.0.0.1:3000.
Step 3: Secure OpenHands with Nginx HTTPS & Basic Auth (or SSH Tunnel)
Once you self-host OpenHands on a VPS and bind it to localhost, you have two secure ways to access the web interface from your laptop:
Option A — Zero-Config SSH Port Forwarding (Fastest for Solo Developers): If you do not want to point a domain name or manage SSL certificates, simply run ssh -L 3000:127.0.0.1:3000 openhands@your-vps-ip on your laptop and open http://localhost:3000 in your browser. All traffic travels over your encrypted SSH connection.
Option B — Custom Domain with Nginx HTTPS, WebSockets & Password Protection: If you want to access OpenHands from any device at https://code.yourdomain.com, place Nginx in front of port 3000 with Let’s Encrypt TLS, HTTP Basic Auth (htpasswd), and WebSocket upgrade headers (required so the live terminal and browser preview stream properly):
# 1. Install Nginx and Certbot, then create your Basic Auth password file
sudo apt install -y nginx certbot python3-certbot-nginx
sudo htpasswd -c /etc/nginx/.openhands_htpasswd developer

# 2. Create the Nginx reverse proxy configuration
sudo tee /etc/nginx/sites-available/openhands > /dev/null << 'EOF'
server {
    listen 80;
    server_name code.yourdomain.com;

    location / {
        auth_basic "Restricted AI Coding Workspace";
        auth_basic_user_file /etc/nginx/.openhands_htpasswd;

        proxy_pass http://127.0.0.1:3000;
        proxy_http_version 1.1;
        proxy_set_header Host $host;
        proxy_set_header X-Real-IP $remote_addr;
        proxy_set_header X-Forwarded-For $proxy_add_x_forwarded_for;
        proxy_set_header X-Forwarded-Proto $scheme;

        # Essential for OpenHands real-time WebSocket agent streams
        proxy_set_header Upgrade $http_upgrade;
        proxy_set_header Connection "upgrade";

        # Prevent timeouts during long LLM reasoning & test runs
        proxy_read_timeout 3600s;
        proxy_send_timeout 3600s;
    }
}
EOF

# 3. Enable the site and issue a free Let's Encrypt SSL certificate
sudo ln -s /etc/nginx/sites-available/openhands /etc/nginx/sites-enabled/
sudo nginx -t && sudo systemctl reload nginx
sudo certbot --nginx -d code.yourdomain.com --redirect
For additional best practices on locking down AI-generated code and secrets, review our vibe coding security checklist and our guide on how to host a remote MCP server on a VPS with HTTPS and authentication.
Step 4: Connect Your LLM API Key and GitHub Repositories
After you self-host OpenHands on a VPS, open your browser, log in through your Nginx Basic Auth prompt (or localhost SSH tunnel), and complete the initial workspace setup:
1. Choose Your Coding LLM Provider: Click the Settings (gear icon) in the bottom-left corner of the OpenHands UI. OpenHands uses LiteLLM under the hood, so you can connect Anthropic (such as Claude Sonnet for high SWE-bench accuracy), OpenAI, OpenRouter, DeepSeek, or a local Ollama endpoint. Paste your API key and save your settings—OpenHands persists these encrypted settings inside ~/.openhands-state/.
2. Connect GitHub with Fine-Grained Repository Tokens: Instead of granting an AI agent unrestricted access to every repository in your GitHub account, generate a Fine-Grained Personal Access Token in GitHub scoped strictly to the specific project repositories you want OpenHands to work on (with Read/Write permissions for Contents and Pull Requests). Paste that token into the GitHub integration field inside OpenHands.
3. Manage Disk Space and Prune Old Sandbox Images: Over weeks of coding, stopped sandbox containers and old build caches can accumulate on your VPS disk. Run these maintenance commands periodically (or via a weekly cron job) to keep your VPS lean:
# 1. View active OpenHands application and sibling sandbox containers
docker ps

# 2. Stream live agent orchestration logs
docker logs -f openhands-app

# 3. Reclaim disk space from exited sandbox containers and dangling build caches
docker container prune -f
docker image prune -f
If you also want a 24/7 personal AI assistant on Telegram or Discord alongside your coding workspace, see our guides on how to install Hermes Agent on an Ubuntu VPS and our comparison of Hermes Agent vs OpenClaw.
Frequently asked questions
What are the minimum VPS requirements to self-host OpenHands?
To self-host OpenHands on a VPS reliably, start with an Ubuntu 22.04 or 24.04 LTS server with at least 2 vCPU cores, 4 GB of RAM (plus a 4 GB swap file), and 30 GB of SSD or NVMe storage. For full-stack projects that run automated test suites and headless Chromium browsers simultaneously, 4 vCPU cores and 8 GB of RAM is the sweet spot.
Why does OpenHands need access to /var/run/docker.sock on my VPS?
OpenHands isolates every AI coding session inside a separate sibling Docker container (the sandbox runtime image) so the agent can install packages, run bash scripts, and execute code without modifying your host Ubuntu operating system. Mounting /var/run/docker.sock allows the main OpenHands app container to spawn and manage those sandbox containers.
Is it safe to expose OpenHands port 3000 directly to the internet?
No. You should never bind OpenHands port 3000 directly to 0.0.0.0 on a public VPS because anyone who discovers your IP address could access your coding workspace, Docker socket, and stored LLM API keys. Always bind the container to 127.0.0.1:3000:3000 and access it through an Nginx HTTPS reverse proxy with password authentication or an encrypted SSH tunnel.
Which LLM models work best with a self-hosted OpenHands VPS?
OpenHands supports dozens of providers via LiteLLM, including Anthropic Claude Sonnet and Opus, OpenAI GPT models, DeepSeek Coder/V3, Qwen Coder, and OpenRouter. Because agentic coding loops send large repository context windows and terminal outputs on each turn, models that support prompt caching (such as Claude Sonnet or DeepSeek) deliver the best balance of coding accuracy and token cost.
How do I update my self-hosted OpenHands instance on Ubuntu?
To update OpenHands, edit your docker-compose.yml file to set the new release version tag on both the openhands image and the SANDBOX_RUNTIME_CONTAINER_IMAGE environment variable. Then run docker compose pull followed by docker compose up -d, and prune the old runtime image with docker image prune -f.