

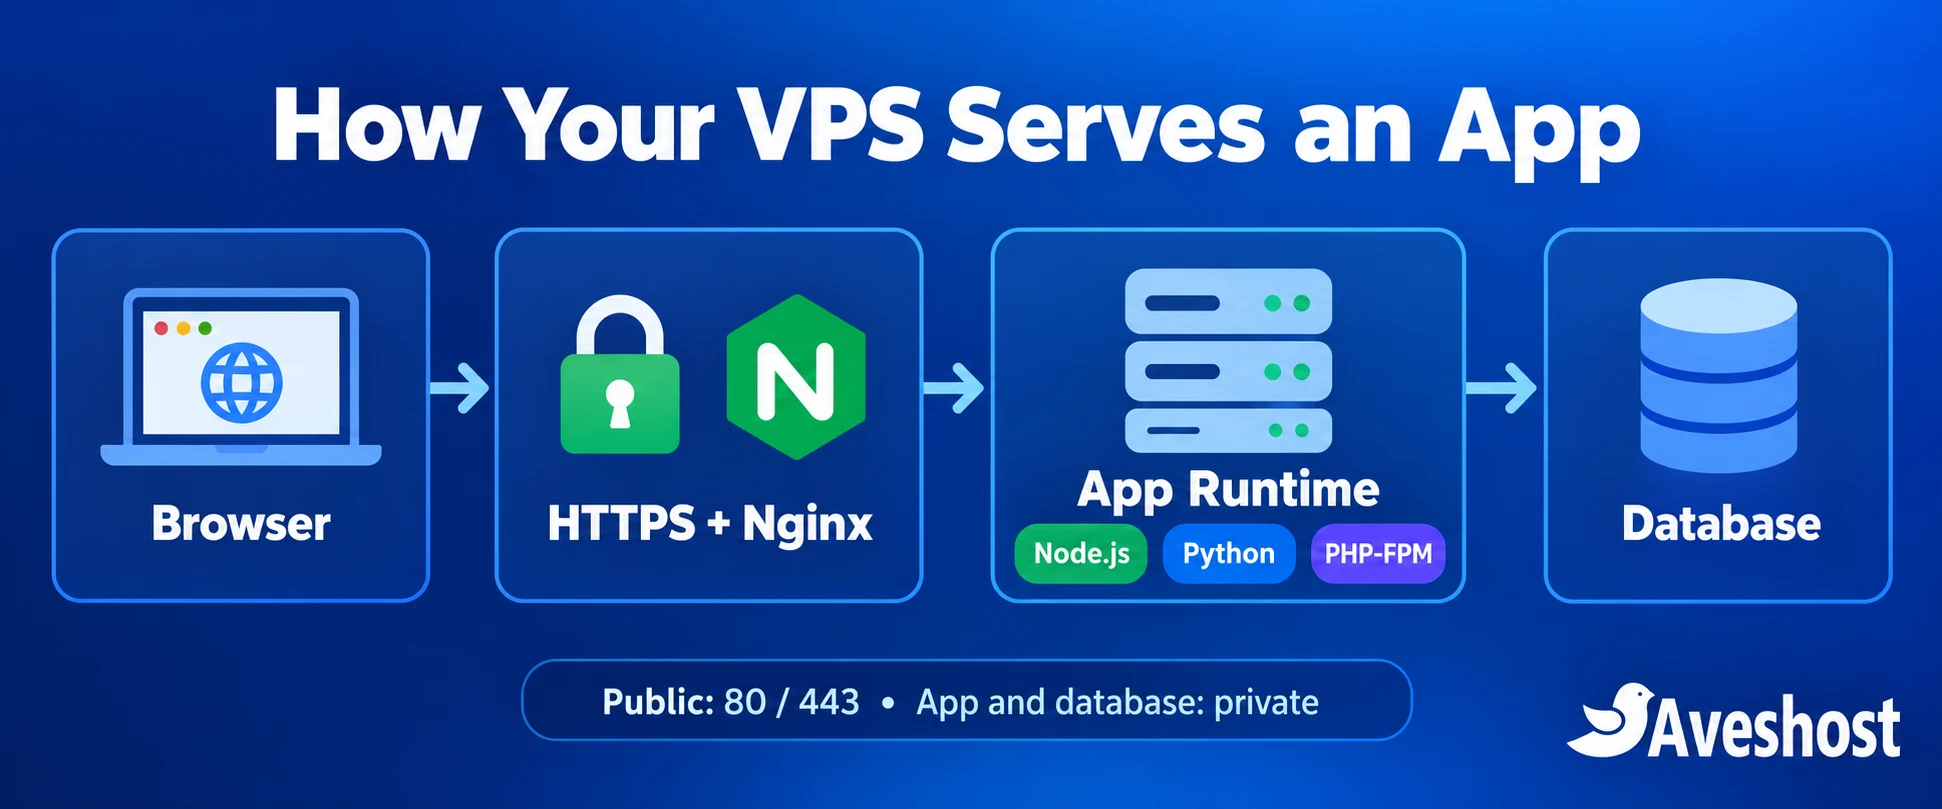
To deploy a web app on a Linux VPS, install the right runtime, run the application as a supervised service, place Nginx in front of it and enable HTTPS. Node.js, Python and Laravel share this foundation, but each needs a different application server and launch command.
A VPS gives you the freedom to choose framework versions, connect databases, run background workers and host several projects under your own domains. Our self-managed cloud VPS plans give you full root access to build that environment your way.
This guide walks through an Ubuntu 24.04 LTS server with Nginx, systemd and SSL. Complete the shared preparation, choose the section for your framework, then finish with the domain, HTTPS and maintenance steps. You do not need to install all three stacks to deploy one app.
Table of Contents
Choose the right Linux VPS for your web app
Choose resources around your workload rather than the programming language alone. A small API needs less memory than a dashboard with database queries, queues and a frontend build. Build tools can briefly consume more RAM than the running app, so leave room for deployment tasks as well as everyday traffic.
| Our plan | Monthly USD price | CPU / RAM / storage | Suggested starting use |
|---|---|---|---|
| Cloud VPS 1 | $9.13 | 1 vCore / 2 GB / 20 GB SSD | Small app, prototype or lightweight API |
| Cloud VPS 2 | $15.51 | 4 vCores / 8 GB / 100 GB SSD | App plus database, builds and background jobs |
| Cloud VPS 3 | $27.38 | 6 vCores / 12 GB / 200 GB SSD | Several apps or a busier production workload |
Prices above are the USD display on our plan page at the time of writing. Select your currency and billing options to see your checkout total. For a first production deployment with a local database, Cloud VPS 2 provides useful headroom; measure memory use, CPU and response times as traffic grows.
Our self-managed VPS gives you control over the Linux environment without a bundled cPanel or DirectAdmin licence. This tutorial uses SSH and command-line tools. If you want a control panel, explore our fully managed VPS options. For an interface that handles Git deployments and containers, follow our Coolify deployment guide.
- A fresh Ubuntu 24.04 LTS VPS with its public IP and administrative access.
- A domain or subdomain whose DNS records you can edit.
- A tested application, dependency lockfile and known production start command.
- An SSH client, a Git repository or secure file transfer access.
- Database credentials and a recovery plan before importing existing data.
1. Prepare Ubuntu, SSH and your firewall
Start with a fresh server. These commands use the default SSH port, 22. If your server uses another port, allow that actual port before enabling the firewall. Keep the current SSH session open until a second connection works.
ssh root@YOUR_SERVER_IP
apt update
apt upgrade
apt install nginx git curl ca-certificates ufw
adduser deploy
usermod -aG sudo deploy
Replace YOUR_SERVER_IP with your server address. On your own computer, create an SSH key if you do not already have one, then add its public key to the deploy account. Never upload or share the private key.
ssh-keygen -t ed25519
ssh-copy-id deploy@YOUR_SERVER_IP
ssh deploy@YOUR_SERVER_IP
Run the remaining commands as deploy with sudo where shown. On Windows, use OpenSSH or your SSH client to place the public key in /home/deploy/.ssh/authorized_keys if ssh-copy-id is unavailable. Set the .ssh directory to mode 700 and authorized_keys to 600, owned by deploy.
sudo ufw allow OpenSSH
sudo ufw allow 'Nginx Full'
sudo ufw enable
sudo ufw status
sudo systemctl enable --now nginx
Only SSH and the public web ports should be reachable for this setup. Node.js and Python will listen on loopback, while PHP-FPM uses a local socket. Do not open database, cache or application ports to the whole internet. Read the Ubuntu firewall documentation when adapting rules to your network.
After key-based access works in a second session, harden SSH with your chosen access policy. Make configuration changes carefully, check them with sudo sshd -t and keep a recovery route through the server console. Apply security updates regularly and plan reboots when the operating system requires them.
2. Upload your code and protect configuration
Each example uses a separate project directory: /srv/nodeapp, /srv/pythonapp or /srv/laravelapp. Choose your app directory and replace YOUR_REPOSITORY_URL with your repository address. Use a read-only deployment key or repository access token with minimal permissions for a private repository; do not put credentials into the URL or shell history.
sudo install -d -o deploy -g deploy /srv/nodeapp
git clone YOUR_REPOSITORY_URL /srv/nodeapp
cd /srv/nodeapp
For Python or Laravel, substitute the relevant directory in all three commands. Deploy a tested release or commit instead of blindly pulling whatever happens to be on the default branch. Keep package-lock.json, your Python dependency lock or composer.lock in version control for reproducible installs.
Keep database passwords, API keys and signing secrets out of Git. For the Node.js and Python service examples, store runtime variables in a root-owned file under /etc, readable by systemd. The application must actually read those variables; an environment file does not configure your code by itself.
sudo install -d -m 700 /etc/webapps
sudo install -m 600 /dev/null /etc/webapps/nodeapp.env
sudoedit /etc/webapps/nodeapp.env
Use ordinary KEY=value entries compatible with systemd EnvironmentFile syntax. The Node example needs NODE_ENV=production and PORT=3000; add your application-specific variables separately. Create pythonapp.env the same way for the Python branch. Laravel uses its project .env file, configured in its own section. Never paste real secrets into a public support ticket.
3. Deploy a Node.js app on your VPS
Install a supported Node.js LTS runtime
Use a Node.js LTS release supported by your app and dependencies. Do not rely on an old distribution package simply because its installation is convenient. Visit the official Node.js download page, select the Linux binary matching your server architecture and verify its checksum against the published release files before installing it.
The service below expects a system-wide installation at /opt/node/bin/node and npm at /opt/node/bin/npm. Extract your verified binary archive into /opt/node with its top-level directory removed, or adapt the absolute paths to your trusted installation. Do not hard-code a path inside another user’s home directory. Confirm the installed version and permissions before continuing.
After downloading and verifying the official archive, transfer it securely to the VPS. Replace NODE_ARCHIVE with its exact filename in the command below. This installs the runtime at the path used by the example service; use it on a fresh setup, and preserve the previous runtime when planning future upgrades.
sudo install -d -m 755 /opt/node
sudo tar -xJf NODE_ARCHIVE --strip-components=1 -C /opt/node
sudo chown -R root:root /opt/node
/opt/node/bin/node --version
/opt/node/bin/npm --version
cd /srv/nodeapp
PATH=/opt/node/bin:$PATH /opt/node/bin/npm ci
PATH=/opt/node/bin:$PATH /opt/node/bin/npm run build --if-presentInstall build dependencies first, produce the build, then decide whether development packages can be pruned. Some apps need packages at runtime that are incorrectly listed as development dependencies; test before removing them. The production entry point in this example is server.js. For a compiled app, replace it with the actual output file, such as dist/server.js.
Keep Node.js running with systemd
Configure the application to bind to 127.0.0.1:3000. For an Express app, the listening call could be app.listen(process.env.PORT || 3000, “127.0.0.1”). Create /etc/systemd/system/nodeapp.service with:
[Unit]
Description=Node.js web application
After=network.target

[Service]
Type=simple
User=deploy
Group=deploy
WorkingDirectory=/srv/nodeapp
EnvironmentFile=/etc/webapps/nodeapp.env
ExecStart=/opt/node/bin/node /srv/nodeapp/server.js
Restart=on-failure
RestartSec=5
NoNewPrivileges=true
PrivateTmp=true

[Install]
WantedBy=multi-user.target
sudo systemctl daemon-reload
sudo systemctl enable --now nodeapp
sudo systemctl status nodeapp
curl -I http://127.0.0.1:3000
sudo journalctl -u nodeapp -n 50 --no-pagerA successful HTTP response proves the app is reachable locally; use a known route if your app does not answer HEAD requests at /. systemd starts the service after a reboot and restarts it after a process failure. You do not need to add a second process manager for this setup. If your framework requires npm start, configure a service command and PATH that match that production script.
4. Deploy a Python app with Gunicorn
For a WSGI application such as Flask or conventional Django, use Gunicorn rather than the framework development server. The example below is Flask with app.py exporting an application object called app. A Django deployment usually changes the target to projectname.wsgi:application.
sudo apt install python3-venv python3-pip
cd /srv/pythonapp
python3 -m venv .venv
.venv/bin/python -m pip install -r requirements.txt
.venv/bin/python -m pip install gunicorn
For repeatable releases, record Gunicorn and other production packages in your tested requirements or lockfile. Avoid sudo pip install into the system Python. Virtual environments keep each app’s dependencies separate.
Create /etc/webapps/pythonapp.env using the protected-file procedure above, with the variables your application expects. Then save /etc/systemd/system/pythonapp.service:
[Unit]
Description=Python web application
After=network.target

[Service]
Type=simple
User=deploy
Group=deploy
WorkingDirectory=/srv/pythonapp
EnvironmentFile=/etc/webapps/pythonapp.env
ExecStart=/srv/pythonapp/.venv/bin/gunicorn --workers 2 --bind 127.0.0.1:8000 --access-logfile - --error-logfile - app:app
Restart=on-failure
RestartSec=5
NoNewPrivileges=true
PrivateTmp=true

[Install]
WantedBy=multi-user.target
sudo systemctl daemon-reload
sudo systemctl enable --now pythonapp
sudo systemctl status pythonapp
curl -I http://127.0.0.1:8000
sudo journalctl -u pythonapp -n 50 --no-pagerTwo workers are a starting configuration, not a universal sizing rule. Tune workers against memory, CPU and request latency. If your app uses an application factory, use the appropriate factory import. See the Flask Gunicorn guide for supported loading patterns.
For Django, set DEBUG=False, configure ALLOWED_HOSTS, run migrations, collect static files and arrange persistent media storage before launch. Configure proxy-related HTTPS settings only when you trust the forwarding proxy. FastAPI and other ASGI apps need an ASGI server such as Uvicorn; do not copy the WSGI app:app command into an ASGI deployment.
5. Deploy Laravel with PHP-FPM
Laravel runs through PHP-FPM in this guide. Ubuntu 24.04 supplies PHP 8.3 packages, suitable for Laravel versions whose PHP requirements allow 8.3. Check your project’s composer.json and installed extensions before deployment, especially for applications with newer or specialised dependencies.
sudo apt install php8.3-fpm php8.3-cli php8.3-mbstring php8.3-xml php8.3-curl php8.3-zip php8.3-mysql php8.3-bcmath unzip composer
cd /srv/laravelapp
composer install --no-dev --prefer-dist --optimize-autoloader
composer check-platform-reqs
cp .env.example .env
chmod 640 .env
For PostgreSQL, install the matching PHP PostgreSQL extension instead of using the MySQL driver alone. Run Composer as deploy rather than root. Check whether your project requires a newer Composer release; use the official Composer installation instructions when the Ubuntu package does not meet its requirements.
Edit .env with APP_ENV=production, APP_DEBUG=false, APP_URL=https://app.example.com and the database, mail, queue and session settings your app uses. For a new application, generate APP_KEY once. For an existing application, preserve its original key: changing it can invalidate encrypted data.
php artisan key:generate
# Run the command above only for a new app without an existing key.
# Back up an existing database before applying migrations.
php artisan migrate --force
php artisan optimize
Provision the database and a dedicated application user before migrating; give that user only the privileges required for the project. Keep the database on loopback or a private network. Never use the database root account as the application login. If the project builds frontend assets, install its supported Node.js runtime, run npm ci and npm run build, then verify the asset manifest is present.
Set writable directories without opening the whole project
sudo chgrp -R www-data /srv/laravelapp
sudo chmod -R g+rX /srv/laravelapp
sudo chmod 640 /srv/laravelapp/.env
sudo find /srv/laravelapp/storage /srv/laravelapp/bootstrap/cache -type d -exec chmod 2770 {} \;
sudo find /srv/laravelapp/storage /srv/laravelapp/bootstrap/cache -type f -exec chmod 660 {} \;
sudo systemctl enable --now php8.3-fpm
These permissions let the PHP-FPM group write to storage and bootstrap/cache while keeping the source owned by deploy. Avoid chmod 777. Ensure newly deployed files retain the required group permissions. If your app uses public uploads, run php artisan storage:link and back up the underlying storage directory.
Set Nginx’s document root to /srv/laravelapp/public, never the project root. See the Laravel deployment documentation for framework requirements and production configuration.
Supervise queues and schedule recurring tasks
If you use an asynchronous queue, create a separate systemd worker with User=deploy, WorkingDirectory=/srv/laravelapp and ExecStart=/usr/bin/php /srv/laravelapp/artisan queue:work –sleep=3 –tries=3 –timeout=90. Use Restart=always and a generous TimeoutStopSec for your longest job. Set the queue connection’s retry_after higher than the worker timeout, and make jobs safe to retry. Reload workers after deploying new code.
For scheduled tasks, add this entry to the deploy user’s crontab using crontab -e. Choose a log path and monitoring strategy if you need visibility into scheduler output:
* * * * * cd /srv/laravelapp && /usr/bin/php artisan schedule:run >> /dev/null 2>&16. Configure Nginx and your domain
Create an A record for app.example.com pointing to your VPS IPv4 address. Add an AAAA record only if IPv6 is configured and reachable on this server. Replace app.example.com throughout with your real hostname. If you still need a domain, use our domain search.
Nginx for Node.js or Python
Create /etc/nginx/sites-available/app with the following HTTP configuration. Node.js uses port 3000; for the Python branch, change proxy_pass to http://127.0.0.1:8000. Use a separate file and hostname for each application when hosting several apps.
server {
    listen 80;
    server_name app.example.com;

    location / {
        proxy_pass http://127.0.0.1:3000;
        proxy_http_version 1.1;
        proxy_set_header Host $host;
        proxy_set_header X-Real-IP $remote_addr;
        proxy_set_header X-Forwarded-For $proxy_add_x_forwarded_for;
        proxy_set_header X-Forwarded-Proto $scheme;
    }
}
If your app needs WebSockets, add the appropriate Upgrade and Connection handling for its endpoint. Configure upload limits and timeouts around genuine requirements. Do not increase limits indiscriminately to hide slow database queries or blocked workers. Apps that generate absolute URLs or secure cookies need correctly scoped proxy trust settings.
Nginx for Laravel
Use this configuration instead of the Node.js/Python proxy block for the Laravel branch. Check the installed PHP-FPM socket if you use a different PHP version.
server {
    listen 80;
    server_name app.example.com;
    root /srv/laravelapp/public;
    index index.php;

    location / {
        try_files $uri $uri/ /index.php?$query_string;
    }

    location ~ ^/index\.php(/|$) {
        include fastcgi_params;
        fastcgi_param SCRIPT_FILENAME $realpath_root$fastcgi_script_name;
        fastcgi_pass unix:/run/php/php8.3-fpm.sock;
    }

    location ~ \.php$ {
        return 404;
    }

    location ~ /\.(?!well-known).* {
        deny all;
    }
}
Enable your chosen configuration, test syntax and reload Nginx. The symbolic link command below is for a new site; skip it if the same link already exists.
sudo ln -s /etc/nginx/sites-available/app /etc/nginx/sites-enabled/app
sudo nginx -t
sudo systemctl reload nginx
curl -I -H "Host: app.example.com" http://127.0.0.1
If the default welcome page appears when using your domain, check server_name, DNS and enabled sites before removing any configuration. On a server with existing websites, do not delete their site files. Test public reachability with a harmless health route; keep real sign-ins and sensitive data off HTTP until HTTPS is ready.
7. Enable HTTPS with SSL certificates
Once your hostname reaches the correct Nginx site, issue a certificate and redirect HTTP to HTTPS. The following uses Certbot’s snap installation for a fresh server, following the official Nginx instructions. Do not mix competing Certbot installations on an existing server.
sudo apt install snapd
sudo snap install --classic certbot
sudo ln -s /snap/bin/certbot /usr/local/bin/certbot
sudo certbot --nginx -d app.example.com
sudo certbot renew --dry-run
Skip the symlink step if /usr/local/bin/certbot already points to the intended snap binary. Follow the prompts with your contact email and choose HTTPS redirection if offered. Certbot’s renewal validation must remain reachable: keep DNS correct and ensure the challenge route is not blocked by authentication or firewall rules.
Visit https://app.example.com, verify the certificate and test sign-in, forms, uploads and callback URLs. If a CDN or proxy is in front, maintain encryption between it and the VPS as well. Use our step-by-step Cloudflare protection guide for that additional layer. Delay strict long-lived HSTS settings until HTTPS works across the hostnames you intend to cover.
8. Add backups, monitoring and safe updates
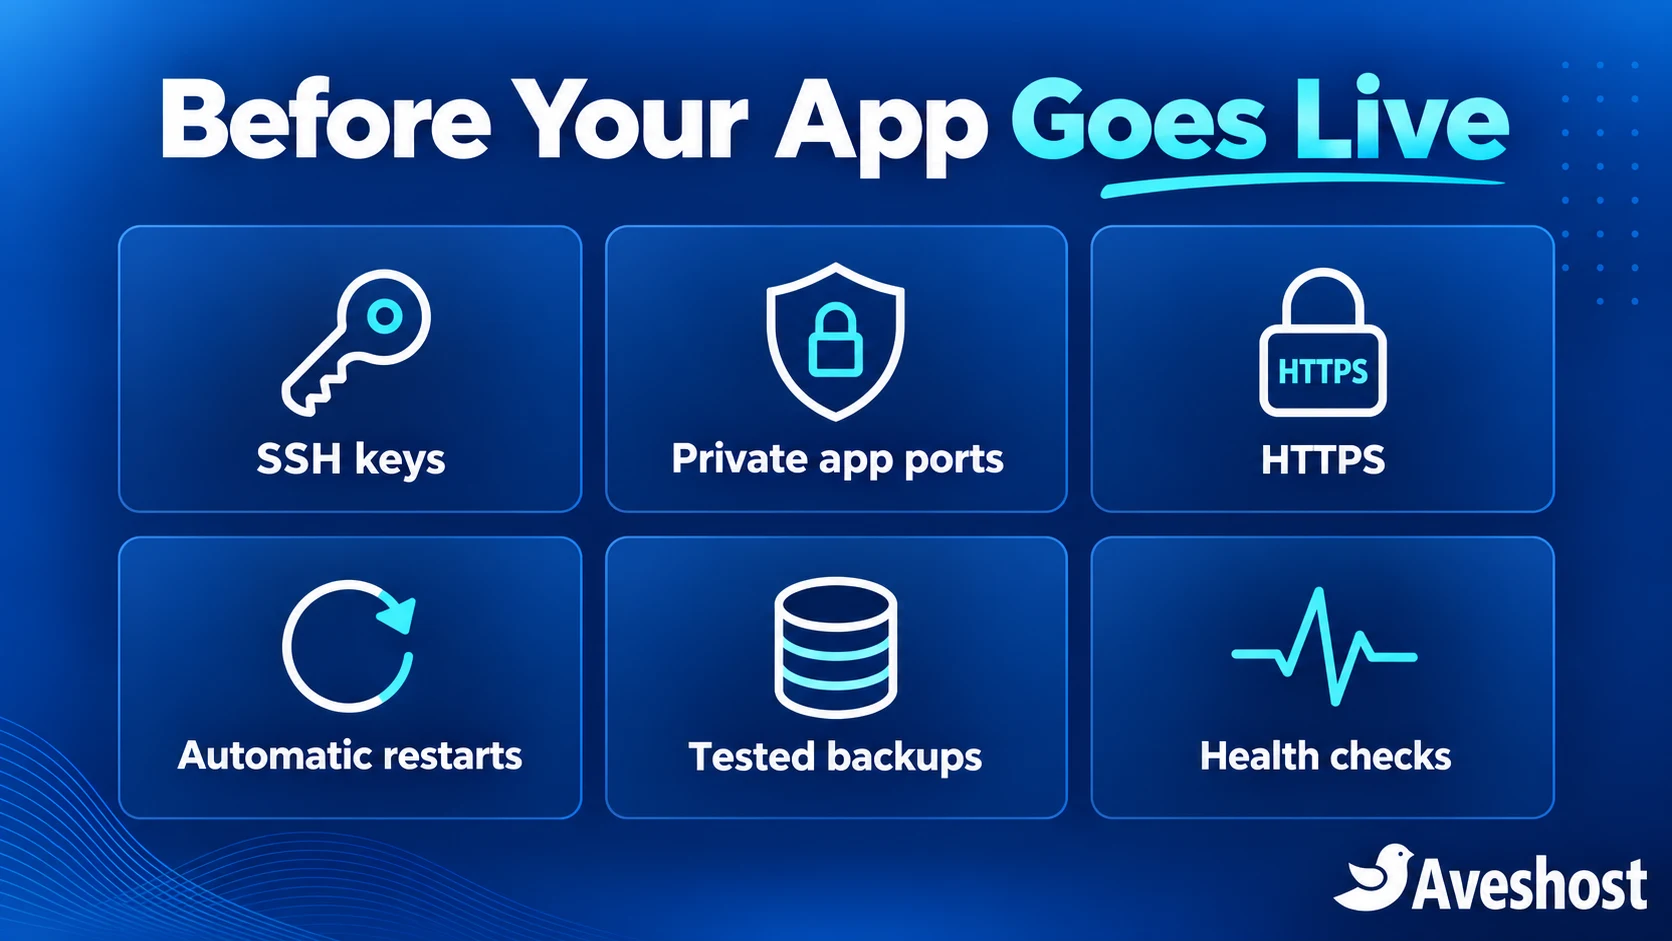
Deployment is complete when the application survives a restart, handles its expected requests and can be recovered from a failure. Build a simple maintenance routine before your first customer depends on it.
- Back up the database with its native backup tool, plus uploads, configuration and required secrets. Protect backup access and encryption keys.
- Keep a separate recovery copy and test restoring it to a clean environment. A copy of a live database directory is not automatically a consistent backup.
- Monitor uptime, response times, memory, disk usage and certificate renewal. Configure actionable alerts rather than relying on users to report outages.
- Keep logs useful without recording passwords, session tokens or full sensitive request bodies. Rotate logs and watch disk capacity.
- Apply operating-system and dependency security updates through tested releases. Schedule disruptive changes and verify the app afterwards.
Deploy updates with a rollback plan
Tag or record the current release, create a database backup before schema changes and deploy the next tested version. Build before switching traffic where practical. For Node.js or Python, restart the relevant service and inspect its journal. For Laravel, rebuild caches, migrate deliberately and restart queue workers so they load new code.
sudo systemctl restart nodeapp
sudo journalctl -u nodeapp -n 50 --no-pager
# For Python, replace nodeapp with pythonapp.
# For Laravel queue workers, run from the project directory:
php artisan queue:restart
Run only the commands for your branch. For a rollback, restore the previous release and its compatible configuration. A database migration can make older code incompatible, so plan backward-compatible schema changes or a controlled database restore. For more advanced releases, use separate release directories and a current symlink, keeping uploads and secrets outside disposable release folders.
Reboot during a planned window and confirm Nginx, the app service, PHP-FPM where applicable and any database or queue services return correctly. A service showing active is only one check; make a real request to the application’s health endpoint and a representative user flow.
Troubleshoot common VPS deployment errors
| Symptom | Likely area | First checks |
|---|---|---|
| 502 Bad Gateway | Application process, port or FPM socket | Check systemctl status, journalctl and the Nginx error log; compare upstream addresses. |
| 403 Forbidden | Document root or permissions | Check parent-directory traversal permissions and Laravel public root; avoid 777. |
| Laravel 500 error | Environment, database or writable storage | Inspect storage/logs, APP_KEY, database access and storage permissions; keep debug off publicly. |
| Wrong site appears | DNS or Nginx server_name | Check A/AAAA records and enabled site names. |
| SSL issuance fails | DNS, HTTP challenge or firewall | Verify the domain reaches this server on port 80; inspect IPv6 and proxy rules. |
| App stops after SSH logout | Process was started interactively | Install and enable the appropriate systemd service. |
| Server slows during builds | Memory, CPU or disk pressure | Check free -h, df -h and process load; build in CI or choose more headroom. |
Useful diagnostic commands include sudo nginx -t, sudo tail -n 50 /var/log/nginx/error.log, sudo systemctl status nodeapp and sudo journalctl -u pythonapp -n 50 –no-pager. Adapt the service name to your app. Fix the underlying error rather than repeatedly restarting services or exposing private ports.
Ready to put your app online? Choose your self-managed cloud VPS, select a location close to your audience and follow the branch for your framework. If you need help choosing resources or a control-panel option, contact our team with your stack, expected traffic and storage needs.
Frequently asked questions
Can I deploy Node.js, Python and Laravel on the same VPS?
Yes. Give each app its own directory, service and hostname. Use different local ports for Node.js and Python, and a PHP-FPM configuration for Laravel. Size the VPS for the combined workloads and use separate database credentials and configuration files.
Which VPS plan should I start with?
A lightweight app can start with a small plan, while an app with a database, builds and background jobs benefits from more headroom. Our Cloud VPS 2 includes 4 vCores, 8 GB RAM and 100 GB SSD storage. Monitor usage and choose resources around your workload.
Do I need cPanel to deploy a web app?
No. This guide uses SSH, Nginx and systemd on our self-managed VPS. A control panel is optional. Our fully managed VPS options include control-panel choices such as cPanel or DirectAdmin.
What keeps my Node.js or Python app running after logout?
A systemd service runs independently of your SSH session, starts on boot when enabled and can restart a failed process. Use the production launch command and check both service status and real HTTP responses.
Should I use Flask run or php artisan serve in production?
Use a production application server. This guide uses Gunicorn for WSGI Python apps and PHP-FPM behind Nginx for Laravel. Development servers are intended for development and testing.
How do I deploy FastAPI on a VPS?
Use an ASGI server such as Uvicorn with a supervised service, bind it to a private local port and put Nginx in front. The Gunicorn WSGI command in the Python example is for a WSGI application and must be adapted for ASGI.
Can I get a free SSL certificate for my VPS app?
Yes. Certbot can obtain a Let’s Encrypt certificate for a domain that correctly reaches your server. Configure Nginx, allow the required validation traffic and test automated renewal.
Why does Nginx show 502 Bad Gateway?
Nginx cannot get a valid response from its upstream. Check whether the app or PHP-FPM is running, whether its port or socket matches the site configuration, and what the service and Nginx logs report.
Where should I store application secrets?
Keep secrets out of Git and public web directories. The Node.js and Python examples use protected environment files under /etc. Laravel uses a restricted .env file outside its public document root. Preserve existing signing and encryption keys during migration.
What should I back up before updating my app?
Back up the database with a consistent native backup, uploaded files, required configuration and secrets. Record the current release and test restoration. Plan database compatibility before rolling code back.