
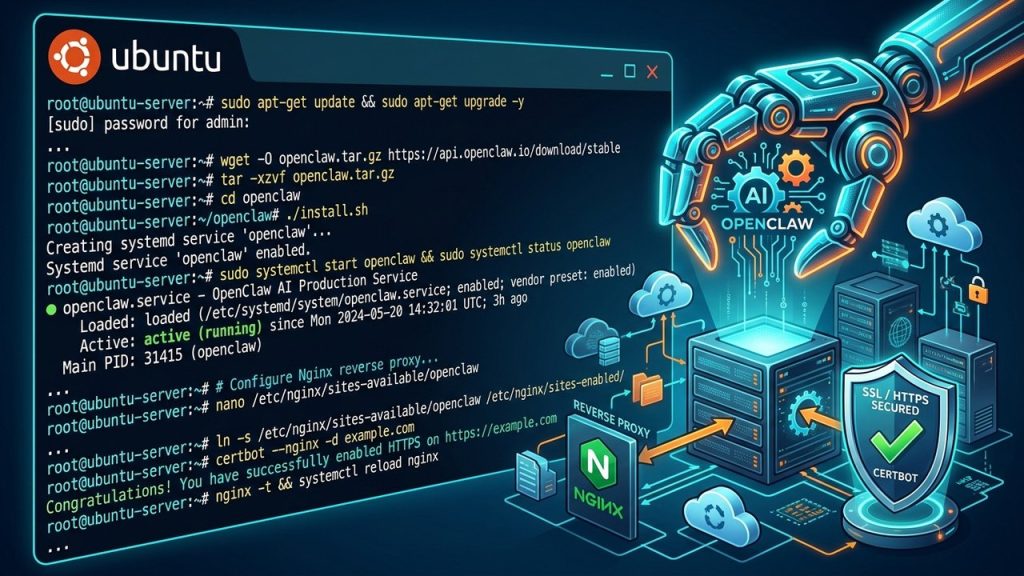
Learning how to install and set up OpenClaw on Ubuntu Server is the single most powerful step you can take toward running a 24/7 autonomous, self-hosted AI agent assistant. In an era where proprietary AI platforms lock your data behind recurring subscriptions and strict usage limits, self-hosting OpenClaw on your own Linux VPS gives you complete data privacy, custom workflow automation, and unrestricted model access.
Whether you want an intelligent assistant that monitors servers, executes scheduled tasks, or handles client conversations across Telegram, WhatsApp, Slack, and Discord, this comprehensive production guide will walk you step-by-step through installing OpenClaw, creating a hardened systemd daemon, setting up an Nginx reverse proxy with Let’s Encrypt SSL/TLS, configuring AI providers (including Google Gemini, OpenAI, and local Ollama models), and locking down your server with UFW firewall rules on Aveshost high-speed hosting.
📌 What You Will Master in This Production Guide:
- Hardware prerequisites, VPS sizing, and non-root user setup on Ubuntu 24.04 / 22.04 LTS.
- Installing Node.js 22 LTS, Git, core system build dependencies, and the OpenClaw CLI.
- Configuring cloud AI models (Google Gemini, OpenAI, Claude) and private local inference with Ollama.
- Configuring a resilient systemd service for 24/7 daemon uptime and automatic restarts.
- Setting up an Nginx reverse proxy with WebSocket (WSS) streaming and free Let’s Encrypt SSL certificates.
- Securing your server perimeter with UFW firewall policies and rate limiting.
- Connecting multi-channel messaging integrations and troubleshooting production logs.
Table of Contents
Server Requirements & Prerequisites
Before installing OpenClaw, ensure your Ubuntu server meets the recommended hardware specifications and network requirements:
- Operating System: Clean installation of Ubuntu 24.04 LTS (Noble Numbat) or Ubuntu 22.04 LTS (Jammy Jellyfish).
- Compute & RAM:
- Standard Cloud API Mode (Gemini/OpenAI/Claude): 1–2 vCPUs, 2 GB–4 GB RAM, 25 GB NVMe SSD storage.
- Local LLM Mode (Ollama / On-device inference): 4+ vCPUs, 16 GB–32 GB RAM (or dedicated GPU instance), 60 GB+ NVMe SSD.
- Registered Domain Name & DNS: A fully qualified domain or subdomain (e.g.,
openclaw.domain.com) with an A Record pointing to your Ubuntu server’s public IP address. (Check our tutorials on how to get a domain name and setting up DNS records in Cloudflare). - User Privileges: SSH access with a standard user with
sudoprivileges (avoid running application daemons as root). Review our guide to top essential Linux commands for terminal navigation.
Step 1: Update Ubuntu & Install Node.js 22 LTS
Log in to your Ubuntu server via SSH and ensure all repository package lists and existing binaries are fully up to date:
# Update and upgrade package index
sudo apt update && sudo apt upgrade -y

# Install essential system utilities and build tools
sudo apt install -y curl wget git build-essential ufw software-properties-common ca-certificates apt-transport-https
OpenClaw requires a modern Node.js runtime (Node.js v22.x or v24.x LTS recommended). We will install Node.js 22 LTS directly via the official NodeSource repository:
# Add NodeSource repository for Node.js 22 LTS
curl -fsSL https://deb.nodesource.com/setup_22.x | sudo -E bash -

# Install Node.js and NPM
sudo apt install -y nodejs

# Verify installed versions
node -v
npm -v
Next, enable Corepack to activate pnpm and yarn package managers, which provides high-speed caching for AI package dependencies:
sudo corepack enable
sudo corepack prepare pnpm@latest --activate
Step 2: Install and Initialize OpenClaw
For a clean production deployment, create a dedicated system service account named openclaw. Running background AI services under a non-root service user isolates server permissions and prevents security vulnerabilities:
# Create a system user and home directory for OpenClaw
sudo useradd -r -s /bin/bash -m -d /opt/openclaw openclaw

# Switch to the openclaw user directory
cd /opt/openclaw
You can now install OpenClaw globally using either the automated quick-installation script or the global NPM package manager:
Method A: Automated Quick Install (Recommended)
# Run the official installer script
curl -fsSL https://openclaw.ai/install.sh | bash
Method B: Global NPM Package Installation
# Install OpenClaw CLI globally
sudo npm install -g openclaw@latest --allow-scripts=openclaw

# Verify OpenClaw binary is available
openclaw --version
Initialize OpenClaw and configure your initial workspace environment:
# Initialize configuration directory
openclaw init --workspace /opt/openclaw/workspace
Step 3: Configure AI Model Providers (Gemini, OpenAI, Ollama)
OpenClaw supports multi-model inference routing. You can connect enterprise cloud APIs or run local open-source models completely offline.
Create a centralized environment file /opt/openclaw/.env containing your API keys and configuration flags:
sudo nano /opt/openclaw/.envAdd your configuration settings to the file:
# OpenClaw Server Gateway Configuration
OPENCLAW_HOST=127.0.0.1
OPENCLAW_PORT=18789
OPENCLAW_AUTH_TOKEN=generate_a_long_secure_token_here_32_chars

# Cloud AI Model Providers
GEMINI_API_KEY=your_google_gemini_api_key
OPENAI_API_KEY=your_openai_api_key
ANTHROPIC_API_KEY=your_anthropic_api_key

# Default Primary Model Selection
DEFAULT_MODEL=gemini-2.5-flash

# Optional: Local Ollama Endpoint (if running private models)
OLLAMA_BASE_URL=http://127.0.0.1:11434
Secure the environment file with strict permission bits so only the openclaw user can read your secrets:
sudo chown openclaw:openclaw /opt/openclaw/.env
sudo chmod 600 /opt/openclaw/.env
Optional: Setting Up Local Private Models with Ollama
If you prefer 100% private local inference without recurring API costs, install Ollama on your Ubuntu server:
# Install Ollama on Linux
curl -fsSL https://ollama.com/install.sh | sh

# Pull high-performance lightweight reasoning models
ollama pull llama3.2:3b
ollama pull mistral
Step 4: Create a 24/7 Production Daemon with Systemd
In a production environment, you should never run background tasks using standard SSH terminal sessions or basic tmux windows. Using a native systemd unit file ensures OpenClaw automatically starts on system boot, captures error logs in journald, and recovers instantly from crashes.
Create the systemd service file at /etc/systemd/system/openclaw.service:
sudo nano /etc/systemd/system/openclaw.servicePaste the following production unit configuration:
[Unit]
Description=OpenClaw Autonomous AI Production Gateway
After=network.target network-online.target
Wants=network-online.target

[Service]
Type=simple
User=openclaw
Group=openclaw
WorkingDirectory=/opt/openclaw
EnvironmentFile=/opt/openclaw/.env
ExecStart=/usr/bin/openclaw gateway --port 18789 --host 127.0.0.1
Restart=always
RestartSec=5s
KillMode=mixed
TimeoutStopSec=30
LimitNOFILE=65536

# Sandboxing and Security Restrictions
PrivateTmp=true
ProtectSystem=full
ProtectHome=read-only
ReadOnlyDirectories=/etc

[Install]
WantedBy=multi-user.target
Reload systemd, enable the service to start at boot, and start OpenClaw:
# Reload systemd configuration
sudo systemctl daemon-reload

# Enable OpenClaw to start on server boot
sudo systemctl enable openclaw

# Start the OpenClaw service
sudo systemctl start openclaw

# Verify service status
sudo systemctl status openclaw
You can inspect real-time logs and debugging information anytime using journalctl:
# Stream real-time OpenClaw gateway logs
sudo journalctl -u openclaw -f -n 50
Step 5: Set Up Nginx Reverse Proxy with HTTPS & WebSockets
OpenClaw’s internal gateway listens on 127.0.0.1:18789. To access the web UI securely from external networks and handle bi-directional streaming via WebSockets, configure Nginx as an SSL reverse proxy.
Install Nginx and Certbot on Ubuntu:
sudo apt install -y nginx certbot python3-certbot-nginxCreate a dedicated Nginx virtual host configuration file for your domain:
sudo nano /etc/nginx/sites-available/openclaw.confAdd the following reverse proxy configuration (replace openclaw.domain.com with your actual domain name):
map $http_upgrade $connection_upgrade {
    default upgrade;
    ''      close;
}

server {
    listen 80;
    listen [::]:80;
    server_name openclaw.domain.com;

    # Redirect plain HTTP to HTTPS
    location / {
        return 301 https://$host$request_uri;
    }
}

server {
    listen 443 ssl http2;
    listen [::]:443 ssl http2;
    server_name openclaw.domain.com;

    # SSL configuration managed by Certbot will be inserted here
    ssl_protocols TLSv1.2 TLSv1.3;
    ssl_prefer_server_ciphers on;

    # Security Headers
    add_header X-Frame-Options "SAMEORIGIN" always;
    add_header X-XSS-Protection "1; mode=block" always;
    add_header X-Content-Type-Options "nosniff" always;
    add_header Referrer-Policy "strict-origin-when-cross-origin" always;

    # Max upload size for file analysis
    client_max_body_size 64M;

    location / {
        proxy_pass http://127.0.0.1:18789;
        proxy_http_version 1.1;

        # WebSocket Streaming Support
        proxy_set_header Upgrade $http_upgrade;
        proxy_set_header Connection $connection_upgrade;

        # Forwarded Client Headers
        proxy_set_header Host $host;
        proxy_set_header X-Real-IP $remote_addr;
        proxy_set_header X-Forwarded-For $proxy_add_x_forwarded_for;
        proxy_set_header X-Forwarded-Proto $scheme;

        # Timeouts for Long-Running AI Agent Chains
        proxy_read_timeout 3600s;
        proxy_send_timeout 3600s;
        proxy_connect_timeout 60s;
        proxy_buffering off;
    }
}
Enable the site configuration and test Nginx for syntax errors:
# Link configuration to sites-enabled
sudo ln -s /etc/nginx/sites-available/openclaw.conf /etc/nginx/sites-enabled/

# Test Nginx syntax
sudo nginx -t

# Reload Nginx
sudo systemctl reload nginx
Provisioning Free SSL/TLS Certificate via Let’s Encrypt
Obtain and install an automated SSL certificate using Certbot:
# Request and auto-configure Let's Encrypt SSL certificate
sudo certbot --nginx -d openclaw.domain.com --non-interactive --agree-tos -m [email protected]

# Verify automatic SSL renewal timer
sudo systemctl status certbot.timer
Step 6: Configure UFW Firewall & Security Hardening
Protecting your Ubuntu server from unauthorized port scanning and brute-force attacks is essential for self-hosted AI applications. Use Ubuntu’s built-in UFW (Uncomplicated Firewall) to restrict incoming connections:
# Set default firewall rules
sudo ufw default deny incoming
sudo ufw default allow outgoing

# Allow SSH (ensure your SSH port is permitted before enabling)
sudo ufw allow 22/tcp comment "SSH Management"

# Allow HTTP and HTTPS web traffic for Nginx
sudo ufw allow 80/tcp comment "Nginx HTTP"
sudo ufw allow 443/tcp comment "Nginx HTTPS"

# Enable UFW Firewall
sudo ufw enable

# Verify active firewall status
sudo ufw status verbose
Notice that internal port 18789 is not exposed publicly. All traffic must pass through the encrypted Nginx reverse proxy with SSL validation.
Step 7: Connect Messaging Channels (Telegram, WhatsApp, Slack)
One of OpenClaw’s most powerful capabilities is interacting with you directly through everyday messaging apps. Here is how to configure a Telegram Bot Gateway:
- Open Telegram and start a chat with @BotFather.
- Send the command
/newbot, choose a friendly name and username, and copy the generated HTTP API Token (e.g.,123456789:ABCdefGhIJKlmNoPQRsTUVwxyZ). - Open your OpenClaw environment file
/opt/openclaw/.envand append your Telegram credentials:
TELEGRAM_BOT_TOKEN=123456789:ABCdefGhIJKlmNoPQRsTUVwxyZ
TELEGRAM_ALLOWED_USERS=your_telegram_user_id
Restart the OpenClaw daemon to apply the messaging channel:
sudo systemctl restart openclawSend a message like “Hello OpenClaw, summarize my server uptime” directly to your Telegram bot. Your self-hosted agent will process the request, run the necessary commands in its isolated environment, and reply within seconds!
Step 8: Monitoring, Maintenance & Upgrades
To keep your production installation fast and dependable, perform regular maintenance:
1. Updating OpenClaw to the Latest Release
# Update OpenClaw global package
sudo npm update -g openclaw

# Restart the daemon service
sudo systemctl restart openclaw
2. Monitoring Server Memory and CPU
Monitor your active memory utilization and model token pipelines using htop or systemd metrics:
# Check OpenClaw systemd process resource usage
systemctl status openclaw

# View real-time server process tree
htop
Troubleshooting Common OpenClaw Production Issues
⚠️ Troubleshooting Matrix & Diagnostic Fixes:
1. Service Fails to Start (Status 203/EXEC or Permission Denied):
Verify directory permissions. Ensure /opt/openclaw is owned by openclaw:openclaw using sudo chown -R openclaw:openclaw /opt/openclaw and that the Node.js path matches which openclaw.
2. 502 Bad Gateway Error in Nginx:
This indicates Nginx cannot reach the upstream OpenClaw service on port 18789. Check if the service is running with sudo systemctl status openclaw and ensure 127.0.0.1:18789 is listening with sudo ss -tulpn | grep 18789.
3. WebSocket Disconnections during AI Generation:
Long model reasoning chains can exceed default HTTP proxy timeouts. Ensure proxy_read_timeout 3600s; and proxy_buffering off; are set in your Nginx configuration.
4. Out of Memory (OOM) Crashes with Local Models:
If running Ollama on a VPS with limited RAM, allocate an 8GB swap file using sudo fallocate -l 8G /swapfile && sudo mkswap /swapfile && sudo swapon /swapfile.
Frequently Asked Questions (FAQs)
What is OpenClaw and how does it differ from traditional chatbots?
OpenClaw is an open-source, autonomous AI agent framework designed for self-hosting on your own Linux infrastructure. Unlike cloud-locked chatbots, OpenClaw operates 24/7 as an autonomous background daemon, connects directly to messaging channels (like Telegram, WhatsApp, and Discord), executes code and API workflows locally, and supports both cloud LLMs (Gemini, OpenAI, Claude) and self-hosted private models (Ollama).
What are the minimum hardware requirements to run OpenClaw on Ubuntu?
For standard cloud-based LLM routing (using Gemini, OpenAI, or Claude APIs), a lightweight VPS with 1-2 vCPUs, 2GB-4GB RAM, and 20GB NVMe SSD is sufficient. If you plan to run local open-weight models via Ollama (such as Llama 3.2 3B or Mistral 7B), we recommend at least 4-8 vCPUs and 16GB-32GB RAM or a dedicated GPU VPS.
Why should I use Nginx and SSL instead of accessing OpenClaw directly via port 18789?
Exposing raw application ports directly to the public internet introduces security risks and lacks cryptographic encryption. An Nginx reverse proxy terminates SSL/TLS certificates (via Let’s Encrypt), secures incoming WebSocket connections (WSS), enables IP filtering and rate limiting, and allows you to bind the OpenClaw service securely to localhost (127.0.0.1).
How does OpenClaw handle background process crashes and server reboots?
By configuring a native Linux systemd service with ‘Restart=always’ and ‘RestartSec=5s’, Ubuntu automatically starts OpenClaw during system boot and restarts the gateway within seconds if an unhandled error or memory spike occurs.
Can I use local LLMs with OpenClaw to avoid cloud API costs?
Yes. OpenClaw provides built-in integration for Ollama and OpenAI-compatible local endpoints (like vLLM and LocalAI). You can install Ollama on your Ubuntu server, pull models like llama3.2 or deepseek-r1, and route all OpenClaw requests locally with 100% data privacy and zero API expenses.
How do I update OpenClaw to the latest version in production?
To update OpenClaw, run ‘sudo npm update -g openclaw’ (or pull the latest Git repository commit), followed by ‘sudo systemctl restart openclaw’. You can verify the running version and logs with ‘openclaw –version’ and ‘journalctl -u openclaw -n 30’.
Conclusion & Next Steps
Deploying OpenClaw on an Ubuntu Server gives you complete ownership over your artificial intelligence assistant. By pairing the robust systemd daemon supervisor with an Nginx reverse proxy, Let’s Encrypt SSL encryption, and UFW firewall hardening, you have built a production-grade infrastructure that operates reliably 24/7 with zero downtime.
From automated server health checks to multi-channel communication across Telegram and Slack, your self-hosted OpenClaw instance is ready to automate complex workflows and boost your daily productivity.
Suggested Reading & Advanced Developer Tutorials:
- How to Deploy Your Website from VS Code Using AI
- How to Deploy a Google AI Studio Web App to Aveshost (Easy Guide)
- How to Use Gemini for SEO (Prompts, Tips & Strategies)
- How to Set Up DNS Records for Your Domain in Cloudflare
- How to Get a Free Domain Name – Here’s How (No Tricks)
- Top 90+ Essential Linux Commands Plus Cheat Sheet