
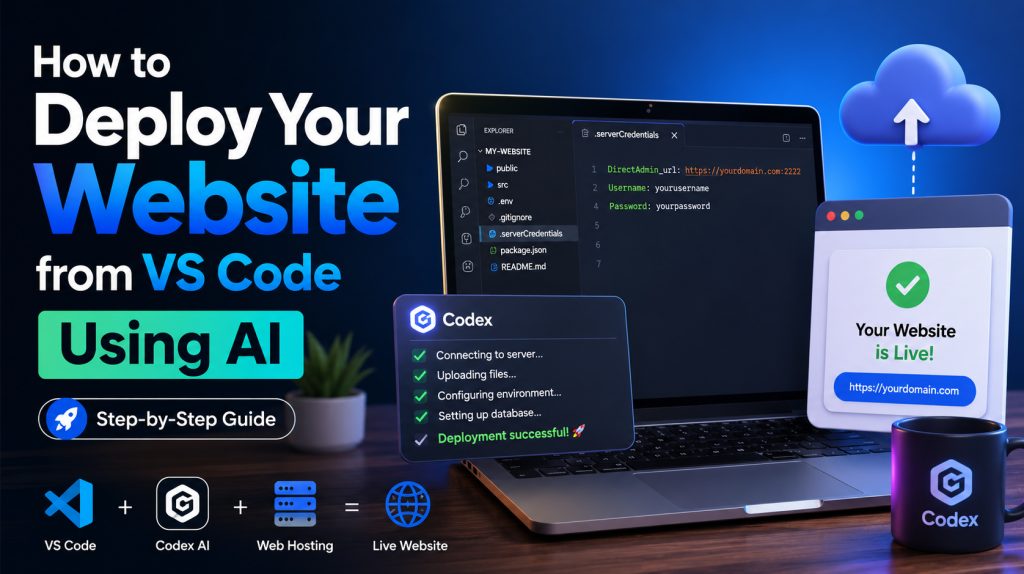
Building websites has become easier than ever, but deployment is still one of the biggest challenges many beginners and even experienced developers face. Moving files from your computer to a live hosting server, setting up databases, configuring environments, and updating production websites can sometimes feel complicated and stressful.
Traditionally, deploying a website meant wrestling with FTP clients, configuring SSH keys, manually creating databases, and double-checking file paths. If you’re deploying a Node.js or Python app, you might find yourself stuck in a terminal loop trying to figure out why your environment variables aren’t loading.
What if you could just ask your code editor to deploy your website for you?
Table of Contents
Thanks to the power of Artificial Intelligence, you can. In this comprehensive guide, we’re going to walk through how to deploy your website directly from VS Code using an AI assistant like Codex Desktop. Whether you’re launching a simple HTML portfolio, a dynamic WordPress/PHP site, or a modern Node.js application, this step-by-step framework will turn a frustrating chore into a two-minute conversation.
Let’s dive in!
Step 1: Secure Your Server Credentials inside VS Code
Before we let AI do the heavy lifting, we need to give it the keys to the kingdom—securely. We want the AI to know how to access our server, but we never want to accidentally leak our passwords to a public GitHub repository.
Here is exactly how to set up a secure credentials file in your project:
- Open your project folder in Visual Studio Code.
- In the root directory of your project, create a new file and name it something like:
.serverCredentials - Crucial Security Step: Open your
.gitignorefile (create one if you don’t have it) and add.serverCredentialson a new line. This ensures your sensitive login details are completely ignored by Git and never pushed to GitHub or GitLab.
# .gitignore snippet
.serverCredentials
.env
node_modules/
Formatting Your Credentials
Depending on what type of hosting control panel you are using, paste one of the following templates into your newly created .serverCredentials file.
Option A: For DirectAdmin Control Panels (Recommended)
If your hosting provider like Aveshost utilizes modern, high-performance DirectAdmin panels, format your file like this:
DirectAdmin_url: https://yourhostname.com:2222 or https://yourdomainname.com:2222
Username: your_username_here
Password: your_password_here
Option B: For cPanel Control Panels
If your host is still utilizing traditional cPanel infrastructure, format your file this way:
cPanel_url: https://yourhostname.com/cpanel or https://yourdomainname.com/cpanel
Username: your_username_here
Password: your_password_here
💡 Where do you find these details? > If you are hosting with a premium digital service provider like Aveshost, these credentials were automatically sent to your email immediately after purchasing your hosting plan. Check your spam or inbox for your welcome email.
Can’t find them? No worries. Simply log into your Aveshost client area, navigate to the support section, and open a quick ticket requesting your control panel login details. The support team will sort you out in no time.
Step 2: Set Up Your AI Deployment Assistant (Codex Desktop)
Now that your credentials are ready and safely ignored by Git, it’s time to bring in the AI power. For this guide, we are using the Codex Desktop app, a powerful AI tool built to interact seamlessly with your local development environment.
- Download and install the Codex Desktop application on your computer.
- Launch Codex Desktop.
- Follow the on-screen prompts to sign in to your Codex account, or create a new account if you don’t already have one.
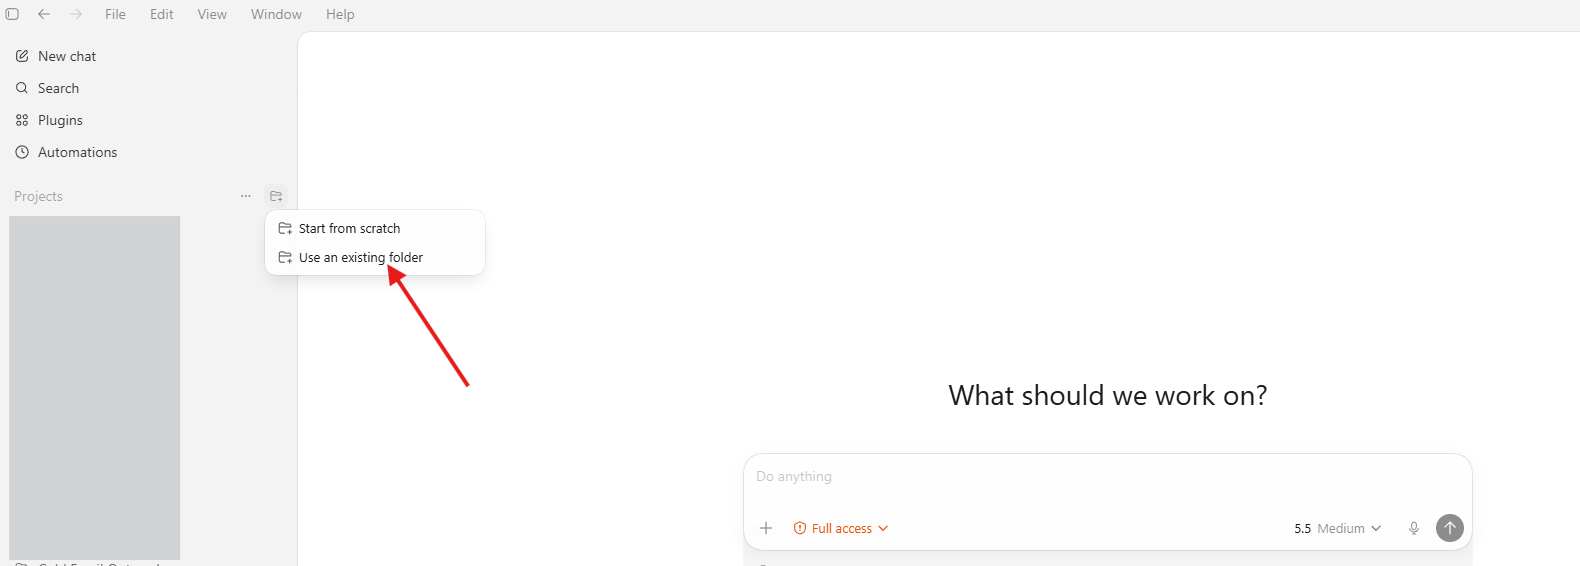
- Navigate to the Projects tab.
- Select “Use an existing folder” and choose the exact project folder you currently have open in VS Code.
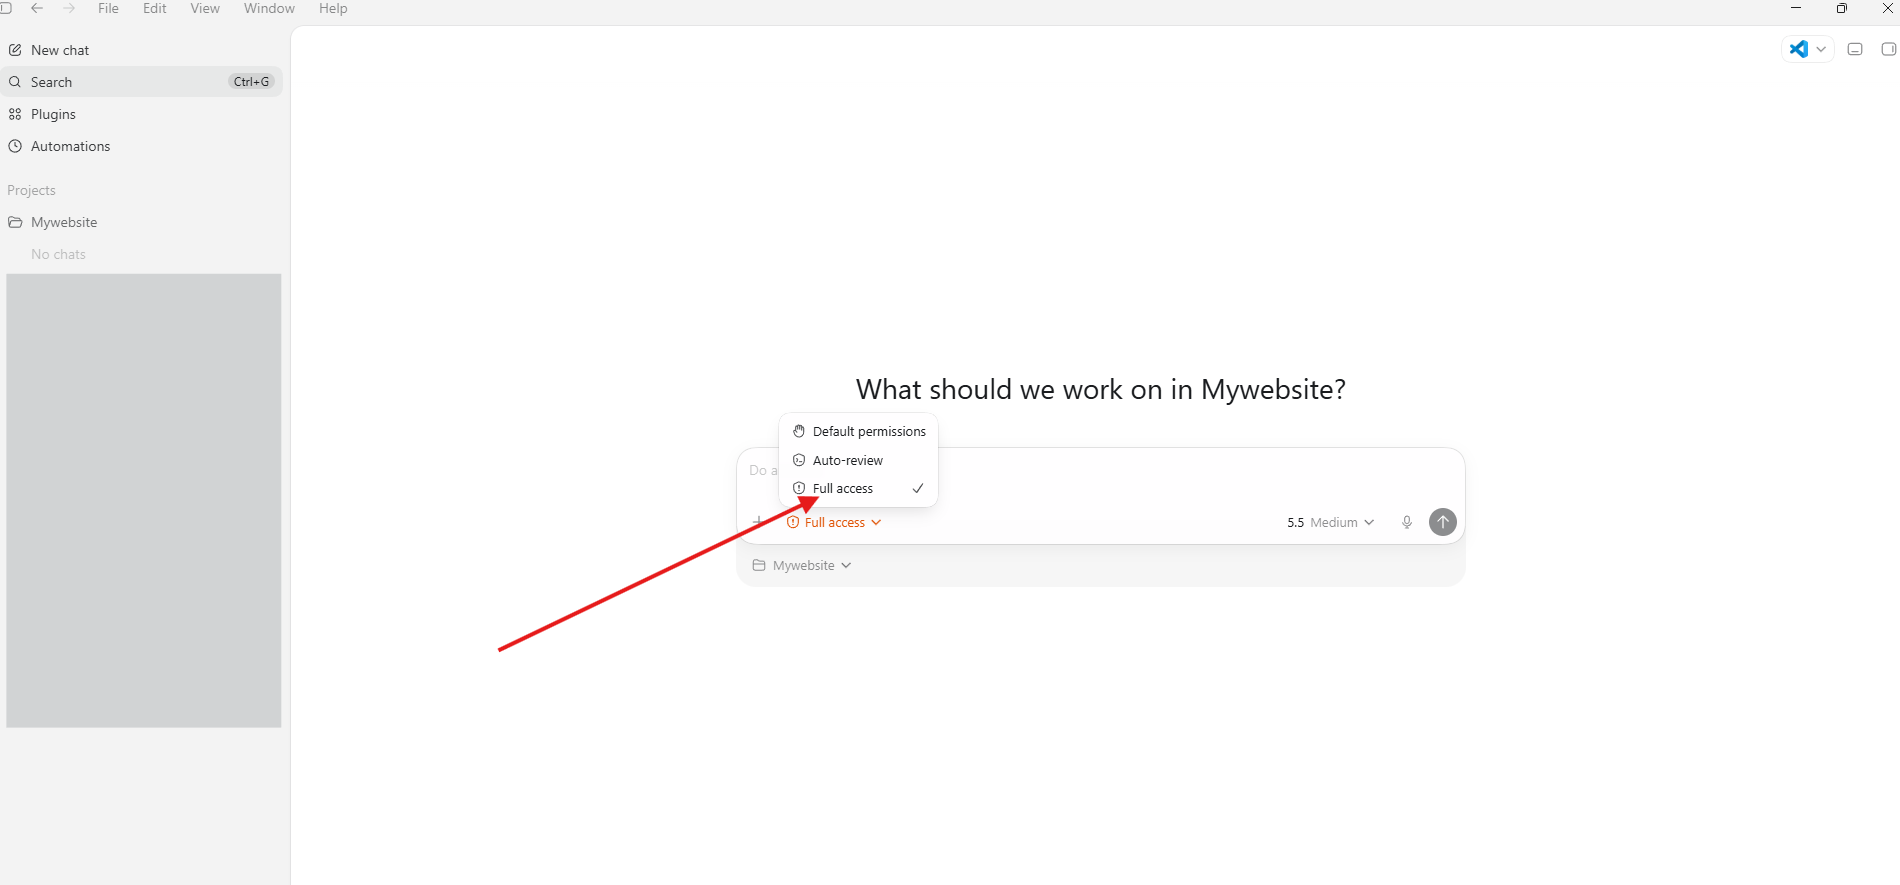
- Grant Codex Full Access Permissions
- Go back to VS Code, right-click your
.serverCredentialsfile, and select Copy Path. It should look something like this depending on your operating system:C:\Users\P C\Documents\Project\.serverCredentials
Keep that absolute file path handy. We are going to feed it directly to the AI.
Step 3: The AI Prompt Blueprints (Choose Your Stack)
This is where the magic happens. Because Codex understands natural language and has access to your local directory, you don’t need to configure complex CI/CD pipelines. You just need to give it the right instructions.
Find your website type below and copy-paste the exact prompt blueprint into Codex.
1. Deploying a Static Website (No Database)
If your site is built using pure HTML/CSS/JavaScript, or is a static build from a framework (like an Angular or React build output), use this prompt:
AI Prompt: “Use the server login details located here:
C:\Users\P C\Documents\Project\.serverCredentialsand deploy the website on the server for me.”
Codex will read the credentials, log into your file manager via the control panel API, zip up your static files, upload them, and extract them directly into your public_html directory.
Note: If your hosting plan supports multiple domains, make sure you specify the exact domain where the website should be deployed.
2. Deploying a Dynamic Website (With a Database)
If you are deploying a CMS, a PHP application, or any site that requires a MySQL/MariaDB database, the AI needs to do double duty. It has to upload the files and provision the database infrastructure.
If you have an exported .sql database file on your local PC, make sure to grab its file path too.
AI Prompt: “Use the server login details located here:
C:\Users\P C\Documents\Project\.serverCredentialsand deploy the website on the server for me. Because this site contains a database, please automatically create the database from the control panel and link it to the site configuration. Check and run migrations for the database if required. [If applicable: Use my local database file located here: C:\Users\P C\Documents\Project\database.sql]”
Codex will log into DirectAdmin or cPanel, spin up a brand new database, generate a secure user password, map it to your web application’s configuration file (like wp-config.php or a .env file), and import your schema.
3. Deploying App Engines (Node.js and Python Apps)
Application servers require a runtime environment to be explicitly initialized on the server backend before they can receive traffic. You have two excellent ways to handle this with AI:
- The Hybrid Approach: Log into your hosting control panel manually, navigate to “Setup Node.js App” or “Setup Python App”, and click create. Once the shell environment exists, jump back to Codex and prompt:“I have initialized the Node/Python environment in my control panel. Please use the server login details here
C:\Users\P C\Documents\Project\.serverCredentialsto deploy my application code into that environment, install dependencies, and start the application engine.” - The Fully Autonomous Approach: If you prefer to stay entirely hands-off, you can command the AI to use browser automation:“Use the server login details here
C:\Users\P C\Documents\Project\.serverCredentialsand launch a headless Chrome instance to log into my control panel. Create a new Node.js/Python application environment first, and then deploy my local project files directly into it.”
Step 4: Updating an Existing Production Website Safely
What happens when you make changes to your code a week later and need to push an update? You don’t want the AI to overwrite your live data or break your production database connection strings!
When pushing updates to an already deployed app, use a preservation prompt. This tells the AI to sync your new code features while safeguarding your live environment configurations.
Whenever you want to push an update, use this specific prompt blueprint:
AI Update Prompt: “Please push my latest local changes to production using the server credentials at
C:\Users\P C\Documents\Project\.serverCredentials. Crucial: You must completely preserve the existing.envfile (or database configuration files) currently residing on the live production server so that production database details are not overwritten or broken. Only sync and update the changed application code files.”
By explicitly instructing the AI to protect production configurations, your live database remains perfectly intact while your new UI features and code patches go live seamlessly.
Conclusion: The Future of Deployment is Conversational
Congratulations! You’ve just bypassed the most tedious parts of web development using artificial intelligence. By combining a secure .serverCredentials strategy inside VS Code with an intelligent desktop agent like Codex, you’ve turned server administration into a simple text message.
This workflow drastically cuts down on deployment friction, giving you more time to focus on what you do best: building incredible things. Have you tried deploying your projects using AI yet? If you run into any hitches with your hosting setup or database migrations, drop a comment below or reach out to Aveshost support line to ensure your control panel API access is fully enabled!
Suggested Reading:
- How to Use Gemini for SEO in 2026 (Prompts, Tips & Strategies)
- How to Make Your WordPress Website Load Under 2 Seconds
- How to Get a Free Domain Name – Here’s How (No Tricks)
- How to set up DNS records for your domain in a Cloudflare
- Why Your Business Needs a Blog: Top Reasons Explained
FAQs About How to Deploy Your Website from VS Code Using AI
Can I deploy my website directly from VS Code using AI?
Yes. By combining Visual Studio Code with AI tools like Codex, you can automate website deployment tasks such as uploading files, configuring databases, and updating production websites.
How does the AI assistant access my server credentials?
You provide the absolute file path of your `.serverCredentials` file directly to the AI in your prompt, allowing it to read the login details securely without exposing them to version control.
Can I use this method for Node.js and Python applications?
Yes, but for Node.js and Python apps, you usually need to manually create the application environment first inside your hosting control panel before instructing AI to complete the deployment.
Is it safe to let AI deploy my production website?
It can be safe if you follow proper security practices such as:
1. Protecting your credentials
2. Backing up your files and databases
3. Preserving your .env file
4. Carefully reviewing deployment prompts before execution
Always test deployments after publishing changes to production.
How do I find my hosting control panel credentials if I lost them?
Check your email inbox (including spam) for the welcome email from your hosting provider. If you can’t find them, log into your provider’s client area and open a support ticket to request your login details.
What should I tell AI when updating an existing website?
When updating a production website, always instruct AI to:
1. Preserve the existing .env file
2. Keep database credentials unchanged
3. Avoid overwriting production configurations
4.Only upload new or modified files
This helps prevent downtime and accidental data loss.
Can AI deploy websites with databases?
Yes. AI can help deploy dynamic websites that require databases, including creating databases from the hosting control panel, importing SQL files, configuring environment variables, and running database migrations if needed.
Why should I add .serverCredentials to .gitignore?
You should add .serverCredentials to .gitignore to prevent sensitive server login details from being pushed to GitHub or other Git repositories. This helps protect your hosting account from unauthorized access.