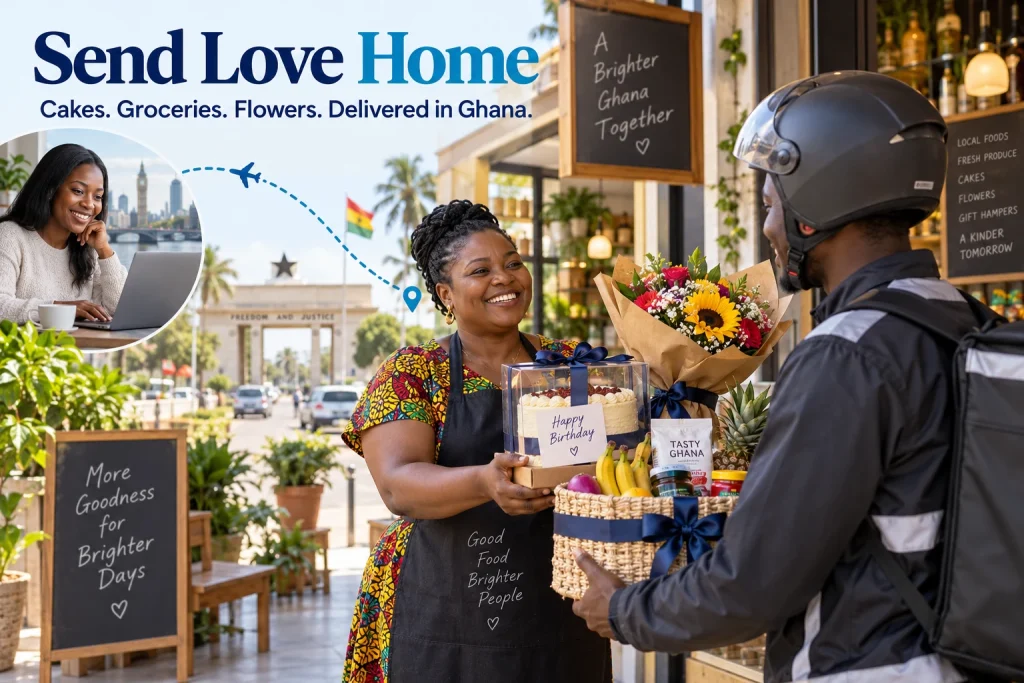

A mini-importation website in Ghana can turn interest from social media into a clearer buying journey. Give customers one mobile-friendly page where they can see the product, understand the Ghana cedi price, check delivery terms and place an order.
In this guide, we build that journey with WordPress and WooCommerce: domain and hosting, product setup, landing-page layout, MoMo payments, pay on delivery and launch testing. The goal is a sales page your business can actually operate, whether you sell available stock or clearly labelled pre-orders.
Table of Contents
Why a mini-importation business needs a focused landing page
A landing page gives one offer a clear destination. Someone who sees your Instagram reel, TikTok video or WhatsApp catalogue can check the product, price and delivery terms before ordering. Your page can work alongside social media while your own domain gives the business a consistent address.
For a small importer in Ghana, this is especially useful when selling a limited batch of bags, home accessories or other everyday products. Instead of answering the same questions in every chat, put the important details on the page and reserve conversations for questions that actually need your attention.
A basic form is useful for gathering enquiries, but a sales page can explain the offer and connect it to a structured checkout. Its advantage comes from the experience you build, not simply replacing one tool with another. Keep the page light, clear and easy to use on a phone.
| Use a landing page when… | Use a fuller shop when… |
|---|---|
| You are promoting one main product or a small collection | Customers need to browse many categories and compare products |
| Your campaign has one clear order action | Buyers regularly add several unrelated items to a basket |
| You want to test a new product offer | You need a larger catalogue and ongoing merchandising |
You can combine both: build a promotional landing page that leads to a WooCommerce product and checkout. The page presents the offer; WooCommerce maintains products, orders and stock.
Ready to build a complete online shop alongside your landing page? Follow our step-by-step guide to starting an online store in Ghana for a walkthrough of setting up your shop and getting ready to sell.
Step 1: choose the product and decide how orders will work
Start with a product you can describe accurately and fulfil reliably. If you source from 1688, Alibaba or suppliers in Turkey, inspect samples or your received stock before describing quality, dimensions or materials. Use your own product photographs where possible, and obtain permission for any supplier images you publish.
Decide whether the offer is in stock, a pre-order or an enquiry. Those are different commitments. An item still awaiting international shipment should not be advertised as ready for immediate delivery in Accra. Explain the expected availability, payment arrangement and what happens if the shipment is delayed.
- In-stock sale: show available variants and the delivery window you can support.
- Pre-order: identify it prominently, explain whether the payment is a deposit or the full price, and publish the expected dispatch window.
- Enquiry: use a request button when you must confirm a quotation or availability before taking payment.
Write a simple offer statement before opening the page editor: “Compact everyday backpack for work and campus, with delivery available in selected Ghanaian locations.” Then add the details that make it specific: size, compartments, colours, material and what is included. Avoid “best quality” as a substitute for useful product information.
Keep a fulfilment sheet with the product reference, quantity, supplier cost, inbound freight, handling and other applicable costs. Your sales page cannot rescue an offer whose price does not cover delivery failures, payment fees and returns.
Step 2: choose a domain and hosting for your Ghanaian shop
Pick a business name customers can remember and a domain you can use across products. A .com address is familiar and flexible; a .store address can make the retail purpose clear. Choose according to your brand and renewal budget, rather than expecting an extension to create sales by itself. Search our domain options and check the registration and renewal terms before buying.
A single landing page can start on a small hosting plan. If you add WooCommerce, lots of product photographs or more extensions, allow space for the database, media and backups. Choose for the whole working website rather than the visual size of one page.
| Our hosting plan | Advertised monthly price | Relevant allowance | Starting use |
|---|---|---|---|
| Deluxe | GH₵9.00 | 1 website; 1 GB NVMe; 1 GB RAM | A compact sales or enquiry page |
| Professional | GH₵16.00 | 1 website; 10 GB NVMe; 2 GB RAM | More room for a growing single-site business |
| Enterprise | GH₵32.00 | 3 websites; 50 GB NVMe; 3 GB RAM | Larger product media or multiple projects |
These prices were reviewed on our web hosting packages at the time of writing. The plan cards list Auto SSL, LiteSpeed, weekly backups and support. Review the chosen billing period, included domain offer and checkout total; a displayed monthly rate does not necessarily mean the checkout collects only one month. Domain and optional service costs depend on your selection.
For a product catalogue and checkout, also compare our WooCommerce hosting. If you prefer help with ongoing WordPress upkeep, explore our managed WordPress hosting. You can start small and review the resources as the site grows.
Step 3: install WordPress and prepare the store foundation
After your hosting is activated, point the domain to the DNS details supplied for your service. Install WordPress through the tools available in your control panel, choose a maintained lightweight theme and activate SSL. Open the public HTTPS address to check that the site loads without warnings.
- Set your business name, logo and contact details.
- Choose a theme with readable typography, simple navigation and a good mobile layout.
- If you want online checkout, install and activate WooCommerce from the WordPress plugin directory.
- Complete the store setup with your actual business location and Ghana cedi currency (GHS).
- Check the Cart, Checkout and My Account pages created for the store.
- Create a backup before installing additional plugins or changing major settings.
Use only the plugins you need for payments, orders, security and the page design. The WordPress block editor can build a straightforward landing page without a large collection of visual effects. If you use another page builder, choose one and keep the layout simple.
Do not leave sample products, placeholder contact details or a “coming soon” overlay on the live campaign page. Test as a customer while logged out; administrator access can hide problems a buyer will encounter.
Step 4: add your product, price and stock information
In WooCommerce, go to Products → Add New and enter the product name, description, price and photographs. A simple product works when the item has one version. A variable product is more suitable when buyers must choose colour, size or another variation with its own stock or price. Review WooCommerce’s product management documentation as you configure the item.
- Use a precise product name and a short summary of the main benefit.
- Show measurements, materials, compatibility and included accessories where relevant.
- Set the price in Ghana cedis and explain any delivery charge separately.
- Manage inventory when you need the store to track available units.
- Add a clear photograph for each important variant.
- Publish delivery, return and support information before sending buyers to checkout.
Do not enable backorders unintentionally. An out-of-stock product should not become a silent pre-order. If you accept advance orders, use a clear availability workflow and an appropriate maintained extension where necessary. WooCommerce’s basic product setup does not automatically provide every deposit or pre-order feature.
For a worked example, imagine a backpack priced at GH₵180 with GH₵25 delivery to an eligible address. The total is GH₵205 before any other applicable charges. These are illustrative selling figures, not courier quotations. Show the final total before the customer confirms the order.
If the advertisement promotes the same backpack, use the same image, price and offer wording on the landing page. Sending customers to an unrelated catalogue makes them search again for the product that interested them.
Step 5: build a mobile-first landing page that answers buying questions
Create the page under Pages → Add New. Give it a clear title and choose a full-width layout if your theme supports one. Build the page with one primary action: buy the product, place a pre-order or request availability. You can keep WhatsApp as a secondary support option without making customers guess which route creates an order.
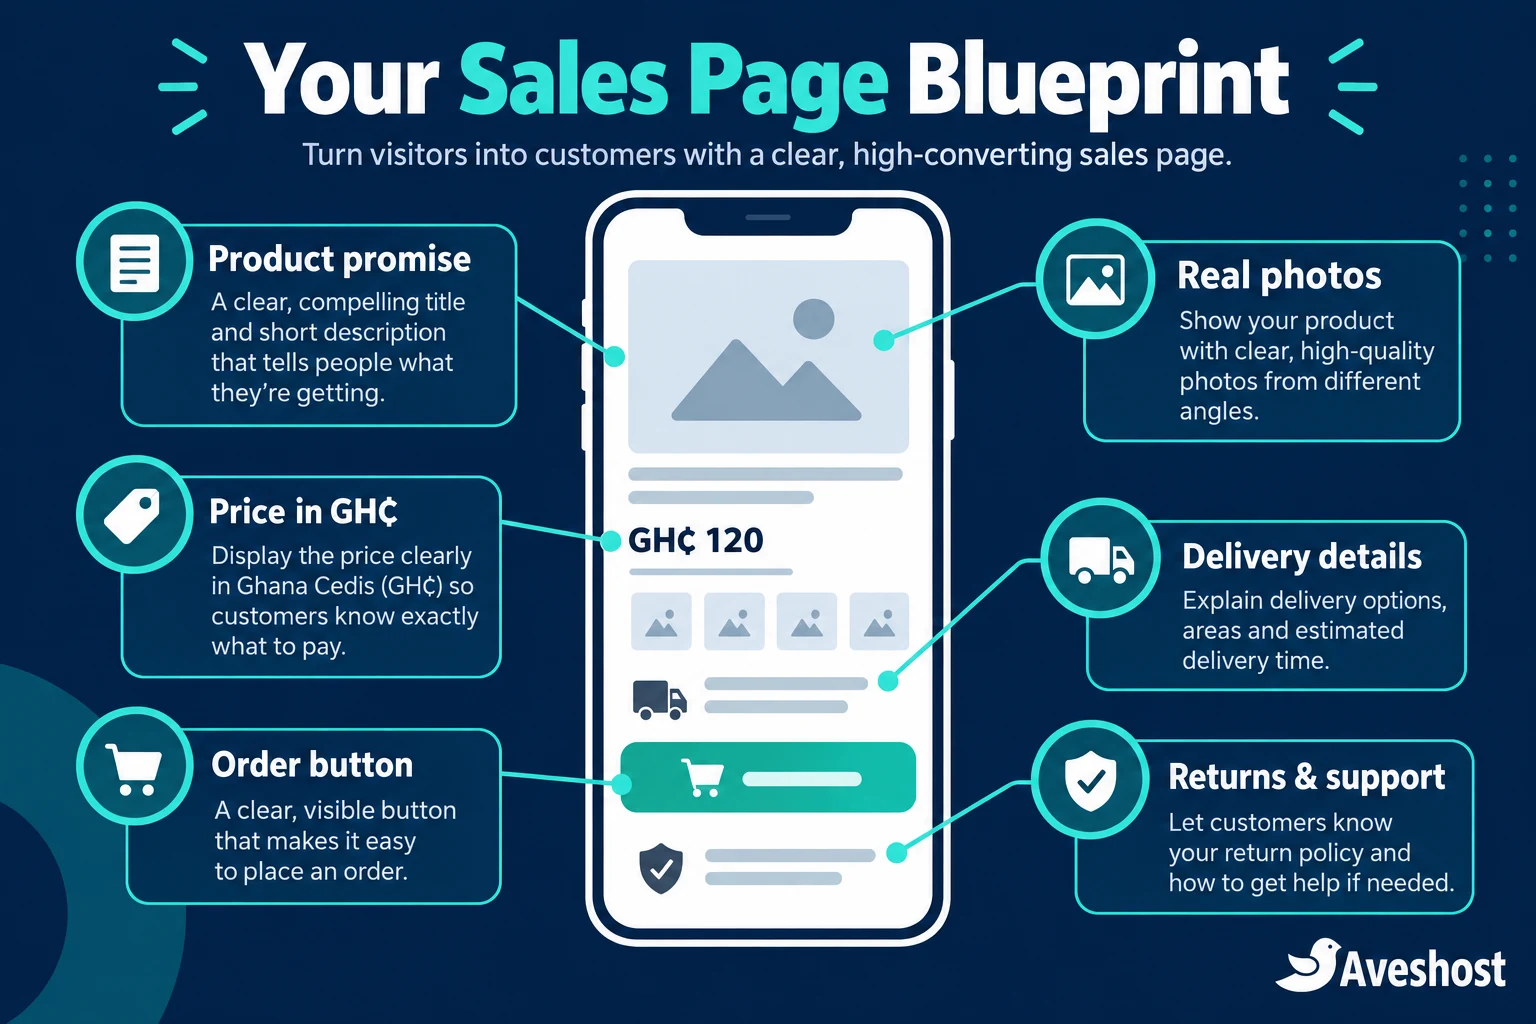
| Page section | What to include |
|---|---|
| Opening section | Product image, clear promise, price and primary button |
| Product details | Dimensions, materials, variants and useful benefits |
| Proof and reassurance | Your own photos, genuine customer feedback and business identity |
| Delivery and payment | Service areas, costs, timeframe, MoMo or pay-on-delivery terms |
| Order action | Product selection and a working checkout or request form |
| Customer questions | Returns, availability, support and what happens after ordering |
A practical opening could read: “Your everyday backpack for work and campus — GH₵180.” Under it, add a short description, the available colours and “Order this backpack”. Use real measurements further down the page so shoppers can decide whether it fits their needs.
In the block editor, use a heading, a short paragraph, an image and a button for the opening section. Use a small number of columns for benefits, a gallery for product photos and readable text for delivery terms. Test the columns on a phone: they should stack cleanly and the order button should remain easy to tap.
Link the main button to the published WooCommerce product page, where the buyer can choose variants and add the item to the cart. You can also use suitable WooCommerce product blocks supported by your theme and version. Test the actual path to checkout rather than relying on a button that only looks clickable.
Keep the landing page URL short, such as /everyday-backpack/. If this is the main business page, set it as the homepage under Settings → Reading. WordPress explains that process in its static homepage guide. A campaign page can remain separate from your homepage and appear only in your advertisements.
Step 6: connect MoMo payments and configure pay on delivery
Choose a gateway that supports your Ghanaian business, intended payment methods and current checkout version. Complete its merchant onboarding, install the provider’s maintained WooCommerce integration and configure the account keys according to its instructions. Keep secret keys private; do not place them in page content or screenshots.
Paystack’s payment channel documentation lists Ghana MoMo support for MTN, Telecel and ATMoney. Available channels depend on the merchant account and integration. Our Paystack, Flutterwave and Hubtel comparison explains Ghana payment options and WordPress integration considerations.
Use the gateway’s test mode before accepting real payments. Confirm that the current plugin supports your chosen checkout, including the WooCommerce Checkout block if you use it. Then switch to the correct live configuration only after the complete order path works.
For pay on delivery, go to WooCommerce → Settings → Payments → Take offline payments, enable Cash on Delivery and manage its settings. Rename the customer-facing title if helpful, explain your payment collection process and restrict it to the shipping methods where you can fulfil it. Follow WooCommerce’s Cash on Delivery instructions for your version.
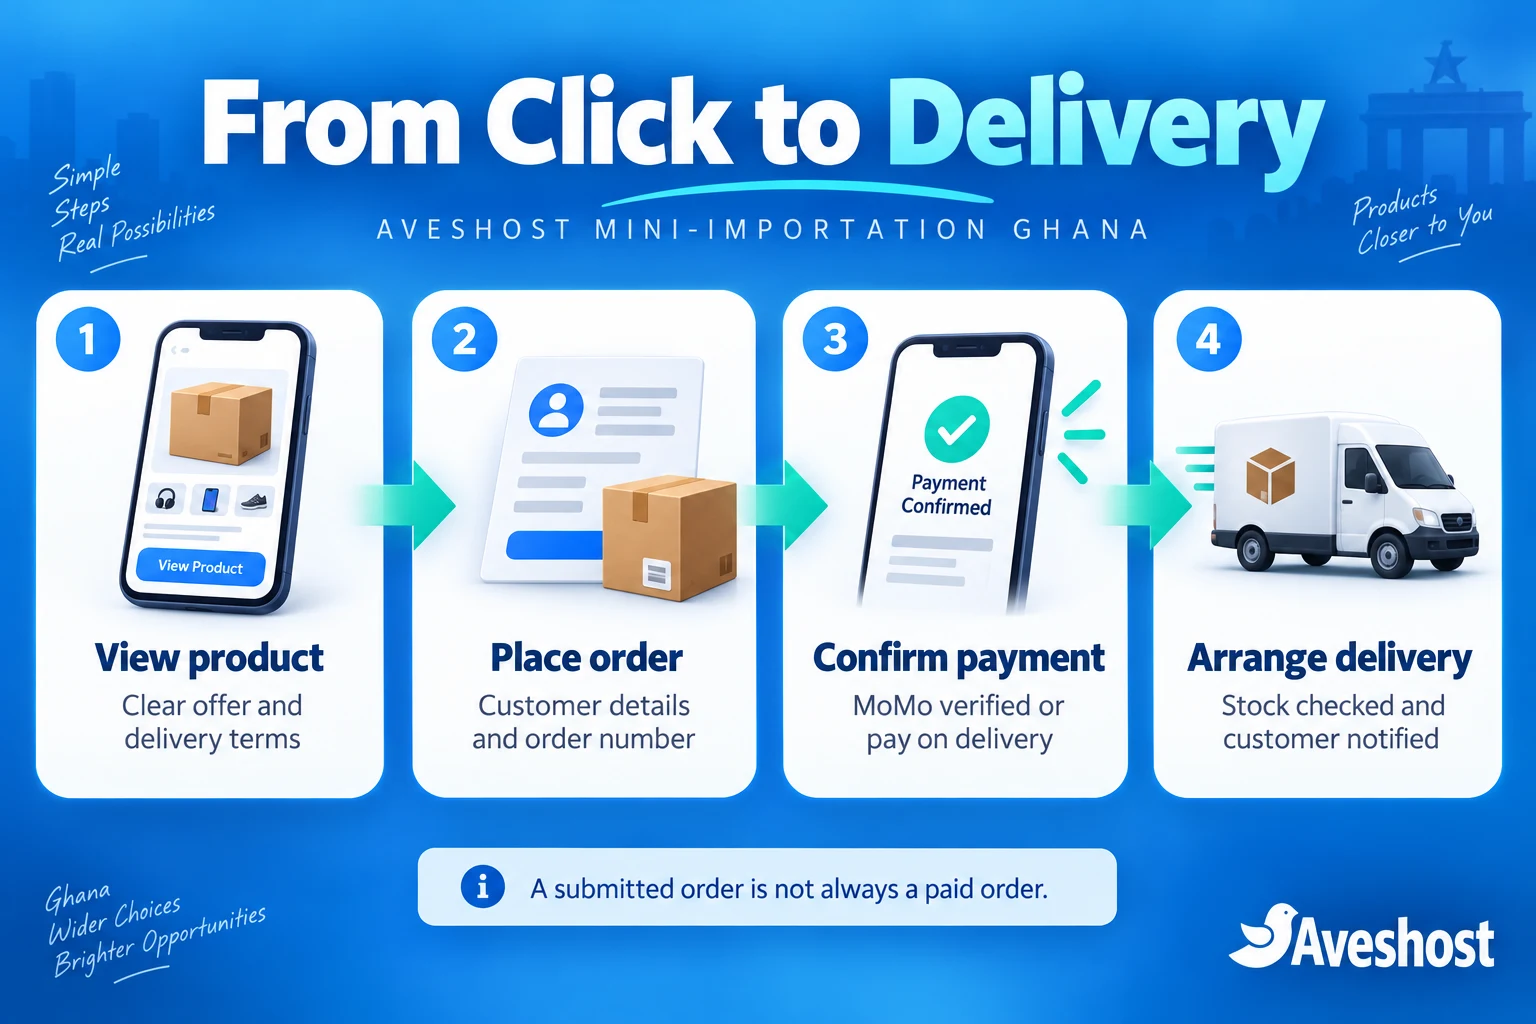
A pay-on-delivery order is not an online payment confirmation. WooCommerce can put a COD order into Processing before money is collected. Your team must still confirm the customer, arrange delivery and record the payment actually received. Do not dispatch expensive items simply because an order has that status.
For MoMo, use the payment gateway and order records to establish success. A screenshot, a customer’s message or a return to the thank-you page is not enough on its own. Paystack’s verification guidance explains transaction confirmation. Never ask customers to type a MoMo PIN or an OTP into your own order form.
Step 7: define delivery areas, pre-order terms and returns
Agree delivery arrangements before opening sales. Know which locations you serve, how addresses are collected, when dispatch happens and how the courier reports delivery or failure. Collect a phone number and usable location details, such as a GhanaPost GPS address or landmark, without requesting unnecessary personal information.
Configure delivery under WooCommerce → Settings → Shipping. Add shipping zones and methods that match your actual service coverage. WooCommerce matches the first qualifying zone, so place narrower zones before broader ones. Its shipping zone guide explains the order and configuration.
Match your WooCommerce delivery areas to the neighbourhoods and rates your courier uses. Use a maintained shipping integration, suitable address mapping or an explicit quotation process where needed. Test at least one address inside your intended service area and one outside it.
- State the product price, delivery charge and final payable amount clearly.
- Explain whether the item is in stock or arriving later.
- For pre-orders, state the expected dispatch window and how delays or cancellations are handled.
- Publish a fair, understandable return and refund process that fits your business and applicable obligations.
- Clarify whether pay on delivery is available everywhere or only on selected routes.
- Give customers a support contact and explain when you respond.
Keep international sourcing information separate from customer delivery promises. “Shipment expected next week” and “delivered to your door tomorrow” describe different stages. Update the page promptly when stock or timing changes.
Step 8: organise order confirmation and customer follow-up
Choose where orders will be recorded. With WooCommerce, use the order number and customer details in the dashboard as your main reference. Keep notes on payment, stock reservation, dispatch and delivery so you can answer questions without searching through several chat threads.
If your first page only gathers enquiries, say so clearly. A form submission should lead to a message such as “We have received your request and will confirm availability and delivery.” It should not tell the customer that payment has succeeded or stock has been reserved unless that action has actually happened.
- Send a confirmation that identifies the product, quantity and order number.
- Check payment status and availability before dispatch.
- For COD, confirm the customer’s location and collection amount.
- For a pre-order, repeat the expected dispatch window in the confirmation.
- Notify the customer when the order is dispatched and provide tracking or delivery details where available.
Test store emails to more than one mailbox. If messages fail, configure a suitable authenticated sending service so customers receive updates directly in their inbox. Our business email packages can give your team a professional address for customer communication.
Give staff only the access they need, protect administrator accounts and keep customer details out of public spreadsheets. If you add marketing messages, make the choice clear to customers and respect their communication preferences.
Step 9: test speed, checkout and every payment outcome
Before spending on advertisements, complete a full purchase journey on a phone. Start with the campaign link, inspect the product, choose a variant, enter delivery details and follow the payment route. Test while logged out and on a typical mobile connection.
| Test | Expected result |
|---|---|
| Successful test payment | The correct order is associated with the verified payment |
| Cancelled or failed payment | The order does not appear as paid |
| Pending MoMo payment | The store waits for the final gateway result |
| Pay on delivery | The collection amount and fulfilment process are clear |
| Unsupported address | The page does not promise a delivery option you cannot fulfil |
| Out-of-stock variant | The customer cannot accidentally buy unavailable stock |
| Confirmation email | Product, order number and next steps are accurate |
Reduce image file sizes, use a lightweight layout and remove scripts that do not help the sale. Follow our guide to making your WordPress website load faster for practical caching and performance work.
Cache public landing pages appropriately, but keep cart, checkout, customer account and payment callback routes out of ordinary page caching. Confirm the exclusions supported by your caching tools and gateway integration. A fast cached page is useful only if the checkout still updates correctly.
Maintain SSL, updates, backups and carefully configured protection. Our Cloudflare setup guide can help with the public website. Test firewall changes so legitimate buyers and payment notifications remain accessible.
Step 10: launch a focused campaign and improve from real orders
Send your advertisements and social posts to the landing page for the product shown in the campaign. Match the creative, price and stock message. If the product is sold out, pause or change the promotion rather than collecting orders you cannot fulfil.
Track the useful stages: page visits, product interactions, checkout starts, verified paid orders, COD orders delivered and refunds. Button clicks are useful signals, but they are not revenue. Evaluate pay-on-delivery performance using successful collections rather than all submitted orders.
For a simple illustration, suppose you receive 100 page visits, 12 submitted orders and 8 completed, paid deliveries. Those figures describe different steps in the journey; the twelve orders are not automatically twelve sales. This is a measurement example, not a forecast of your business results.
- If visitors leave early, check whether the offer and product image are immediately clear.
- If buyers ask the same question repeatedly, answer it on the page.
- If checkout abandonment is high, inspect delivery surprises and payment problems.
- If COD refusals are common, improve confirmation and assess service areas.
- If customers complain after delivery, correct the product description or sourcing issue.
Change one important element at a time and compare meaningful outcomes. You can add genuine customer feedback with permission, stronger photographs or clearer sizing information. Avoid fake countdowns, fabricated reviews and stock messages that do not match inventory.
Launch checklist for your mini-importation website in Ghana
- A domain and hosting plan you control, with renewal arrangements in place.
- Working HTTPS and a readable mobile layout.
- Accurate product photos, specifications, variants and stock.
- Ghana cedi pricing and clear delivery charges.
- A functioning order route, with MoMo or COD configured for your business.
- Verified payment handling and a record of money actually collected.
- Clear in-stock or pre-order terms, returns and customer support.
- Tested delivery areas, confirmation emails and failed-payment outcomes.
- A backup, maintained plugins and appropriate account access.
- Campaign links that lead to the exact product offer.
Your first sales page does not need to be complicated. It needs to answer buying questions, collect orders reliably and support the promises your business can fulfil. Start with our web hosting packages and domain search, or discuss your e-commerce website with us if you want help turning the offer into a working store.
Frequently asked questions
Do I need a full online shop for mini-importation in Ghana?
A focused landing page can suit one main product or a small collection. Add WooCommerce when you need structured checkout, order records and stock management. A larger catalogue benefits from a fuller shop.
Can customers pay with MoMo on my website?
Yes, use a gateway and integration that supports your Ghanaian merchant account and checkout. Test enabled channels and confirm payments through gateway and order records before fulfilment.
Can I accept pay on delivery?
Yes. WooCommerce includes Cash on Delivery settings. Limit it to delivery methods you can support and record the money collected; an order marked Processing is not proof that COD payment has been received.
Can I collect pre-orders before imported goods arrive?
You can build a clearly labelled pre-order offer, with availability, expected dispatch, payment and cancellation terms. Use an appropriate maintained extension if you need deposits or specialised pre-order handling.
Is a .com or .store domain better?
Both can suit a retail business. Choose a memorable name and compare renewal terms. The extension alone does not determine trust or conversion.
How much does starter hosting cost in Ghana cedis?
At the time of writing, our web hosting packages start with Deluxe at GH₵9.00 per month and Professional at GH₵16.00 per month. Check the billing term and final checkout amount, and budget for the domain and optional services.
Can I use supplier photographs?
Use your own photographs where possible. Only publish supplier images when you have the appropriate permission, and make sure they accurately represent the items customers will receive.
Should I use WhatsApp instead of checkout?
WhatsApp is useful for questions or an enquiry route. For structured purchases, checkout provides clearer order records. Explain which action places an order and which only requests information.
Why should I exclude checkout from page caching?
Cart and checkout contain customer-specific, changing information. Ordinary page caching can interfere with totals and payment flows. Follow your caching tool and gateway instructions and test the complete purchase journey.
Can you build my landing page or integrate payments?
Yes. Contact our support team to discuss your website, product offer and payment requirements so we can help plan the project.