Knowing how to configure the Gmail SMTP server lets you send authenticated outgoing emails for free from your WordPress website, desktop mail client, printer, or custom web application without setting up your own mail transfer agent. By routing messages through Google’s outgoing infrastructure at smtp.gmail.com, your contact form alerts, order confirmations, and day-to-day messages are signed and encrypted rather than sent through unauthenticated server mail functions that often land in spam.
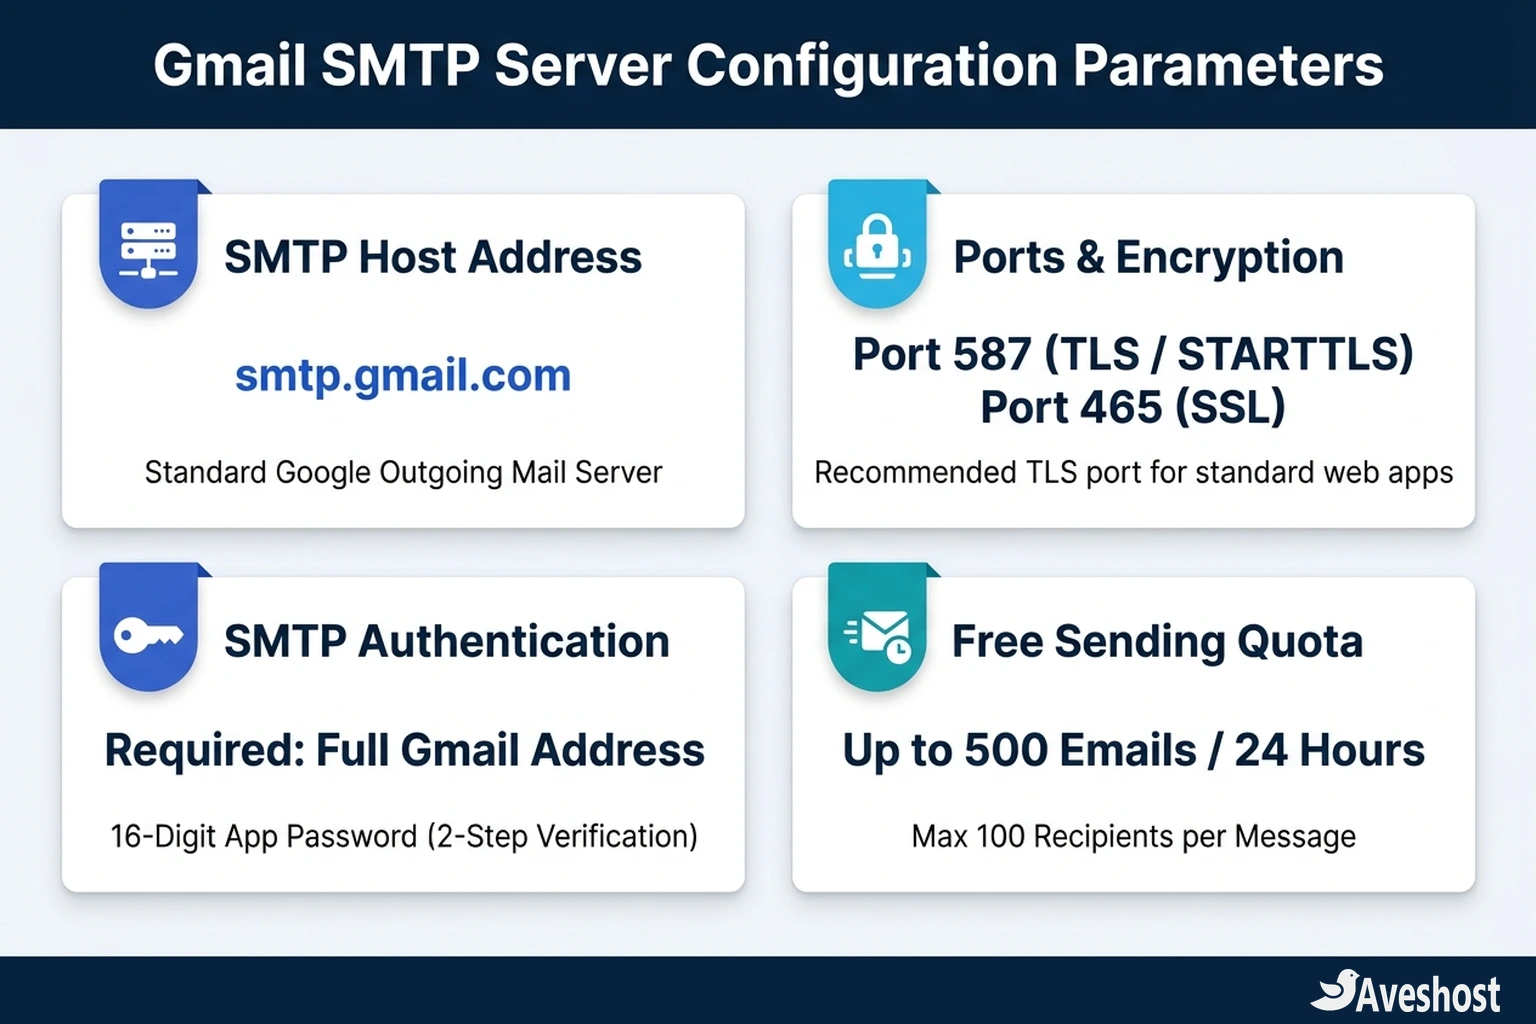
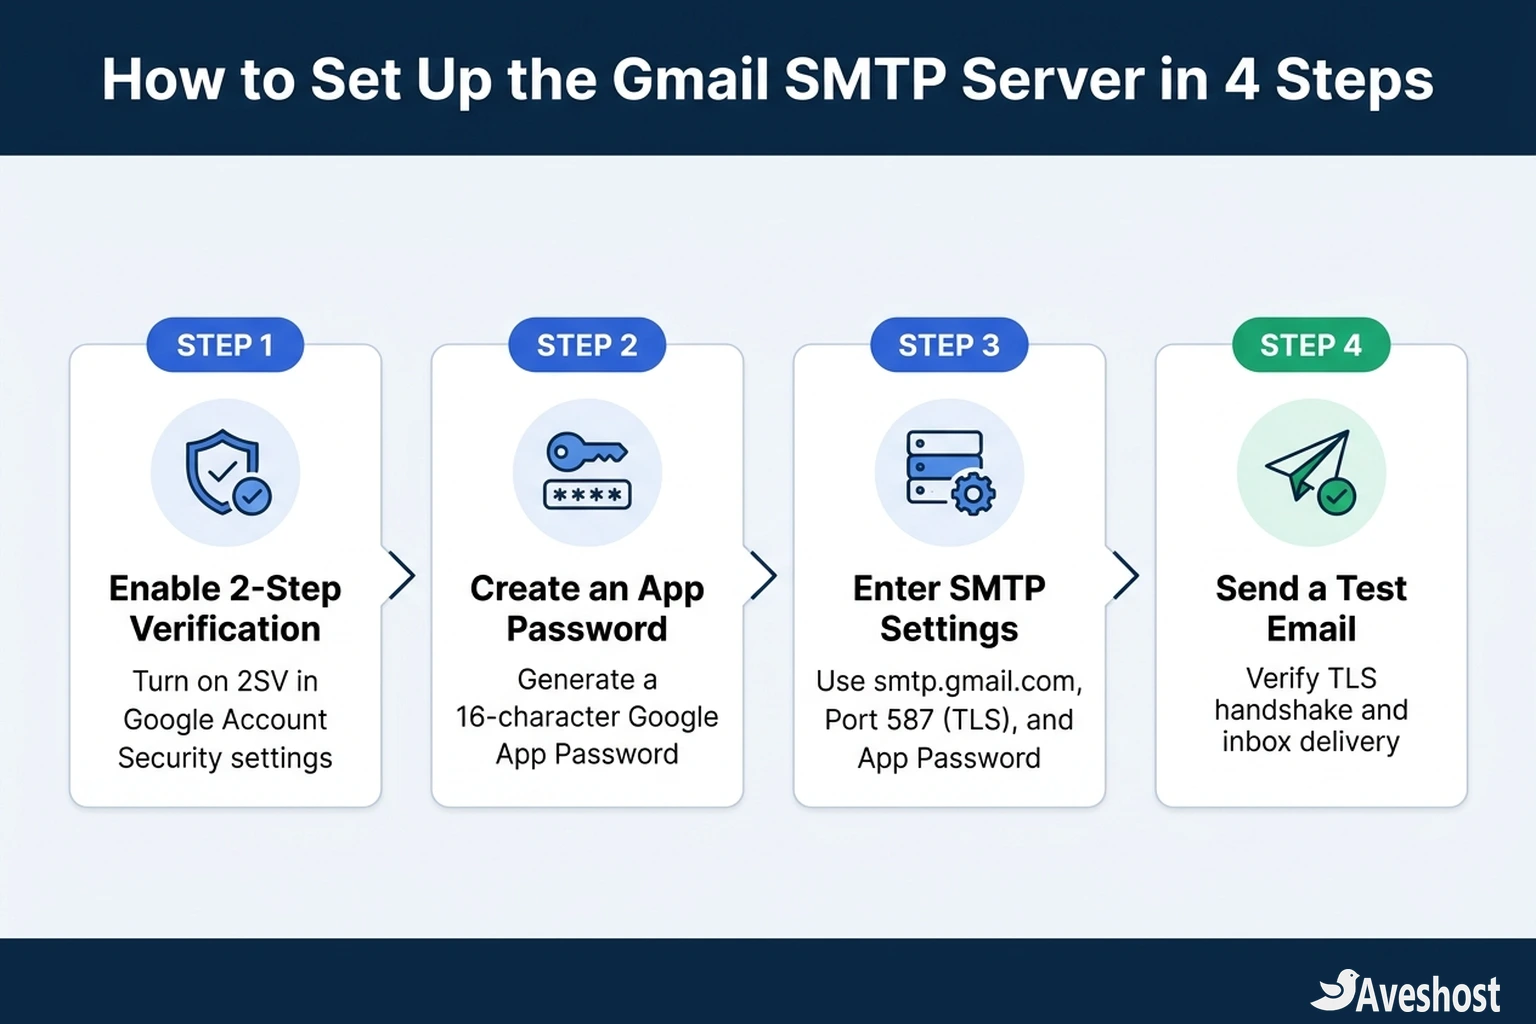
To connect to the Gmail SMTP server, you need four essentials: the host address smtp.gmail.com, port 587 (with TLS/STARTTLS) or port 465 (with SSL), your full Gmail or Google Workspace email address, and a 16-character Google App Password. Below, we walk through the exact server settings, how to generate an App Password, how to connect desktop apps and WordPress, and what daily sending limits apply.
Table of Contents
What Is the Gmail SMTP Server and Why Use It?
SMTP (Simple Mail Transfer Protocol) is the universal internet standard responsible for transmitting outgoing emails from a mail client or website server to a recipient’s inbox provider. While IMAP and POP3 handle retrieving incoming messages, an SMTP server handles authenticating the sender, encrypting the message in transit, and relaying it across the internet.
When you build a website or run an online store, default server mail functions—such as WordPress’s built-in PHP mail() handler—often send messages without proper cryptographic authentication or reverse DNS alignment. Receiving providers like Gmail, Outlook, and Yahoo frequently quarantine or reject those unauthenticated emails before they ever reach the inbox.
Using the free Gmail SMTP server solves this problem for low-to-moderate email volumes. Instead of relying on unverified local scripts, your application logs in to Google’s trusted outbound mail gateway, encrypts the connection via TLS, and dispatches the message through Google’s authenticated mail servers. It is an ideal no-cost starting point for personal websites, portfolio contact forms, staging environments, and desktop mail clients like Thunderbird, Apple Mail, or Microsoft Outlook.
Gmail SMTP Server Settings at a Glance
Whether you are configuring a desktop email client, a multifunction office scanner, a custom Python or Node.js script, or a WordPress SMTP plugin, the official Google mail client settings use the same core parameters. Keep these values handy before opening your application settings:
| Parameter | Recommended Setting | Notes & Requirements |
|---|---|---|
| SMTP Server (Outgoing Host) | smtp.gmail.com | Standard outgoing hostname for both free Gmail and Google Workspace accounts |
| SMTP Username | Your full Gmail address (e.g., [email protected]) | Always enter the complete email address, including the domain part |
| SMTP Password | 16-character Google App Password | Regular Google account passwords are rejected; requires 2-Step Verification |
| SMTP Port (TLS / STARTTLS) | 587 | Recommended modern standard for web apps, WordPress plugins, and mail clients |
| SMTP Port (SSL) | 465 | Use if your application requires implicit SSL encryption instead of STARTTLS |
| Requires Authentication | Yes (Enabled) | Unauthenticated relay connections on smtp.gmail.com are blocked |
| Daily Sending Limit | Up to 500 emails per 24 hours (free Gmail) / 2,000 (Workspace) | External SMTP client connections on free accounts may cap around 100–500 recipients/day |
Step 1: Enable 2-Step Verification and Create a Google App Password
The single most common reason a Gmail SMTP server connection fails is entering your normal Google account password into the SMTP password field. Google retired basic password sign-ins (formerly called “Less Secure Apps”) to protect accounts against credential stuffing. To authenticate via standard SMTP, you must create a dedicated 16-character Google App Password.
Follow these steps inside your Google Account to generate your App Password:
1. Open Google Account Security: Sign in to your Google Account at myaccount.google.com and click Security in the left-hand navigation menu.
2. Turn on 2-Step Verification: Scroll to the “How you sign in to Google” section. If 2-Step Verification is currently off, click it and follow the prompts to verify your phone number or authenticator app. App Passwords are only available after 2-Step Verification is active.
3. Navigate to App Passwords: Once 2-Step Verification is enabled, use the top search bar in your Google Account to search for App passwords (or visit myaccount.google.com/apppasswords directly).
4. Name and create your password: Enter a descriptive label in the App name field—for example, WordPress Contact Form or Thunderbird Desktop—and click Create. Google will display a yellow or modal box containing a 16-letter passcode divided into four groups of four characters.
5. Copy the 16-character key immediately: Copy the code without spaces and paste it directly into your application’s SMTP password field. Once you close the modal window, Google will not display that specific 16-character code again. Also remember that if you ever change your primary Google account password in the future, Google automatically revokes existing App Passwords, so you will need to generate a fresh one.
Step 2: Configure the Gmail SMTP Server in an Email Client
If you want to send outgoing emails through a desktop mail application such as Mozilla Thunderbird, Microsoft Outlook, or Apple Mail—or from a network scanner or accounting system—you can plug your credentials straight into the client’s outgoing server screen.
1. Open Outgoing Server (SMTP) settings: In your mail application, open Account Settings and locate the Outgoing Server (SMTP) configuration panel.
2. Enter the server and port: Set the server hostname to smtp.gmail.com. Select STARTTLS (or TLS) as the connection security and enter port 587. If your device only supports implicit SSL, select SSL/TLS and enter port 465.
3. Enable password authentication: Check the box for Server requires authentication (in Thunderbird, set Authentication method to Normal password). Enter your full Gmail address as the username and paste your 16-character Google App Password as the password.
4. Send a test message: Save your settings and compose a quick test email to a secondary address to confirm the TLS handshake succeeds and the message lands in the recipient’s inbox.
Step 3: Use the Gmail SMTP Server on a WordPress Website
For WordPress site owners, connecting the Gmail SMTP server is one of the fastest ways to fix missing contact form submissions, WooCommerce order receipts, and password reset emails. You can connect WordPress using a lightweight plugin such as WP Mail SMTP, FluentSMTP, or Post SMTP.
There are two ways to configure Gmail inside a WordPress SMTP plugin: the Other SMTP (App Password) method and the Google Workspace / Gmail API (OAuth 2.0) method. For most small sites, the App Password method takes less than three minutes:
1. Install and activate an SMTP plugin: In your WordPress dashboard, go to Plugins → Add New Plugin, search for WP Mail SMTP (or FluentSMTP), and click Install Now → Activate.
2. Configure sender details: Set the From Email to your exact Gmail address and check Force From Email so third-party form plugins cannot spoof a different sender address that Google would reject. Enter your website or brand name in the From Name field.
3. Select Other SMTP and enter server credentials: Choose Other SMTP as your mailer. Enter smtp.gmail.com in the SMTP Host field, choose TLS encryption (which automatically selects port 587), toggle Authentication to On, enter your full Gmail address in SMTP Username, and paste your 16-character App Password in SMTP Password.
4. Run the built-in Email Test: Save your settings, switch to the plugin’s Email Test tab, and send a test message to an external inbox. If your site is hosted on Aveshost WordPress Hosting, outbound ports 587 and 465 are supported so your encrypted SMTP connection establishes immediately.
How to Send Custom Domain Emails Through Gmail SMTP
Many business owners enjoy Gmail’s clean web interface but want customers to see a professional address like [email protected] instead of a generic @gmail.com address. You can combine a custom domain mailbox with Gmail’s interface at no extra Google subscription cost.
When you register a domain and host your site on Aveshost Shared Web Hosting or Aveshost Business Email, you can create custom domain email accounts directly in your control panel. From there, open Gmail on the web, go to Settings (gear icon) → See all settings → Accounts and Import → Send mail as, and click Add another email address. By entering your custom mailbox’s incoming POP3 and outgoing SMTP details, you can read and send custom-domain emails right inside your familiar Gmail inbox.
We have a complete step-by-step walkthrough with screenshots in our dedicated tutorial on how to set up a webmail email account in Gmail to send and receive emails, as well as our guide on creating a professional business email address using your own domain.
Gmail SMTP Sending Limits and Common Error Fixes
While the Gmail SMTP server is reliable for everyday transactional notifications and personal correspondence, Google enforces strict automated sending quotas to prevent bulk spam. According to Google’s official mail sending limits, every recipient in the To, Cc, and Bcc fields counts individually toward your rolling 24-hour quota.
Free @gmail.com accounts can send up to 500 emails per rolling 24-hour period from the web interface, while external SMTP client connections are often capped between 100 and 500 recipients per rolling 24 hours (and a maximum of 100 recipients per single SMTP message). Paid Google Workspace accounts allow up to 2,000 messages per rolling 24-hour period. If you encounter an SMTP error code during setup or sending, use this quick diagnostic table to resolve it:
| SMTP Error Code / Message | Root Cause | How to Fix It |
|---|---|---|
| 535-5.7.8 Username and Password not accepted | Using your normal Google password instead of an App Password, or a typo in the email address | Enable 2-Step Verification and generate a 16-character Google App Password |
| 530-5.7.0 Must issue a STARTTLS command first | Port 587 was selected without enabling TLS/STARTTLS encryption | Set Encryption to TLS (or STARTTLS) when using port 587, or switch to port 465 with SSL |
| 550 5.4.5 Daily user sending limit exceeded | Your account exceeded the rolling 24-hour recipient cap (100–500 for free Gmail) | Wait 24 hours for the rolling window to reset, and avoid using Gmail SMTP for bulk newsletters |
| Connection timed out / Could not connect to host | Firewall or network blocking outbound port 587 or 465 | Verify your firewall rules allow outbound TCP traffic on port 587 or 465 |
When to Move from Free Gmail SMTP to Dedicated Email & Web Hosting
Using a free @gmail.com account with the Gmail SMTP server works well when you are launching a small project, testing a contact form, or sending a few dozen administrative notifications a day. However, as your business grows, relying on a free personal Gmail address creates two practical bottlenecks: recipients see a consumer @gmail.com sender address (or a “via gmail.com” warning if your domain lacks alignment), and busy sales days can quickly exhaust Google’s rolling 24-hour sending cap.
When you are ready to send from a branded address like [email protected], Aveshost Business Email and Aveshost Web Hosting give you dedicated custom-domain mailboxes with preconfigured SPF, DKIM, and DMARC records. Your WordPress website and desktop mail apps can authenticate directly against your own domain’s mail server, ensuring your invoices, booking confirmations, and customer replies carry your brand identity cleanly. If you need help choosing the right email or hosting plan for your website, reach out to our team through Aveshost Support.
Frequently asked questions
Is the Gmail SMTP server completely free to use?
Yes. Anyone with a standard free @gmail.com account can use smtp.gmail.com at no cost to send up to 100–500 emails per rolling 24-hour period through an external mail client, script, or WordPress plugin.
Should I use port 587 or port 465 for the Gmail SMTP server?
Port 587 with TLS (STARTTLS) is the recommended modern standard for WordPress SMTP plugins, web applications, and desktop mail clients. Use port 465 with SSL only if your device or legacy application specifically requires implicit SSL.
Why does Gmail SMTP say my username and password are not accepted?
Google no longer accepts your standard account login password over basic SMTP connections. You must enable 2-Step Verification in your Google Account and generate a 16-character Google App Password to use as your SMTP password.
Can I use the Gmail SMTP server for bulk email marketing or newsletters?
No. The Gmail SMTP server is designed for personal correspondence and low-volume transactional notifications. Exceeding the rolling 24-hour recipient cap triggers a temporary 550 5.4.5 sending block.
Why did my Gmail SMTP connection stop working after I changed my Google password?
Whenever you change your primary Google Account password, Google automatically revokes all existing 16-character App Passwords for security. Simply generate a new App Password in your Google Account Security settings and update it in your mail client or WordPress plugin.