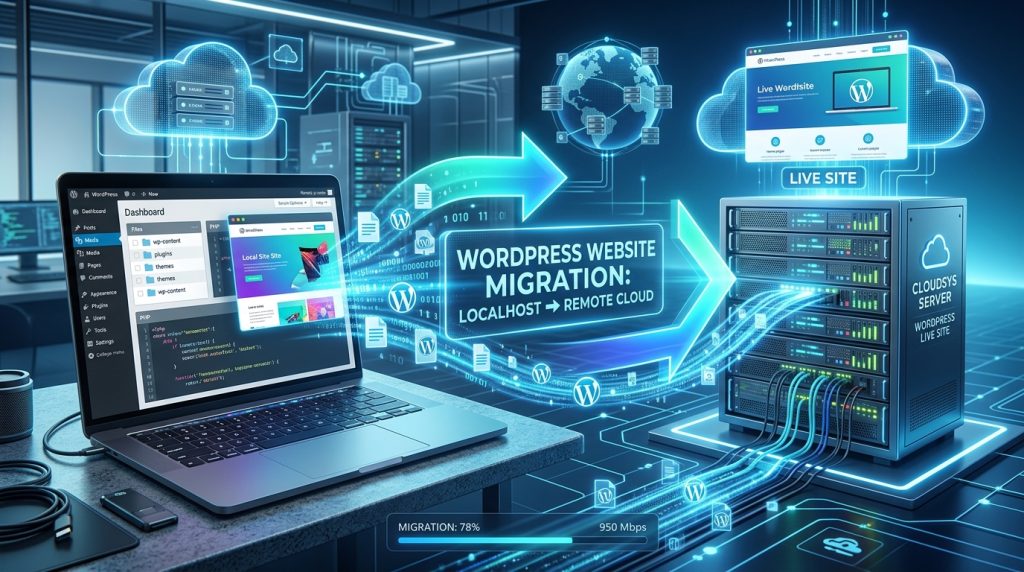
Learning how to migrate your WordPress website from localhost to a remote server is an essential milestone for any developer, agency, or website owner. Developing locally with tools like LocalWP, XAMPP, WampServer, or MAMP provides a fast, risk-free environment to build layouts and customize plugins before launching to the public.
However, once your website is polished and ready for the world, you must move it from your local computer to a live, remote web hosting server. In this comprehensive guide, we will walk you through the entire process of migrating your WordPress site to a remote server powered by the modern DirectAdmin Control Panel on Aveshost.
📌 What You Will Learn in This Guide:
- Essential pre-migration preparation and checklist.
- Method 1: The Automated Plugin Method (Fast, Beginner-Friendly via All-in-One WP Migration).
- Method 2: The Manual Control Panel Method (Full control via DirectAdmin File Manager, MySQL Management, and phpMyAdmin).
- How to update database URLs and domain references correctly.
- Post-migration verification, Let’s Encrypt SSL/TLS activation, and troubleshooting common errors.
Table of Contents
Pre-Migration Checklist: What You Need Before You Start
Before transferring files and database records, completing a quick audit ensures a seamless migration without unexpected errors:
- Active Remote Hosting Account: A web hosting package running DirectAdmin (such as high-speed NVMe hosting from Aveshost). If you haven’t logged in before, check How to Login to DirectAdmin Control Panel.
- Registered Domain Name: Your live domain (e.g.,
domain.com) pointed to your hosting server’s Nameservers or A Record IP address. Learn how to get a domain name and how to add a domain name in DirectAdmin. If you manage DNS via Cloudflare, check our guide on setting up DNS records in Cloudflare. - Database Credentials: Access to your local phpMyAdmin or database manager.
- Clean Up Your Local Site: Empty your trash bins (deleted posts, pages, and media), delete spam comments, and remove unused themes or deactivated plugins to keep your backup lightweight.
- Deactivate Caching & Security Plugins: Temporarily turn off plugins like Wordfence, iThemes Security, or WP Fastest Cache on your local site before creating the export archive to avoid file permission lockouts or redirection conflicts.
- Record Your URLs: Take note of your local website address (e.g.,
http://localhost/mysiteorhttp://mysite.local) and your target live URL (e.g.,https://domain.com).
Overview of the DirectAdmin Environment
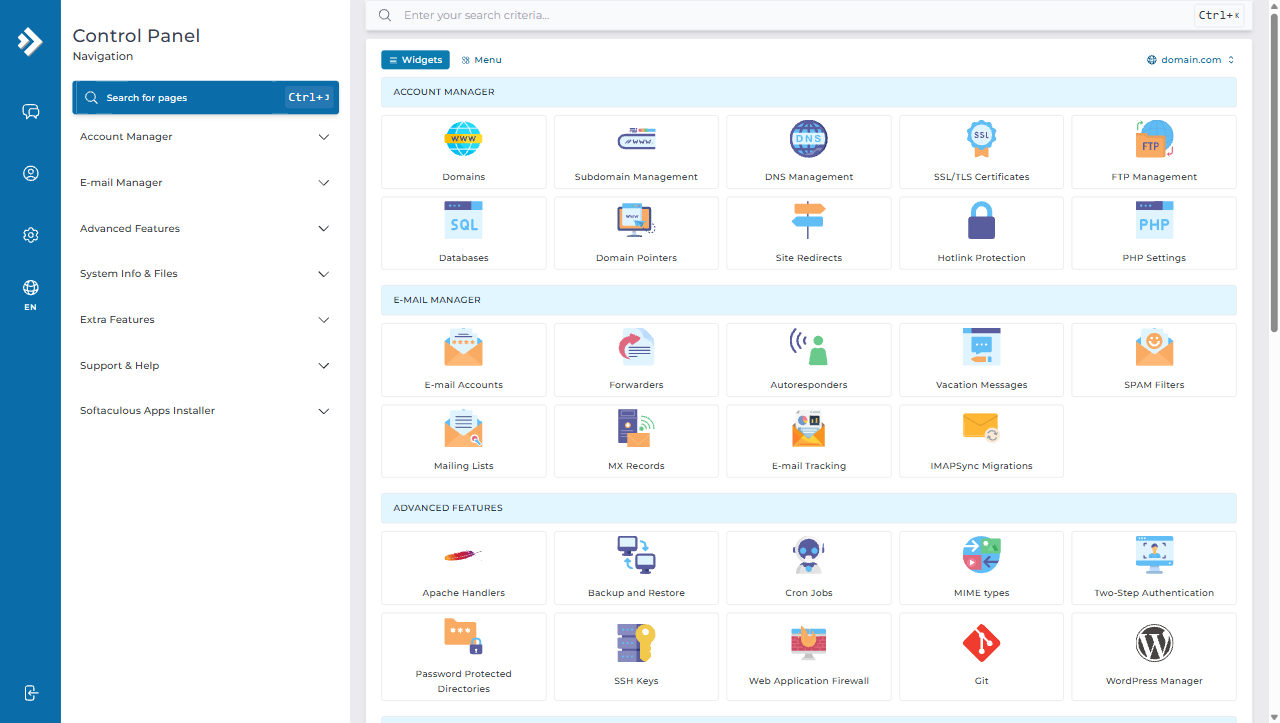
DirectAdmin is a lightning-fast, secure, and intuitive web hosting control panel. Unlike resource-heavy legacy panels, DirectAdmin’s Evolution interface provides rapid access to core hosting features including Databases, File Manager, SSL/TLS Certificates, and Softaculous 1-Click Installers.
Method 1: Automated Migration via Plugin (Recommended for Beginners)
The easiest way to migrate small-to-medium WordPress websites (under 512MB to a few gigabytes) without touching server files manually is using a trusted migration plugin like All-in-One WP Migration or Duplicator.
Step 1: Install Migration Plugin on Localhost
- Log in to your local WordPress dashboard (e.g.,
http://localhost/mysite/wp-admin). - Navigate to Plugins > Add New.
- Search for All-in-One WP Migration.
- Click Install Now and then Activate.
Step 2: Export Your Local WordPress Site
- In your local dashboard menu, navigate to All-in-One WP Migration > Export.
- Click on Export To and select File from the dropdown list.
- The plugin will package your database, media library, plugins, and active theme into a single
.wpressarchive. - Once the export process completes, click the pulsing download button to save the file to your computer.
Step 3: Install WordPress on Your Remote DirectAdmin Server
- Log in to your DirectAdmin control panel.
- Scroll down to Extra Features or Softaculous Apps Installer and click on WordPress (or follow our step-by-step guide on How to Install WordPress in DirectAdmin).
- Click Install Now.
- Choose your domain (e.g.,
https://domain.com), leave the in-directory field blank, set your admin credentials, and click Install.
Step 4: Import Your Website onto the Remote Server
- Log in to the newly installed WordPress admin dashboard on your remote server (
https://domain.com/wp-admin). - Go to Plugins > Add New, install and activate All-in-One WP Migration.
- Navigate to All-in-One WP Migration > Import.
- Drag and drop the
.wpressfile exported from your localhost. - Follow the on-screen prompt warning that the import will overwrite your existing database and files, then click Proceed.
Step 5: Save Permalinks Twice
Once the import finishes, your WordPress login credentials will change to match your localhost username and password. Log back in, go to Settings > Permalinks, and click Save Changes twice to regenerate your URL rewrite rules.
Method 2: Manual Migration via DirectAdmin (Best for Full Control & Large Websites)
For large websites, custom development projects, or instances where plugin execution times out, the manual migration method provides complete control over your files and database. (If you prefer using command-line workflows or Git, you can also check our guides on deploying via Git in DirectAdmin and deploying from VS Code using AI).
Step 1: Export Your Local WordPress Files
- Navigate to your local WordPress installation directory on your computer:
- XAMPP:
C:\xampp\htdocs\mysite - WampServer:
C:\wamp64\www\mysite - LocalWP:
~/Local Sites/mysite/app/public
- XAMPP:
- Select all files and folders inside the root directory (including
wp-admin,wp-content,wp-includes,wp-config.php, and.htaccess). - Right-click and compress them into a single
.ziparchive (e.g.,site-files.zip).
Step 2: Export Your Local MySQL Database
- Open your local database management tool (typically
http://localhost/phpmyadmin). - Click on your WordPress database name in the left sidebar.
- Click on the Export tab at the top.
- Choose the Quick export method and ensure the format is set to SQL.
- Click Go (or Export) to download the
.sqlfile to your computer.
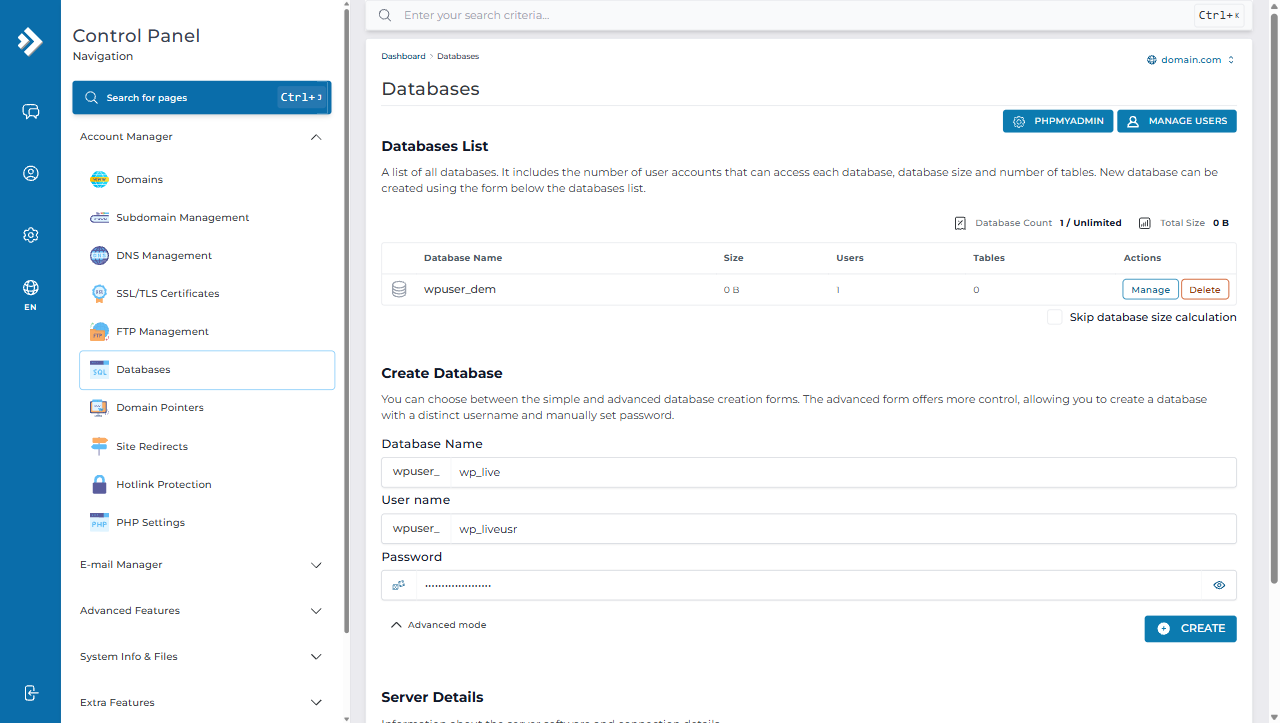
Step 3: Create a New MySQL Database and User in DirectAdmin
Now, set up a fresh database on your remote server to receive your local data:
- Log in to your DirectAdmin control panel.
- Under the Account Manager section, click on Databases.
- In the Create Database area, click on Advanced mode to set custom user credentials.
- Enter your desired Database Name (e.g.,
wpuser_wp_live) and User name (e.g.,wpuser_wp_liveusr). - Generate or enter a strong password and save these details securely in a notepad.
- Click the CREATE button. DirectAdmin will establish the database and automatically grant full administrative privileges to the new user.
Step 4: Upload and Extract Files via DirectAdmin File Manager
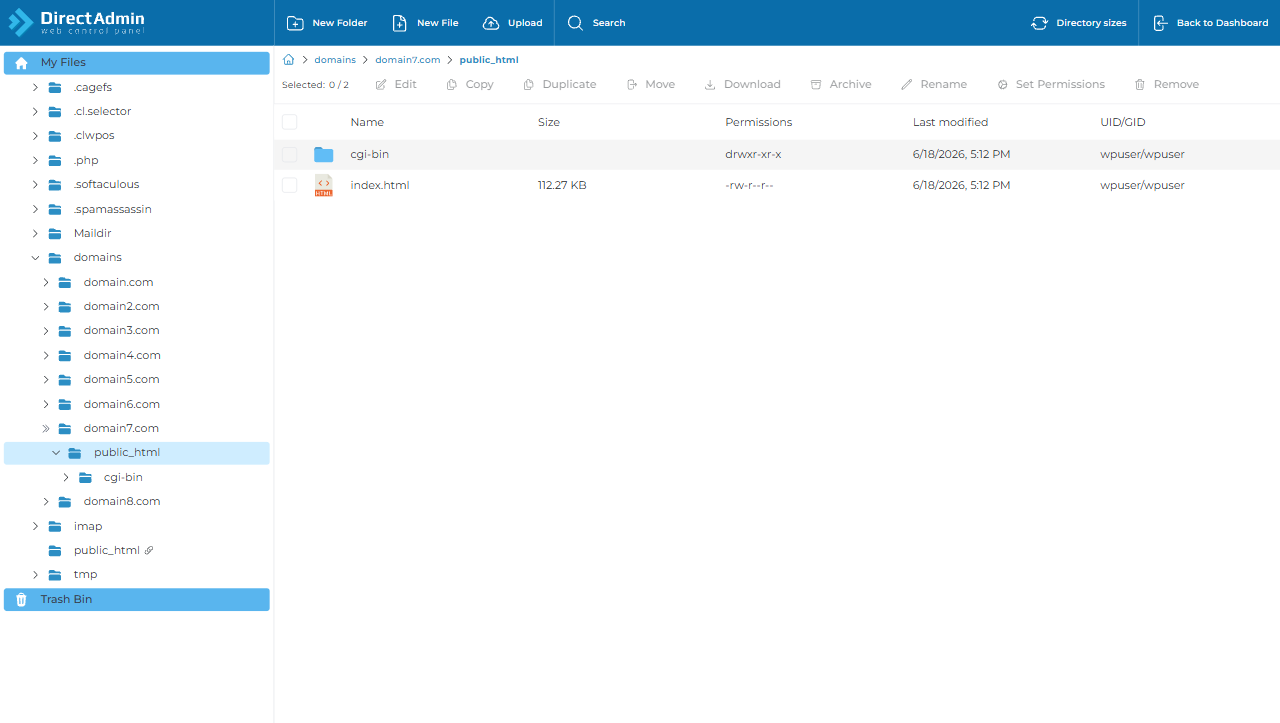
- In DirectAdmin, go to System Info & Files > File Manager.
- Navigate to your domain’s public root directory:
domains/domain.com/public_html. - If there is a default placeholder
index.htmlfile, delete or rename it. - Click the Upload button on the top toolbar.
- Drag and drop your
site-files.ziparchive and wait for the upload to reach 100%. - Hover over the uploaded zip file, click Extract (or right-click > Extract), and confirm the destination is
public_html.
Step 5: Import the Local Database in DirectAdmin via phpMyAdmin
- Return to Account Manager > Databases in DirectAdmin.
- Click the PHPMYADMIN button in the top right to access phpMyAdmin.
- In phpMyAdmin’s left sidebar, select the newly created database (e.g.,
wpuser_wp_live). - Click on the Import tab in the top navigation bar.
- Click Choose File and select the
.sqlfile you exported from your localhost. - Scroll down and click Import (or Go). You will see a success message indicating all database tables have been created.
Step 6: Update wp-config.php with New Database Details
Your WordPress files on the remote server must now be linked to the newly created database:
- In DirectAdmin File Manager, locate
wp-config.phpinsidepublic_html. - Click Edit to open the built-in code editor.
- Locate the MySQL settings section and update the database name, username, and password with your DirectAdmin database details:
// ** Database settings - You can get this info from your DirectAdmin panel ** //
/** The name of the database for WordPress */
define( 'DB_NAME', 'wpuser_wp_live' );

/** MySQL database username */
define( 'DB_USER', 'wpuser_wp_liveusr' );

/** MySQL database password */
define( 'DB_PASSWORD', 'YourSecurePasswordHere' );

/** MySQL hostname (standard DirectAdmin default is localhost) */
define( 'DB_HOST', 'localhost' );

/** Database charset to use in creating database tables. */
define( 'DB_CHARSET', 'utf8mb4' );

/** The database collate type. Don't change this if in doubt. */
define( 'DB_COLLATE', '' );- Click Save to commit the changes.
Step 7: Update Site URLs and Domain Names in Database
WordPress stores absolute URLs in multiple database tables. Since your database was exported from localhost (e.g., http://localhost/mysite), you must update all occurrences to your live domain (e.g., https://domain.com).
Option A: Run SQL Queries in phpMyAdmin
Open phpMyAdmin in DirectAdmin, click on your database, navigate to the SQL tab, paste the following queries (replacing the table prefix and domain names), and click Go:
UPDATE wp_options SET option_value = replace(option_value, 'http://localhost/mysite', 'https://domain.com') WHERE option_name = 'home' OR option_name = 'siteurl';

UPDATE wp_posts SET guid = replace(guid, 'http://localhost/mysite', 'https://domain.com');

UPDATE wp_posts SET post_content = replace(post_content, 'http://localhost/mysite', 'https://domain.com');

UPDATE wp_postmeta SET meta_value = replace(meta_value, 'http://localhost/mysite', 'https://domain.com');
Option B: Use the Better Search Replace Plugin
If your theme or page builder (such as Elementor) uses serialized data, running a raw SQL query might corrupt serialized arrays. You can safely replace URLs using the free Better Search Replace plugin:
- Log in to your WordPress admin (
https://domain.com/wp-admin). - Install and activate Better Search Replace.
- Go to Tools > Better Search Replace.
- In the Search for field, enter:
http://localhost/mysite(or your local URL). - In the Replace with field, enter:
https://domain.com. - Select all tables, uncheck “Run as dry run”, and click Run Search/Replace.
Post-Migration Setup: Securing and Fine-Tuning Your Live Site
Congratulations! Your website files and database are now operating on your remote server. Complete these essential final touches:
1. Install Free Let’s Encrypt SSL/TLS Certificate in DirectAdmin
An SSL (Secure Sockets Layer) Certificate encrypts data between your visitors and your server, displays the secure padlock icon, and improves your search engine rankings. For detailed step-by-step instructions, see the official Aveshost knowledge base guide on How to Install an SSL Certificate in DirectAdmin.
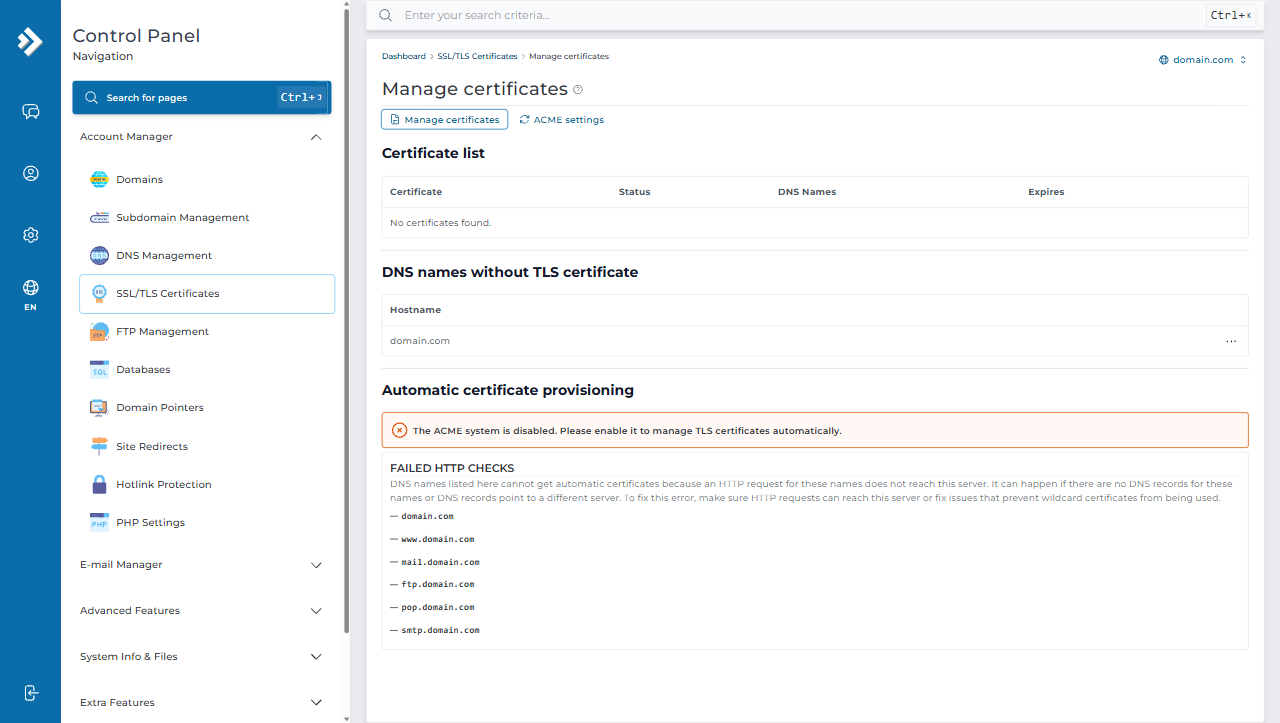
- In DirectAdmin, navigate to Account Manager > SSL/TLS Certificates.
- Click on the ACME settings tab to configure automated certificate issuance.
- Check Enable ACME, select Let’s Encrypt as the provider, and choose ECDSA P-256 (or RSA 2048) for modern, fast cryptographic handshakes.
- Select your root domain (
domain.com),www.domain.com, and any relevant subdomains, then click SAVE. DirectAdmin will automatically issue and install the certificate in 30–60 seconds. - Next, force secure browsing: go to Account Manager > Domains, click your domain, and check Force SSL with https redirect. (See How to Force HTTP to HTTPS in DirectAdmin).
2. Flush WordPress Rewrite Rules (Permalinks)
Log in to your live WordPress dashboard, go to Settings > Permalinks, and click Save Changes twice. This forces WordPress to regenerate your .htaccess file, ensuring clean permalinks work properly.
3. Re-enable Security and Caching Plugins
Turn back on your caching plugin (e.g., LiteSpeed Cache, WP Fastest Cache) and security suite (e.g., Wordfence, cPGuard). Purge all cache to ensure visitors receive fresh, optimized pages. You can also configure domain emails by following How to Create an Email Account in DirectAdmin.
Troubleshooting Common Migration Issues
⚠️ Frequently Encountered Errors & Solutions:
1. Error Establishing a Database Connection:
Double-check wp-config.php. Ensure the database name, username, and password match exactly. Make sure the database user has full permissions assigned in DirectAdmin under Databases > Manage Users.
2. 404 Errors on Pages and Blog Posts:
If only your homepage loads and all internal links return a 404 Not Found error, verify that .htaccess exists in public_html with standard WordPress rewrite rules and re-save your Permalinks.
3. Broken Images or Insecure Content Warnings:
Some media items may still be referencing http:// instead of https://. Run Better Search Replace to update http://domain.com to https://domain.com.
4. File Upload Limits in DirectAdmin:
If you encounter upload size limitations when importing files, navigate to DirectAdmin > Account Manager > PHP Settings (or Select PHP Version) and increase upload_max_filesize, post_max_size, and memory_limit to 512M.
Frequently Asked Questions (FAQs)
How long does a WordPress migration from localhost to a remote server take?
Using an automated plugin like All-in-One WP Migration, the migration typically takes 5 to 15 minutes for standard websites. For larger websites migrating manually via DirectAdmin File Manager and phpMyAdmin, the process takes approximately 15 to 30 minutes depending on your internet upload speed and database size.
Will my plugins and themes still work after migrating to DirectAdmin?
Yes. All installed themes, active plugins, custom code, page builder layouts (such as Elementor), and media files are fully preserved. However, make sure to flush your permalinks twice in Settings > Permalinks and run a search-and-replace to update any hardcoded localhost URLs.
Why is my remote website showing ‘Error Establishing a Database Connection’?
This error occurs when the database credentials in wp-config.php do not match the database created in DirectAdmin. Double-check that DB_NAME, DB_USER, and DB_PASSWORD are correct and verify that the database user has been granted full privileges under Databases > Manage Users in DirectAdmin.
Do I need to reinstall WordPress on DirectAdmin before manual migration?
No, for manual migration you do not need to install WordPress first. You simply upload your zipped localhost files directly into domains/domain.com/public_html, extract them, import your database via phpMyAdmin, and update wp-config.php.
How does Let’s Encrypt SSL renewal work in DirectAdmin?
DirectAdmin includes automated ACME SSL certificate management. Once enabled under Account Manager > SSL/TLS Certificates, Let’s Encrypt certificates renew automatically every 60 to 90 days with zero downtime and no manual renewal steps required.
What should I do if my local site has serialized data?
If you built your website using page builders like Elementor or widgets with complex options, avoid using raw SQL queries for domain replacement. Instead, use the Better Search Replace plugin or WP-CLI (wp search-replace) because they safely unpack, update, and re-serialize PHP arrays without corrupting database strings.
Conclusion
Migrating your WordPress website from localhost to a remote server does not have to be intimidating. By leveraging DirectAdmin’s streamlined file manager and database controls alongside modern WordPress tools, you can transition your development projects to a high-performance live server smoothly with zero downtime.
Whether you choose the rapid automated plugin method or the comprehensive manual DirectAdmin approach, following this guide ensures your files, database, and SSL certificates are configured for optimal speed, reliability, and security.
Suggested Reading & Helpful Resources:
- How to Install an SSL Certificate in DirectAdmin (Official KB)
- How to Install WordPress in DirectAdmin (Softaculous Guide)
- How to Deploy Your Website from VS Code Using AI
- How to Deploy a Google AI Studio Web App to Aveshost (Easy Guide)
- How to Use Gemini for SEO (Prompts, Tips & Strategies)
- How to set up DNS records for your domain in Cloudflare
- How to Get a Free Domain Name – Here’s How (No Tricks)
- Top 90+ Essential Linux Commands Plus Cheat Sheet